Use the Find Menu to search for pending, past and cancelled appointments. Once you create an appointment in PHS, it never disappears, and you always have easy reference to it by using the Find menu. You can look up appointment details or make appointment changes. When a patient calls you to clarify or change an appointment date, you would use the Find Menu, to find a list of their appointments.
· The Appointment Search Results window
· Access for Full-Scheduling Users on the Appointment Search Results Window
· Access for Read-Only Users on the Appointment Search Results Window
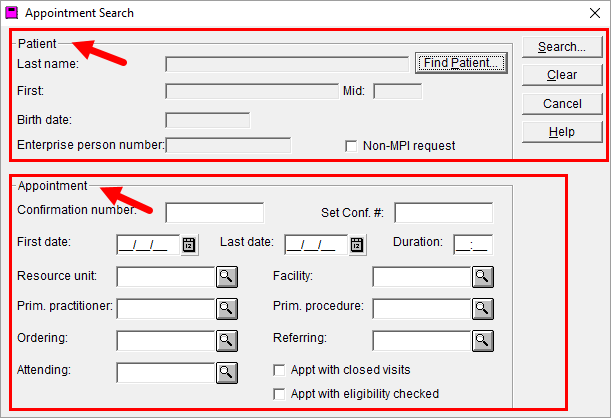
The FIND menu has two sections:
1. The Patient section, at the top of the menu, allows you to find a list of all of your patient’s appointments. Once you find your patient, their list of appointments will then appear on the Appointment Search Results window. For more details on finding patient appointments, see the topic Finding Appointments.
2. The Appointment section, at the bottom of the menu, allows you to find lists that are appointment focused, based on the fields that you enter. Enter fields such as a specific clinic (the Resource unit), practitioner (Prim. Practitioner) and procedure (Prim. Procedure). e.g. You can pull up an appointment list for the date range and clinic that you specify. For more details on finding appointment lists, see the topic Find Appointments.
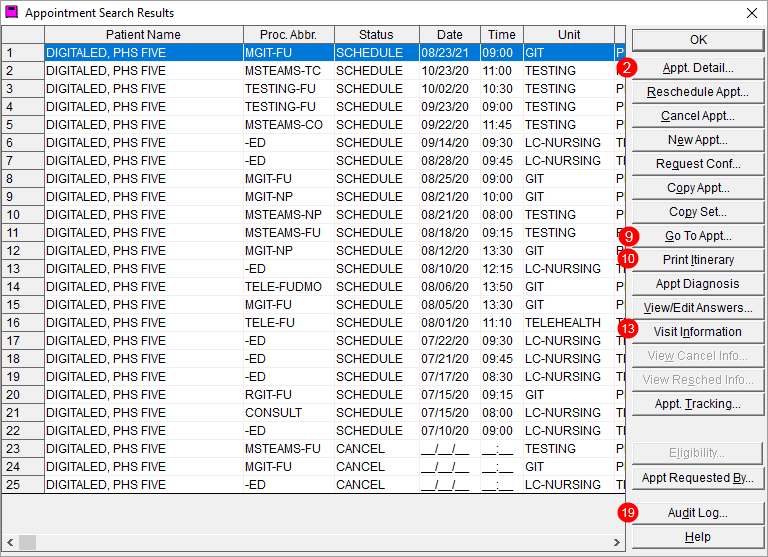
The Appointment Search Results window shows you a list of the appointments you searched for. It could be patient-focused, or appointment-focused. See the topic Finding Appointments.
On the right side of the Appointment Search Results window is a menu of options, which are similar to the options on the Right-Click Menu.
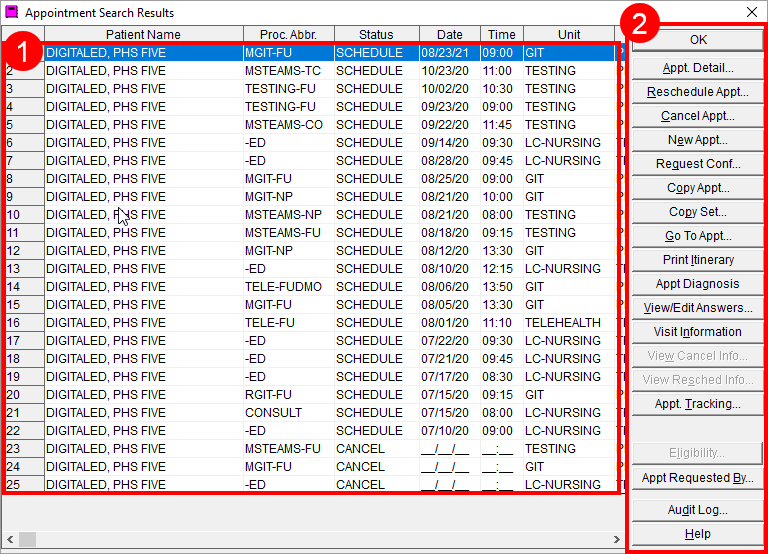
1 Select an appointment from the list on the left side of the window.
2 Click the functionality you want applied to the selected appointment. For example, you may view the Appointment Detail, Print an Itinerary for the patient, etc.
Users with Full-Scheduling privileges can view information and make changes to a selected appointment; therefore, they have more options from the Find Menu, than Read-Only users. Not all of the options on the menu are used at UHN.
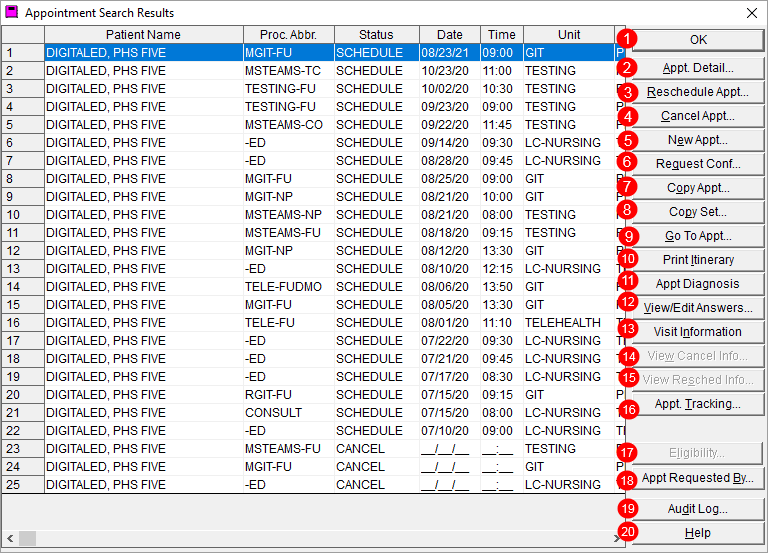
1 OK – Closes the Appointment Search Results window
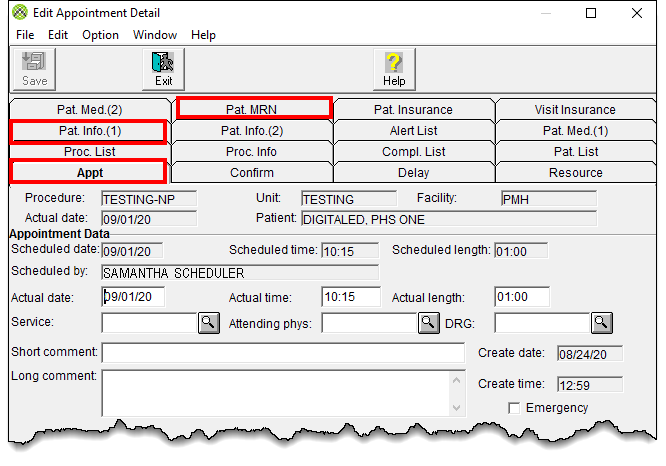
2 Appointment Detail – Opens the Edit Appointment Detail window, showing information within the different tabs. For example:
Appt tab:
· Procedure type
· Person who scheduled the appointment
Pat. Info (1) tab:
· Patient’s demographics information
MRN tab:
· Patient’s Medical Record Number
3 Reschedule Appt. – Enables you to reschedule the selected appointment. See the Rescheduling Single Appointments topic for more details.
4 Cancel Appt. – Enables you to cancel the selected appointment. See the Cancelling Single Appointments topic for more details.
5 New Appt. – Launches the Patient Scheduling window, so you can create a new appointment for the patient.
6 Request Conf. – Puts black vertical lines on the selected appointment box. For more details, see the Confirm feature on the Appointment Book Overview topic.
7 Copy Appt. – Enables you to make a copy or copies of the selected appointment. See the Copying Appointments topic for more details.
8 Copy Set – This is not used at UHN.
9 Go to Appt. – Takes you to the location of the appointment on the Appointment Book.
10 Print Itinerary – Enables you to print a patient itinerary.
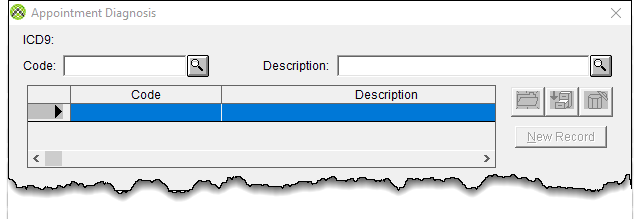
11 Appt. Diagnosis – Opens the Appointment Diagnosis window where you can add the ICD9 code for the appointment. For more information, see details on the Appointment Diagnosis button within the Scheduling an Appointment Using the New Button topic.
12 View/Edit Answers –Opens a window where you may view or edit answers to any scheduling questions attached to an appointment.
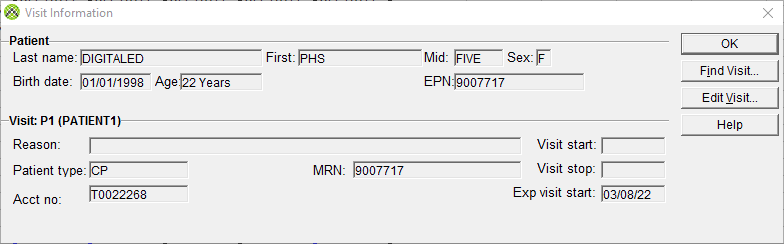
13 Visit Information – Opens the Visit Information window
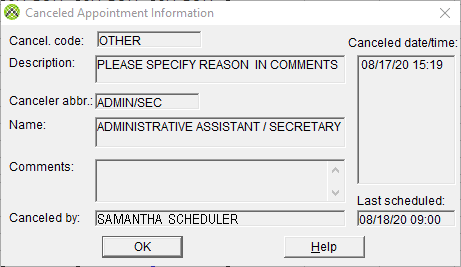
14 View Cancel Info. – Allows you to view information for a cancelled appointment
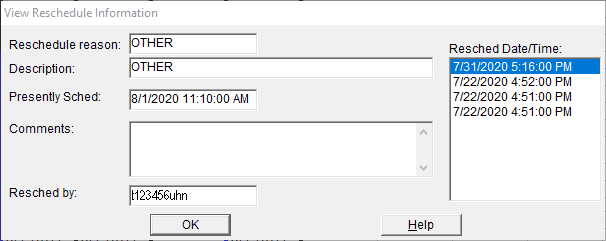
15 View Resched. Info – Allows you to view information for a rescheduled appointment
16 Appt. Tracking – Used by users who do not have access to EPR, to arrive or activate appointments. Please see the topic on Visit Activation.
17 Eligibility – Not used at UHN
18 Appt. Requested By – Allows units to capture the referral date of the appointment. See details in the Scheduling an Appointment using a New Button topic.
19 Audit Log – Enables you to view the status of the appointment. Look under the Orig. Loc. column to see the status. Click the OK button at the bottom to close the window
20 Help – Not used at UHN. For Help, contact UHN Digital Help Desk at ext. 4357 (help) or help@uhn.ca
Users with Read-Only privileges are able to view information on a selected appointment, but they cannot make any changes to the appointment. The following options from the Find Menu will allow you to view information on a selected appointment:
2 Appt. Detail
9 Go To Appt.
10 Print Itinerary (Read-Only users may print a patient itinerary for their patient)
13 Visit Information
19 Audit Log