You can make a copy or multiple copies of an existing appointment, for faster scheduling. When you copy an appointment, you are replicating all the details of the original appointment, including any comments that you added to the long procedure name. A visit is automatically created in EPR for each copied appointment. Always create a new appointment to copy from. The appointment and the appointment copies are considered an appointment Set in PHS. This means you can reschedule/cancel this group of appointments at the same time.
· Copying an Appointment Using the Right-Click Menu
o Step 1: Right-click the appointment.
o Step 2: Enter the number of copies you want to make.
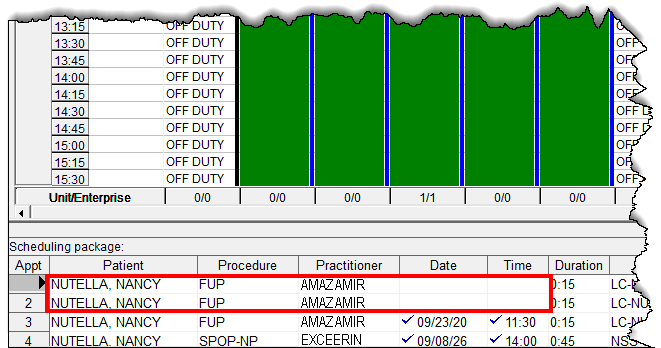
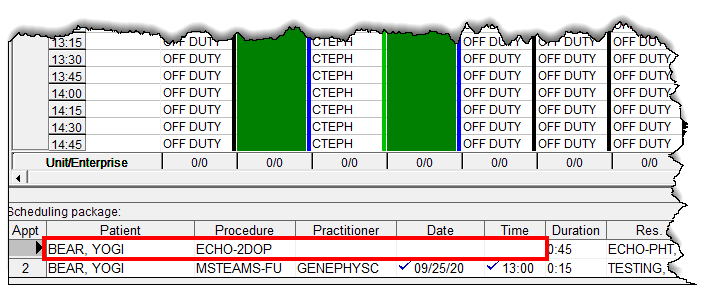
o Step 3: Find your appointment copies in the Scheduling Package at the bottom of the screen.
o Step 4: Use the calendar to choose the date for the copied appointment.
· Copying an Appointment Using the Find Menu
o Step 1: Find your patient and their list of appointments
o Step 2: From the patient’s list of appointments, select the appointment that you want to copy from.
o Step 3: Enter the number of copies you want to make.
o Step 4: Find your appointment copy in the Scheduling Package at the bottom of the screen.
o Step 5: Use the calendar to choose the date for the copied appointment.

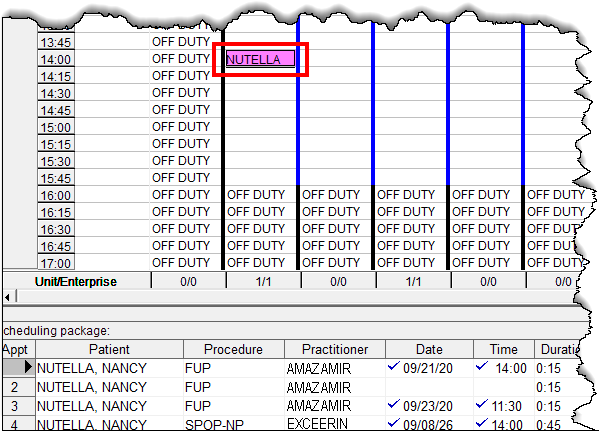
1 Right-click inside the appointment box.
2 From the Menu, select Copy Appointment.
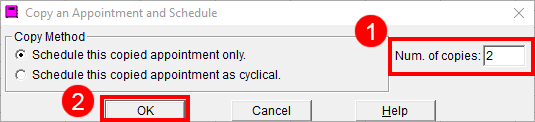
1 On the right side of the window, enter the number of copies you want to make.
2 Click OK on the bottom left.
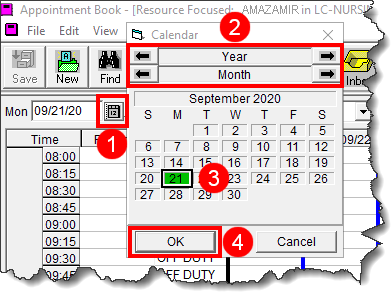
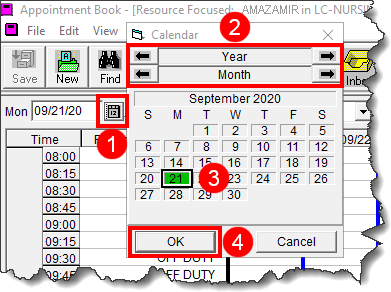
1 Click on the calendar icon in the top left corner of the Appointment Book window.
2 Use the arrows at the top of the calendar to navigate to your preferred date.
3 Click the date for the copied appointment.
4 Click the OK button at the bottom.
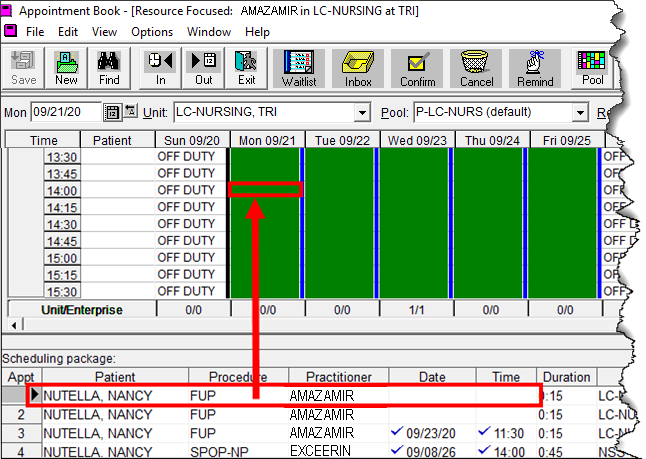
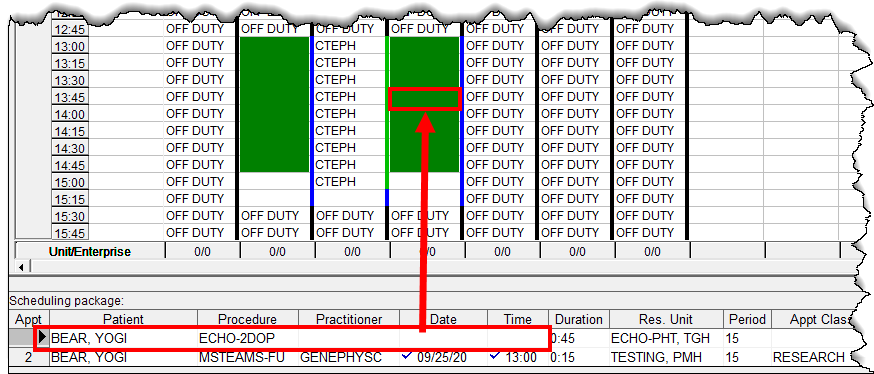
1. Your first appointment is now on the Appointment Book.
2. If you have made more than one copy, double click on the next copied appointment in the Scheduling Package to select it. Drag and drop this copied appointment to the Appointment Book.

Tip: You can also select the next appointment to be scheduled (in the Scheduling Package) by double clicking on the patient’s name in the Work List. (Not on the yellow folder). This will move this appointment to the top of the Scheduling Package, where you can easily drag it to the desired appointment slot.

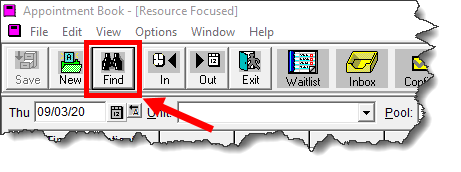
1. Click the Find button in the top left corner of the Appointment Book.
2. In the Appointment Search window, click Find Patient in the top right.

3. Search for your patient using the Patient Search window.
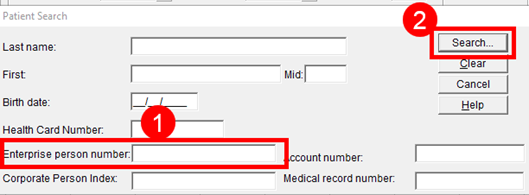
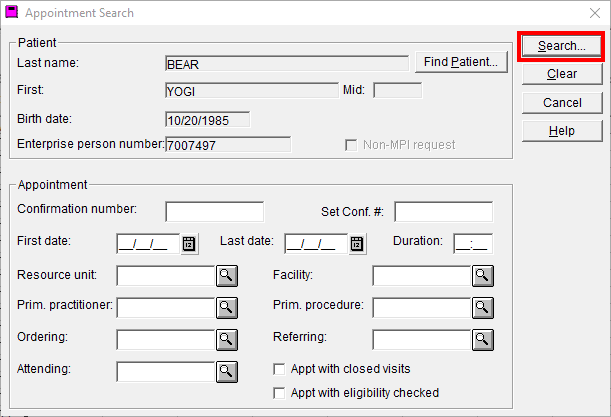
1 Enter your patient’s MRN (Medical Record Number) in the Enterprise Person Number field.
2 Click the Search button in the top right corner.
4. The patient information appears. Check that the patient information is correct.
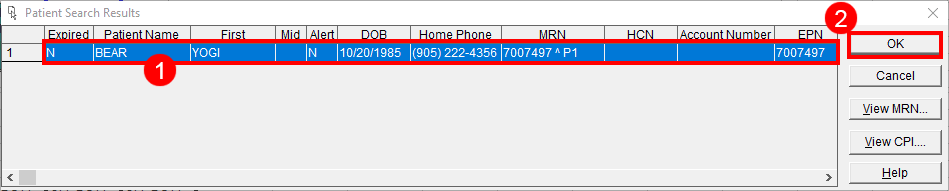
1 Confirm the information in the Patient Search Results window.
2 Click OK in the top right.
5. Your patient’s information is now in the top section of the Appointment Search window. Click Search in the top right corner. This will open a list of your patient’s appointments.
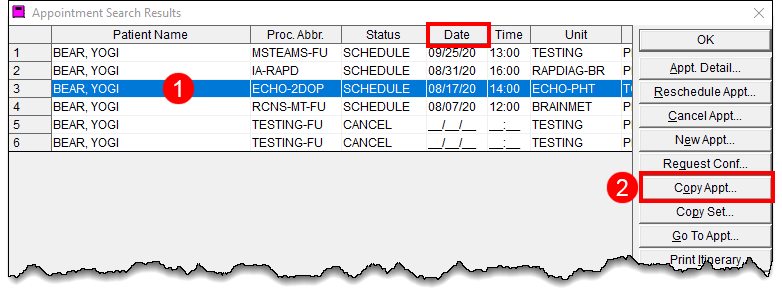
1 Select the preferred appointment. Notice that the date is shown as Month/Day/Year.
2 Click on the Copy Appt. option from the menu on the right.
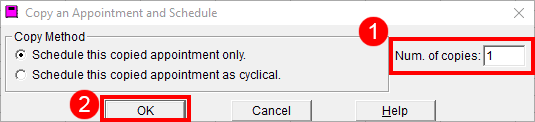
1 On the right side of the window, enter the number of copies you want to make.
2 Click OK on the bottom left.
1 Click on the calendar icon in the top left corner of the Appointment Book window.
2 Use the arrows at the top of the calendar to navigate to your preferred date.
3 Click the desired date for the copied appointment.
4 Click the OK button at the bottom.
· Always create a new appointment to copy from.
· Do not copy an appointment that has been copied already.
· When you are setting up the first new appointment, be mindful that when you copy, you are copying all of the appointment details – the exact same unit, the procedure, the practitioner involved and any comments that you have added to the appointment.
See the Direct Scheduling topic, or Scheduling Using the New Button topic to create a new appointment.