Scheduling an appointment using the New Button from the toolbar enables you to add more details to the appointment, as well as utilize complex PHS functionality to create multiple appointments.
For example, on a New Patient appointment, there are options for capturing the referral date, patient wait times and ICD9 codes (the International Classification of Disease codes) for Princess Margaret. This information is important for statistics, which UHN reports to the Ministry of Health and Long Term Care.
Scheduling Using the New Button video (5:30)
Scheduling Using the New Button video transcript
Follow the following four steps to schedule an appointment using the New Button:
· Step 1: Enter the Patient information
· Step 2: Enter the Appointment Information
o Capturing ICD9 Codes (Princess Margaret Hospital)
· Step 3: Add the Visit and Insurance Information
· Step 4: Drag the Appointment to the Appointment Book
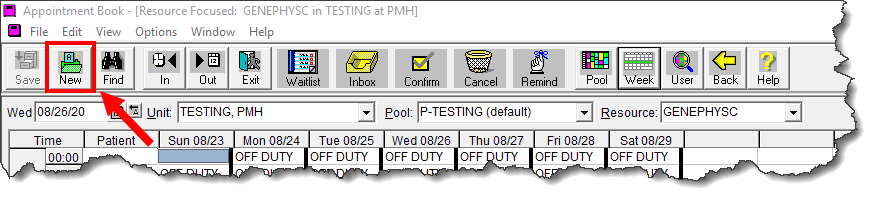
1. Click the New button in the top left corner of the toolbar.
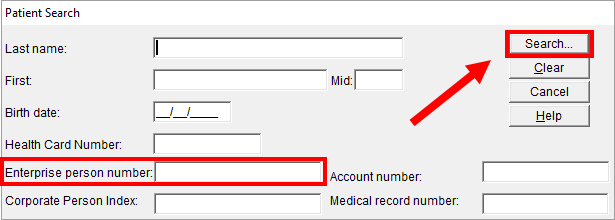
2. Enter the patient’s MRN number into the Enterprise Person Number field, and then click Search in the top right corner. Note: Do not use the PHS Medical record number. Only the Enterprise Person Number field interfaces to EPR.
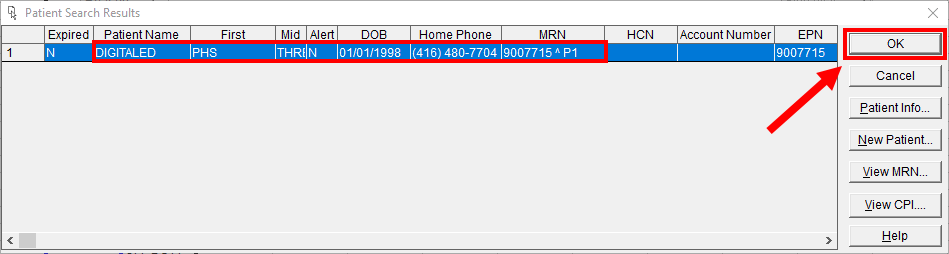
3. Confirm the patient information in the Patient Search Results window to ensure that you have selected the correct patient, then click the OK button in the top right corner.
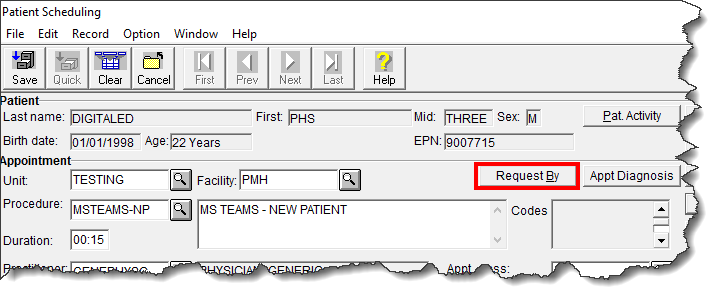
The Patient Scheduling Screen is where all appointment details are entered.
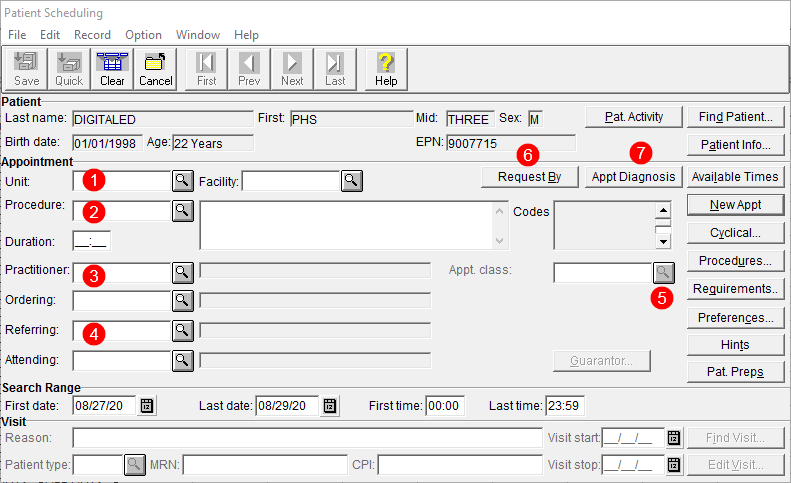
1 Enter the code for your unit into the Unit field, then click the magnifying glass to the right of the field to validate your information.
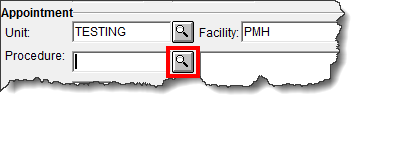
2 Click the magnifying glass to the right of the Procedure field.
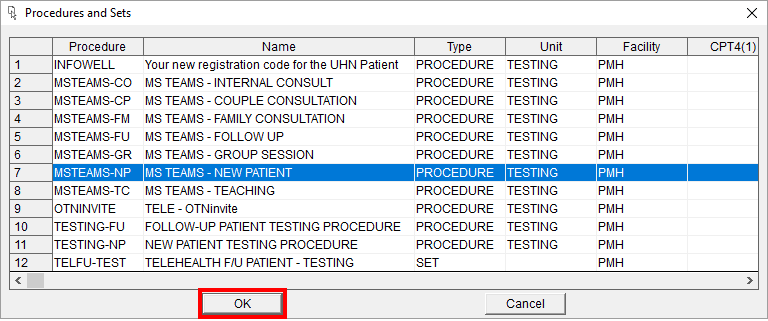
The procedures that are specific to your unit will appear in the Procedures and Sets window. Select the appropriate procedure for your appointment and click OK at the bottom of the window.
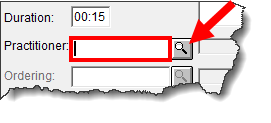
3 Enter the practitioner into the Practitioner field using the PHS naming convention then click the magnifying glass beside the field to validate the information.
The Resource Unit, Practitioner and Procedure fields are connected. For example - If you first enter the Resource Unit information, and then click on the magnifying glass of the Practitioner or Procedure fields, all the practitioners or procedures connected to that unit will display. You can do this with any of these three fields, that is, if you click on the magnifying glass beside Practitioner, you will see all the procedures/resource units that he/she works in.
4 Enter the referring physician’s name into the Referring field, which is located in the lower left of the window. Use the PHS naming convention and then click the magnifying glass beside the field to search for the physician.
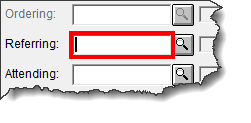
Select the physician from the search results. Once you have selected the correct physician, click the OK button at the bottom of the window.
Tip: You can use the scroll bar at the bottom of the Referring Physician window to view more details about each physician on the list. Details include Physician ID, City, Phone Number, etc.

5 If the workflow for your unit includes capturing the Appointment Class, click the magnifying glass beside the Appt. Class field, located on the right side of the window.
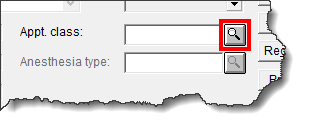
Select the option that is appropriate to your workflow, then click OK at the bottom.

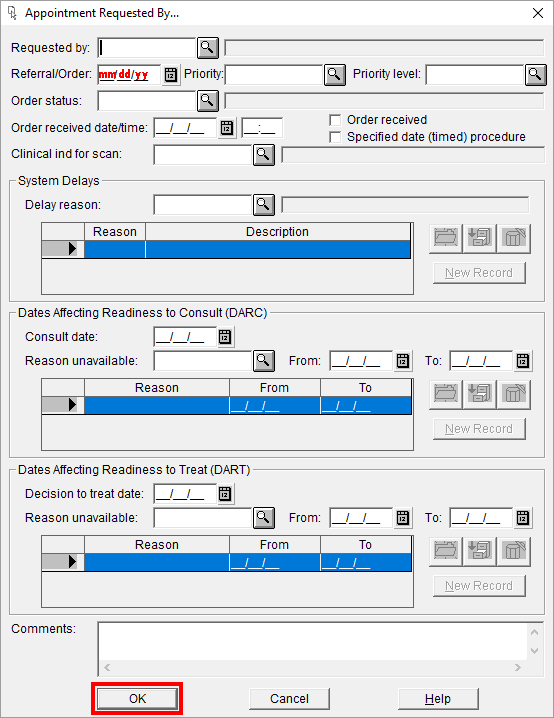
6 If the workflow for your unit includes capturing the referral date, click the Request By button, which is at the top right area of the window.
The Appointment Requested By window appears. Click the calendar button beside the Referral/Order field in the top left corner.
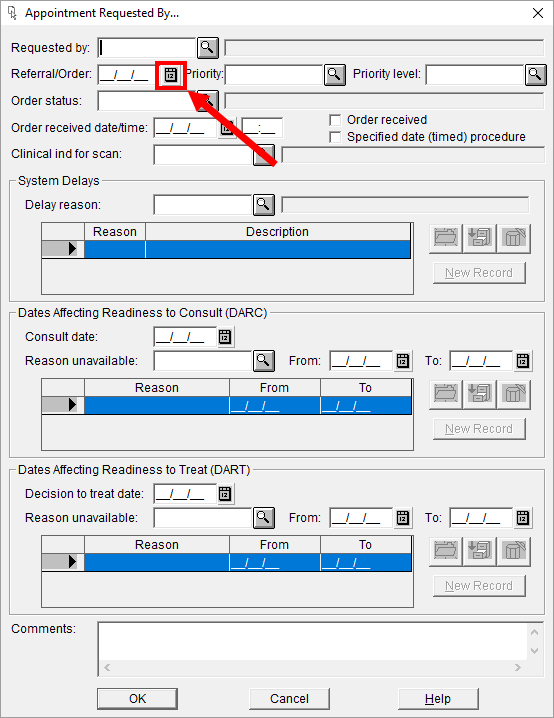
A calendar window appears. Use the arrows above the calendar to navigate, then select the correct referral date and click OK at the bottom of the calendar.
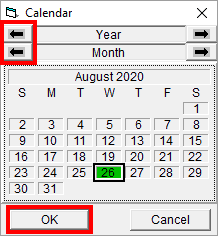
Click OK in the bottom left of the Appointment Requested By window
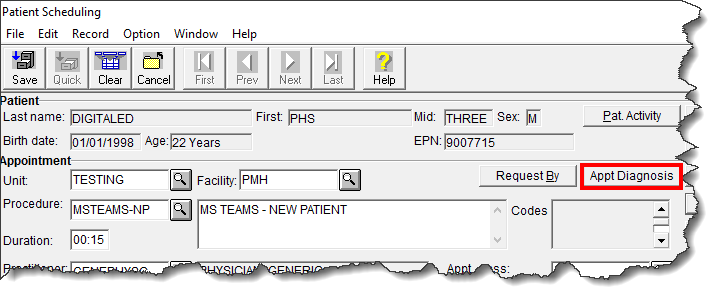
7 For units at Princess Margaret, the ICD9 code must be captured. Click the Appt. Diagnosis button, located towards the top right area of the Patient Scheduling window.
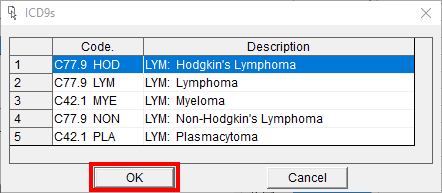
In the Appointment Diagnosis window, type the first few letters of the diagnosis in the Description field, located in the top right of the window. For example, if the diagnosis is Lymphoma, type LYM into the field, then click the magnifying glass beside the field.
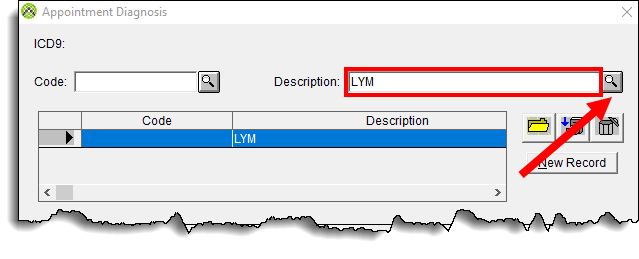
Select the appropriate option then click OK at the bottom.
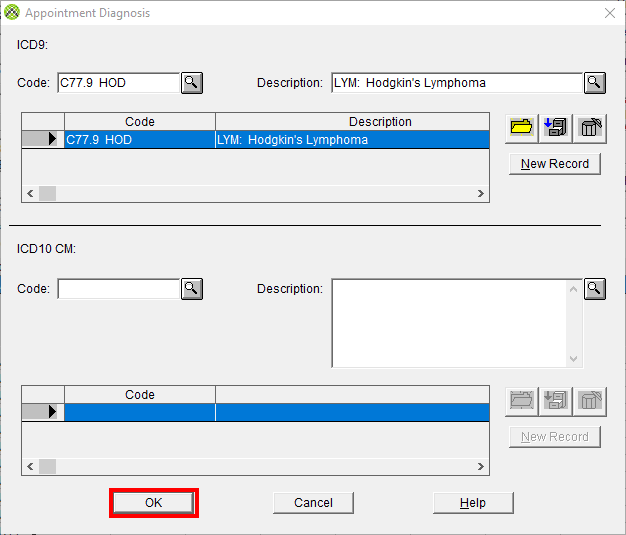
Click OK in the bottom left of the Appointment Diagnosis window.
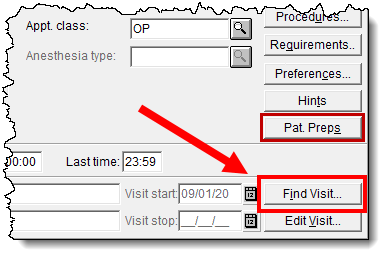
1. Check to ensure that all the details you have entered on the Patient Scheduling Screen are correct, then click the Find Visit button in the bottom right corner of the window.
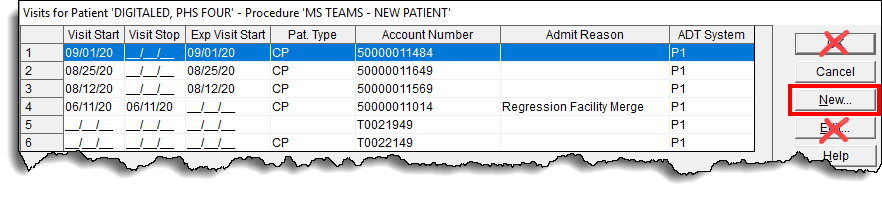
2. You must always click the New button in the Visits for Patient window. This creates a new visit in EPR.
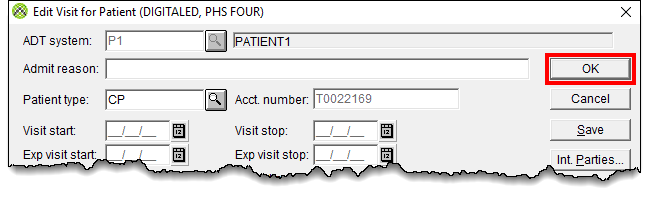
3. The Edit Visit for Patient window is where you would enter the Visit and Insurance information for this appointment. Click the magnifying glass at the right side of the Patient type field, which is located at the top left of the window.
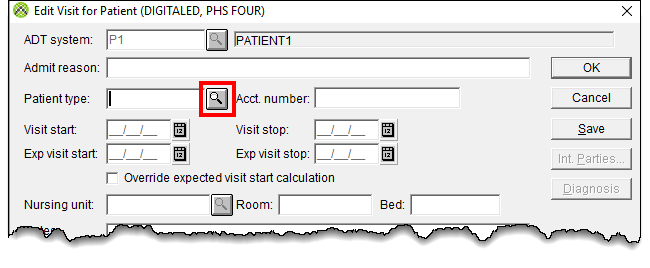
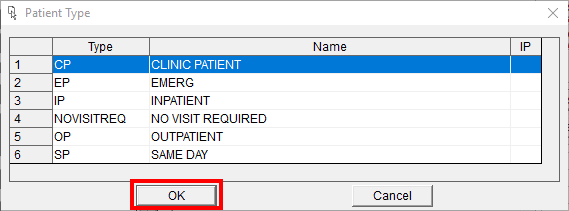
Select the Patient Type according to your workflow, then click OK. This is important for funding. Please see the topic called Patient Types and Insurance Options in PHS for more details.
4. Once you have selected the Patient type, click the OK button in the top right corner.
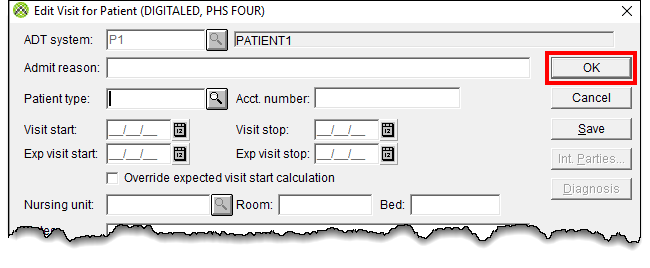
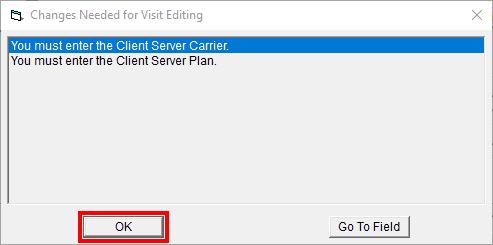
5. You are reminded to enter the Client Sever Carrier, and the Client Server Plan information. This are the insurance details. Click the OK button to close this window.
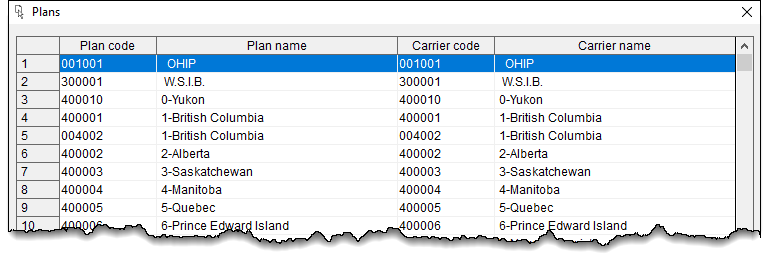
6. Click the bottom right magnifying glass to open a list of insurance options. By completing this field, all four mandatory Insurance fields at the bottom of the window will also be completed.
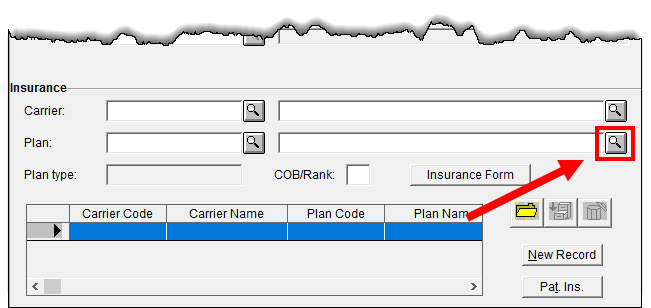
7. Select the appropriate Insurance Plan then click OK at the bottom.
8. Your Edit Visit for Patient window should now have all the required information. Click OK in the top right corner to close the window.
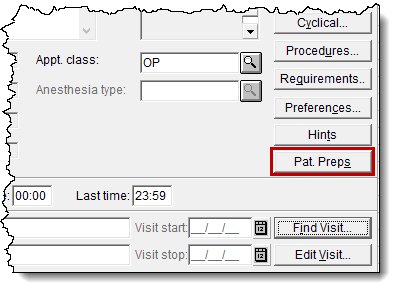
9. In the Patient Scheduling screen, double check that all the required fields are complete. If there are any patient preparations for this appointment, the Pat. Preps button will be outlined in red. Be sure to read this information and communicate it to your patient.
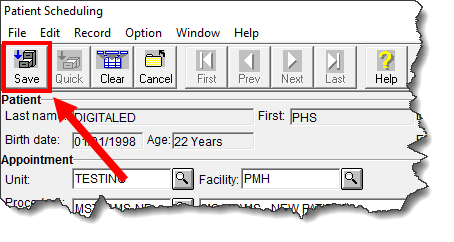
10. Click the Save button in the top left corner.
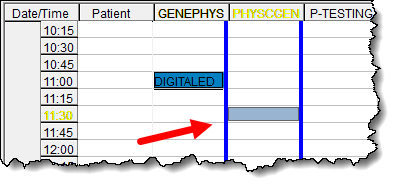
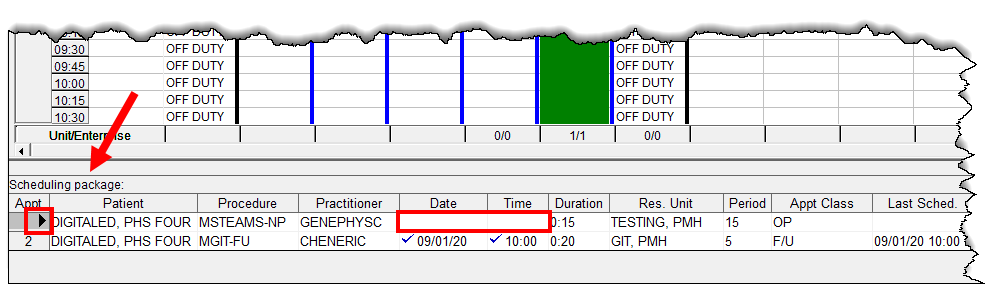
1. You will find your appointment at the bottom of the Appointment Book window, within the Scheduling Package. A black arrow on the bottom left corner will be pointing to the appointment that you had just created. Notice that area under the Date and Time columns are blank. Notice also that there is Green Space on the Appointment Grid.
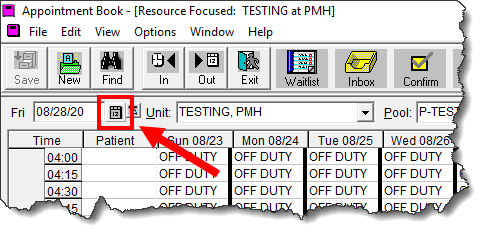
2. Use the calendar at the top left to navigate to your preferred appointment date.
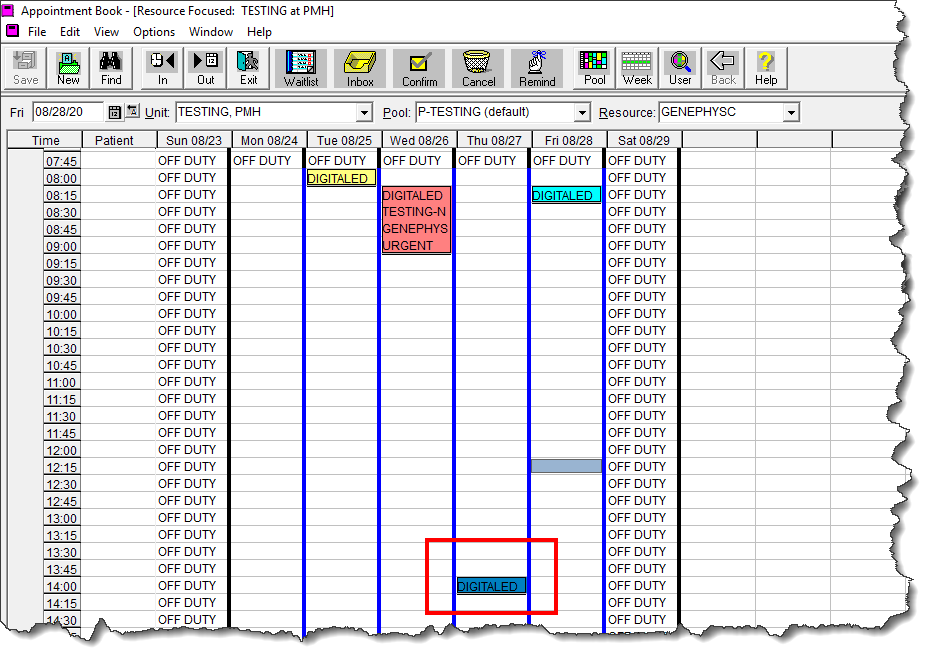
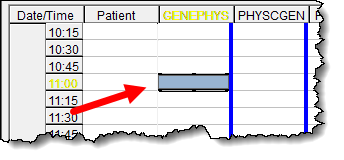
3. Drag your appointment from the Scheduling Package to the Green Space on the Appointment Book.

4. Your
appointment is now scheduled.
Note: After you schedule an appointment, the PHS selection bar often covers the appointment, especially when the appointment has a short duration and is the same size as the PHS selection bar.
Click on a different part of the Appointment Book to deselect the appointment and to view the appointment box.