Use the Appointment Book to view, schedule, and edit appointments for your clinic.
· Opening the Appointment Book
· Three Main Sections of the Appointment Book
o Off Duty and On Duty Time on the Appointment Book
o New – Creates a New Appointment
o Find – Search for Your Patient and Their Appointment
o In and Out – Zoom In and Out
o Exit – Close the Appointment Book
o Waitlist – Stores Unscheduled Appointments
o Inbox – Send or Receive an Appointment Request
o Confirm – Add/Remove Black Vertical Lines on an Appointment
o Cancel – Cancel an Appointment
o Pool – Appointment Book View of all Practitioners
o Week – One Practitioner/Resource Week View
o Resource – Change your Practitioner/Resource in Week View
· The Buttons below the Toolbar
o Calendar Icon – Select a Date
o Pool – View Pools of Practitioners/Resources
o Resource – Change your Practitioner/Resource in Week View
· Appointments on the Appointment Book
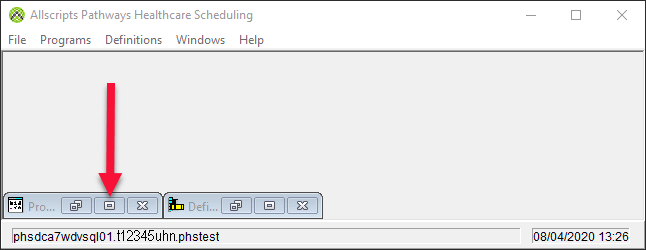
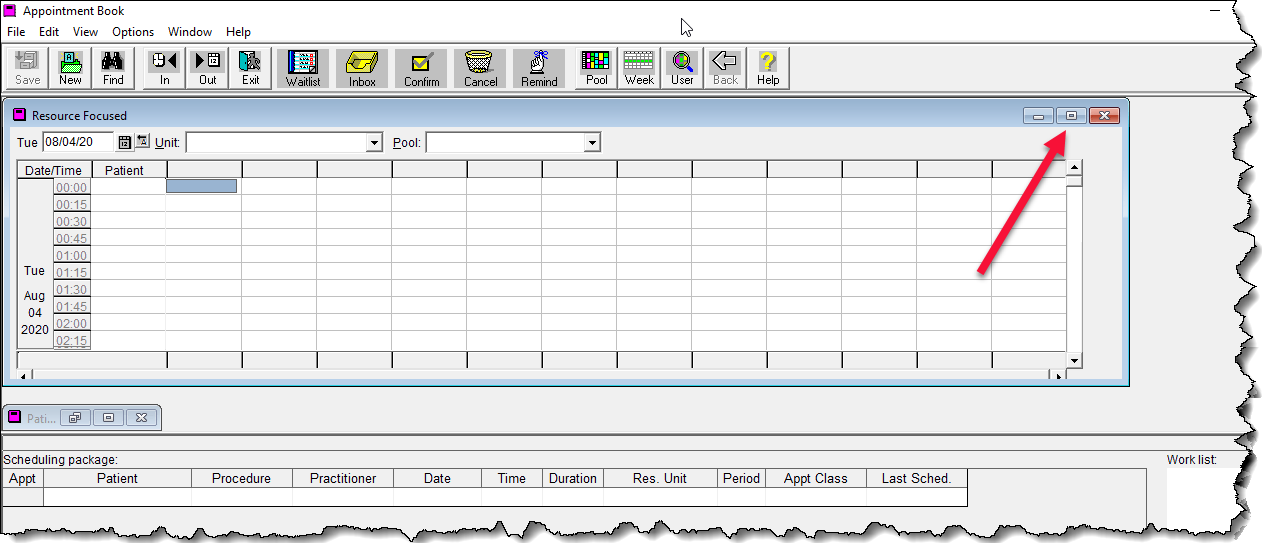
1. After logging in, to open the Appointment Book, maximize the Programs window on the bottom left of the Allscripts Pathways Healthcare Scheduling window. Click on the small square.
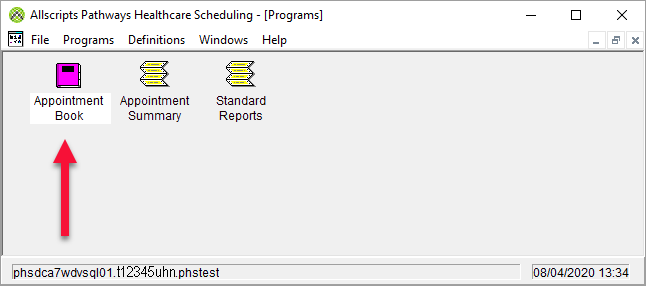
2. Double-click the Appointment Book icon in the top left corner.
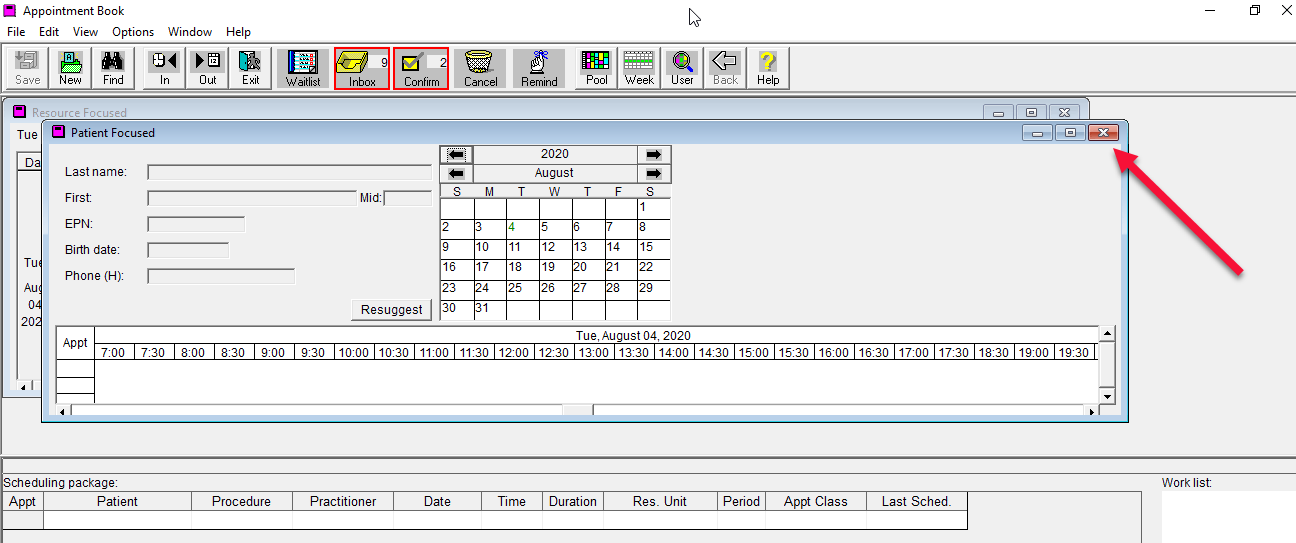
3. Three windows appear: The Appointment Book toolbar, the Resource Focused window, and the Patient Focused window, which is not used at UHN.
Close the Patient Focused window by clicking on the X button at the top right corner.
4. Maximize the Resource Focused window, by clicking on the small square in the top right corner. The Resourced Focused view allows you to see the resource availabilities, such as the clinicians, examination rooms or equipment.
5. Within the Unit field, type the name of your unit, then click the downward arrow at the right side of the field. This will open the Appointment Book for your Unit.
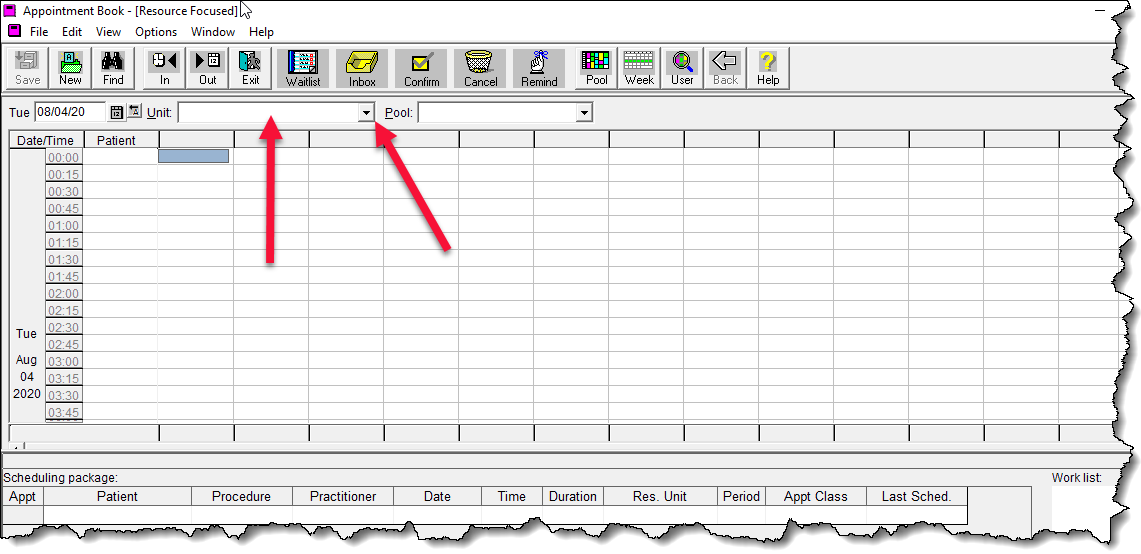
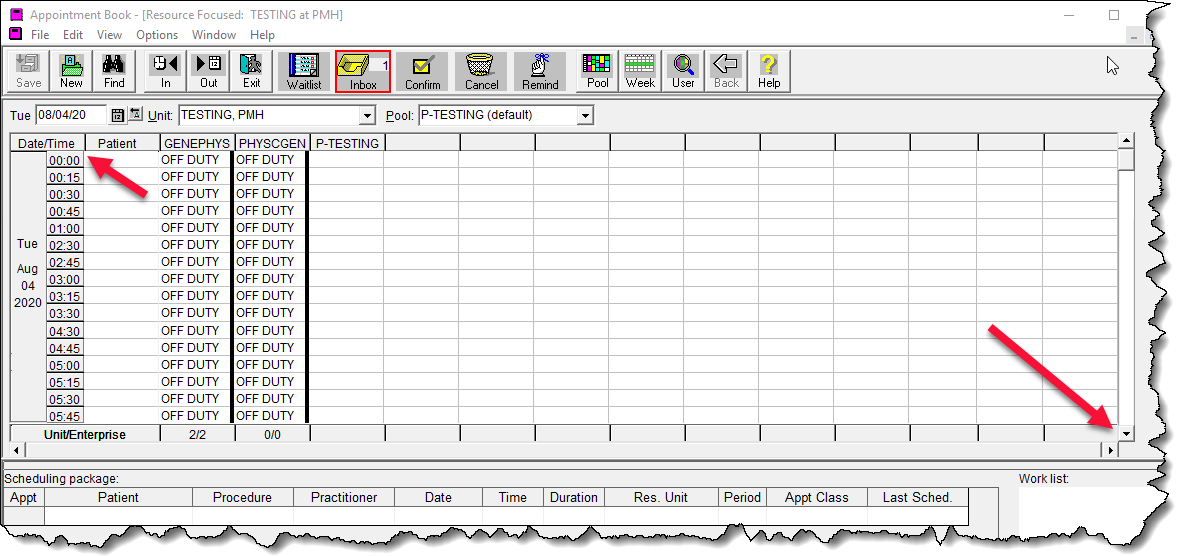
6. Notice that under Date/Time, it says 00:00. Use the scroll bar at the right of the screen to scroll down to the clinic time.
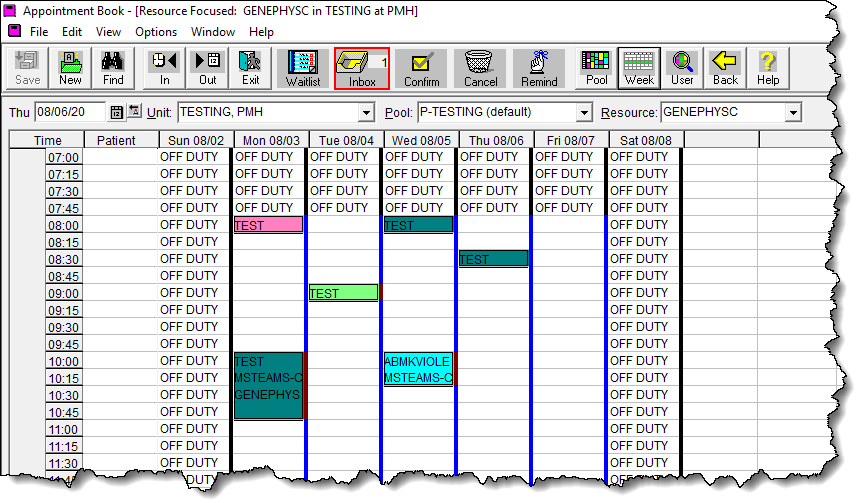
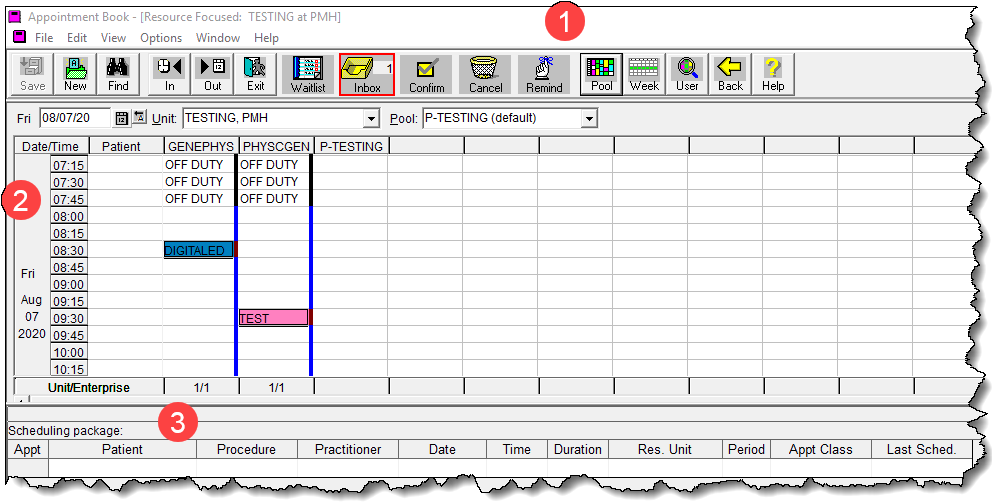
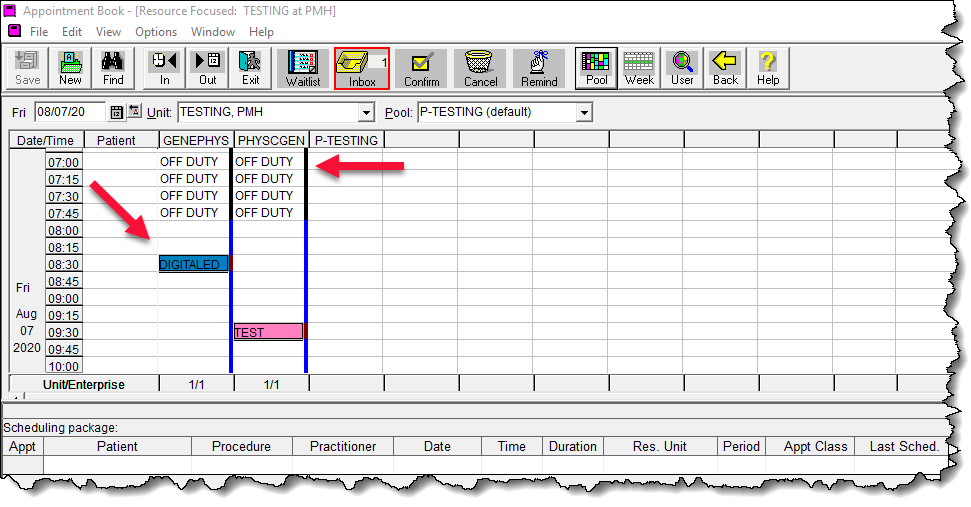
1 At the top is the Toolbar, which has the buttons and icons necessary for scheduling.
2 The middle section is the Appointment Book where appointments are scheduled.
3 At the bottom is the Scheduling Package, which is a holding area for unscheduled appointments.
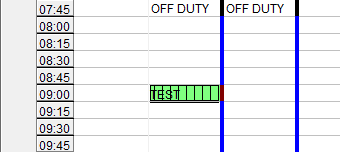
An appointment appears as a box with the patient’s last name. In the example below, the patient’s last name is “TEST.”
The OFF DUTY text on the Appointment Book indicates that the clinic is closed. The white space (in between the OFF DUTY text) indicates on duty time, when the clinic is open. This is programmed by the Enterprise Scheduling (ES) Team.
Buttons and icons on the Toolbar launch different functionalities for scheduling.


Saves changes made to patient record. It is greyed out when no record is open.
· This function is not available to Read-Only users

This is one of the ways to create an appointment. See the Scheduling Using the New Button topic for instructions.
· This function is not available to Read-Only users

Enables you to search for your patient and their appointments, as well as lists of appointments. See the Finding Appointments and Finding Multiple Appointments topics for more information.

Allows you to zoom in and out of the Appointment Book. Zooming in shortens time intervals to a minimum of 15 minutes. Zooming out lengthens time intervals up to a maximum of 2 hours.
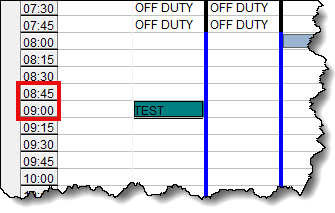
Below is an example of an Appointment Book that is fully zoomed in. Time intervals are 15 minutes.
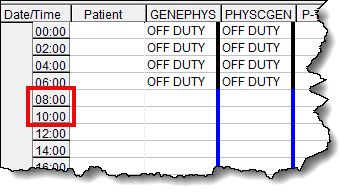
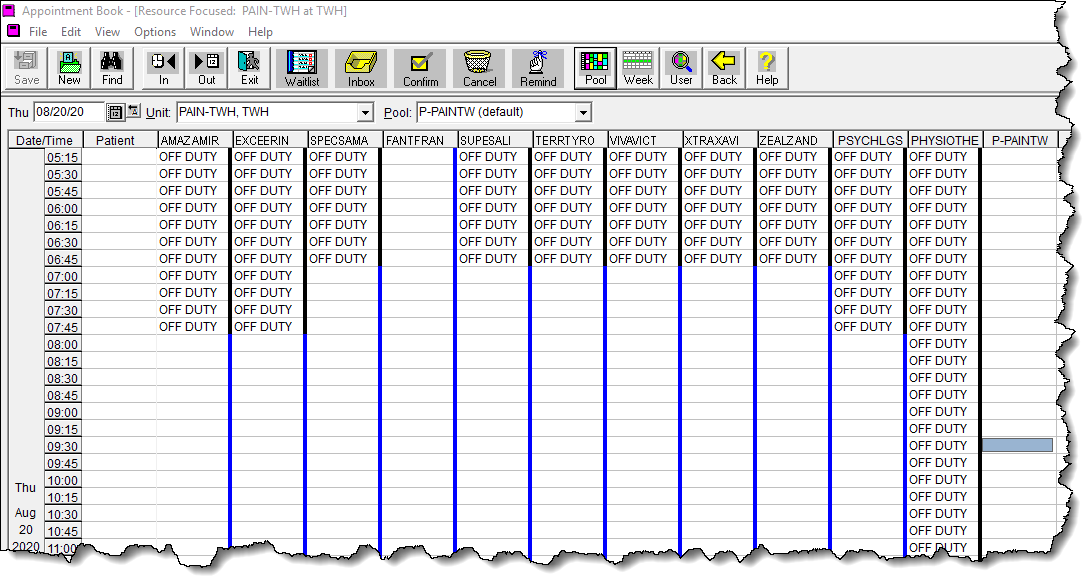
The Appointment Book below is fully zoomed out. Time intervals are 2 hours.

Closes the Appointment Book window but does not log you out of PHS. To log out of PHS, see the topic Logging in and Out.

The Waitlist stores unscheduled appointments for scheduling at a later date. This functionality is trained on the job, as it is custom designed for each unit.
· Check with your colleagues to find out if your area uses this functionality.
· It should not be used by schedulers, who have not had the Waitlist scheduling functionality programmed for them by the Enterprise Scheduling (ES) Team.
· This function is not available for Read-Only users.

The Inbox allows one unit to request an appointment and the receiving unit to schedule that appointment. The second user would have the permission to schedule the appointment. For example, clinics that create Telehealth appointments use the Inbox to send an appointment request to the Telehealth Team.
· The Inbox is functionality whose usage for your area has been determined by the Enterprise Scheduling (ES) Team.
· Check with your colleagues to find out if your area uses this functionality .
· This function is not available for Read-Only users.

The Confirm feature puts black vertical lines on the appointment. Some areas use this tool to indicate appointment confirmation. Check with your unit to determine if your workflow requires this feature.
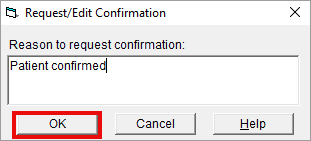
1. To put black vertical lines on an appointment, drag and drop the appointment on the Confirm icon. The Request/Edit Confirmation window appears. You may type your message into the Reason to request confirmation field, then click the OK button on the bottom left of the window to close.
Black vertical lines appear on the appointment box.
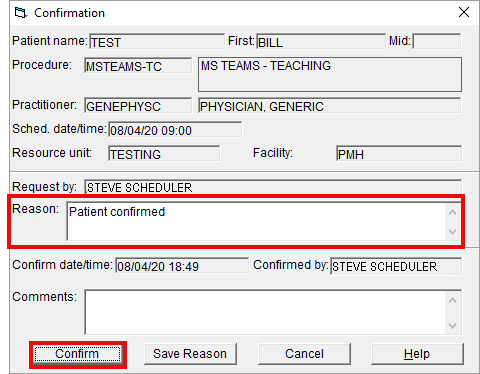
1. To remove the black vertical lines, right-click inside the appointment box and select Confirm from the menu.
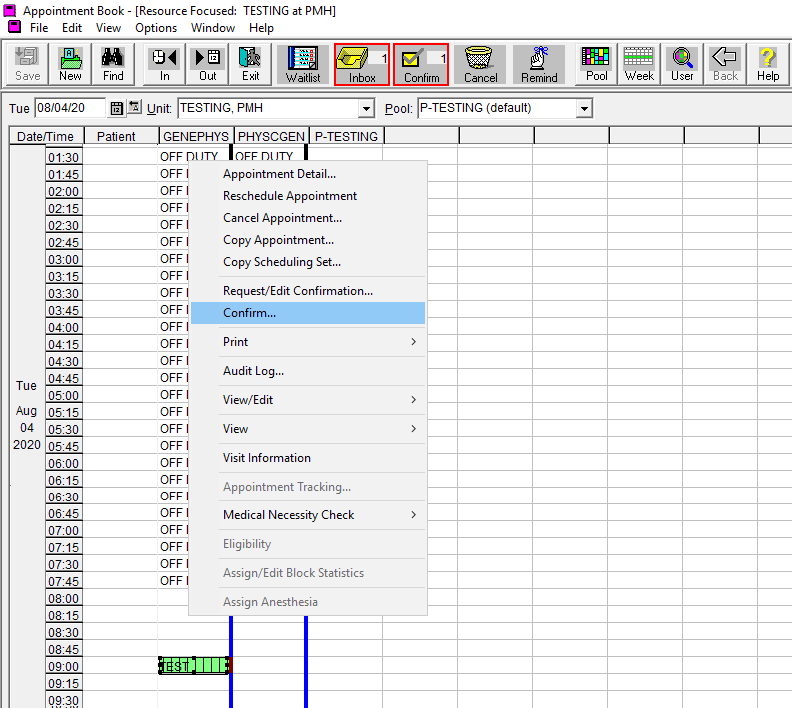
2. The
Confirmation window appears, which captures the message that was
typed into the Request/Edit Confirmation window.
Click on the Confirm button on the bottom left of the window to
remove the black vertical lines from the appointment box.

This is one of the ways to cancel an appointment. See the topic on Cancelling Appointments for more detail.
· This function is not available for Read-Only users

Not used at UHN.

The Pool view is the default view of the Appointment Book. It shows all the Resources (clinicians, practitioners, equipment, and examination rooms) of a selected unit.
This enables the user to see the availabilities of all resources for a particular day.
In Pool view, column headers display the names of resources. (Practitioner names in this scenario)

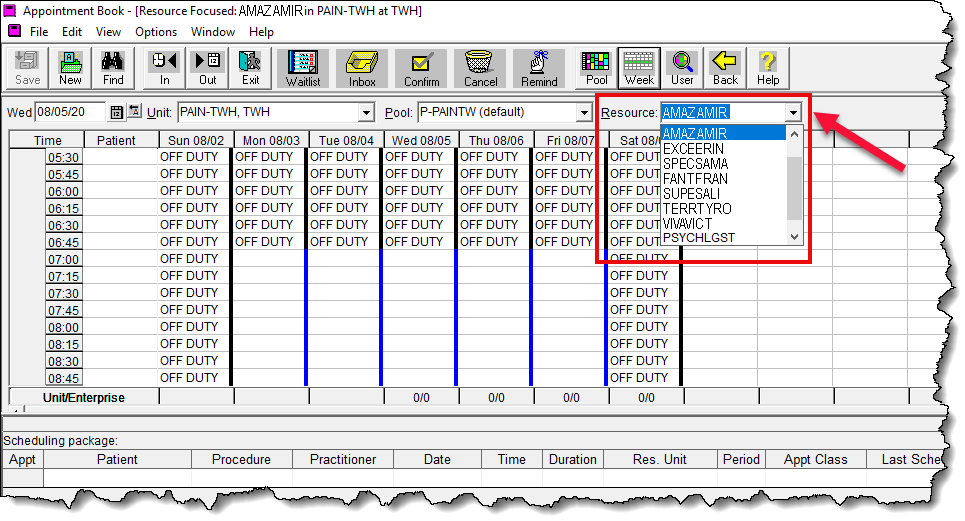
The Week view shows the full week availability of only one Resource. Column headers display the dates for each day of the week.
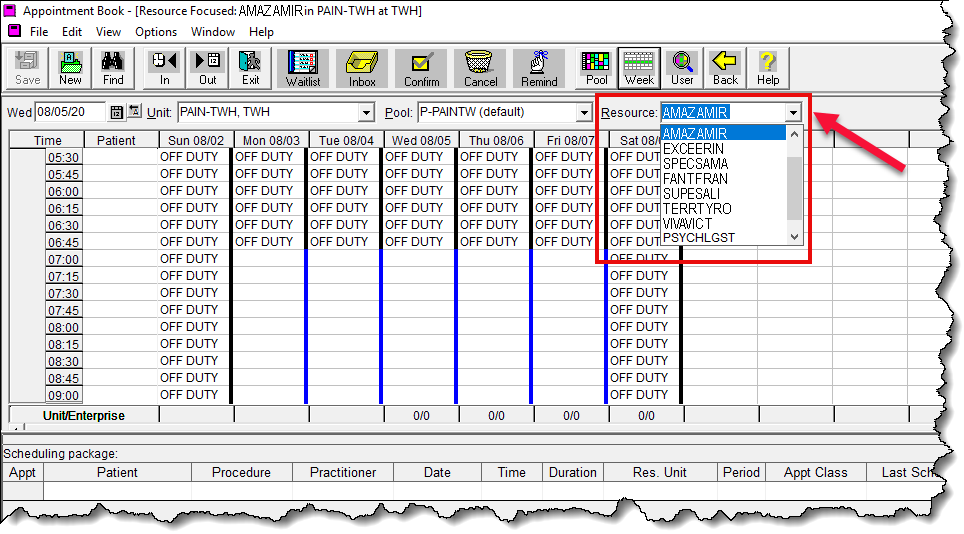
You can view the week availability for any resource by selecting the desired resource from the drop-down menu under the toolbar.

Not used at UHN.

Changes the view of the Appointment Book back to the previous display.

Not used at UHN.
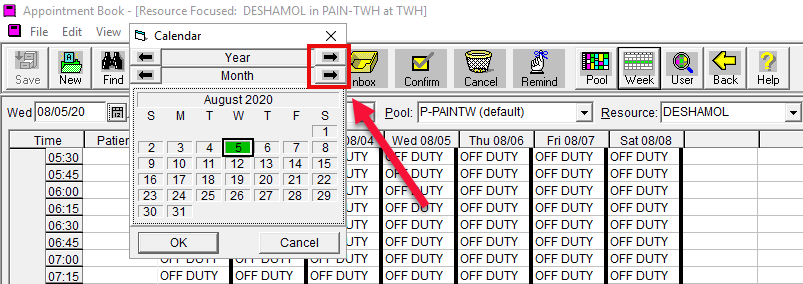
The calendar enables you to select the date you want to view. Click on the calendar icon.

Use the arrows within the small calendar window to navigate to your desired date.
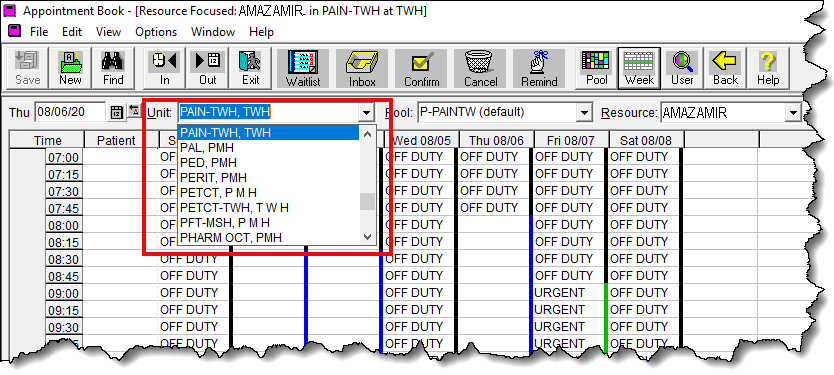
Clicking on the drop-down arrow to the right of the Unit field will give you a list of all the clinics you have access to.
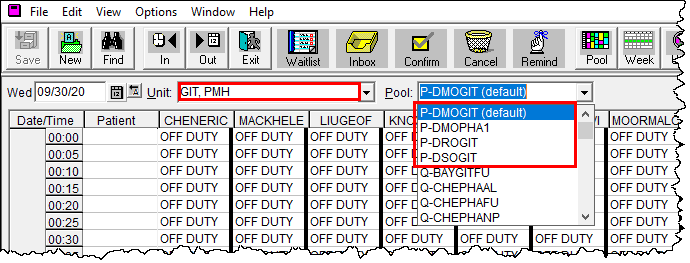
Clicking on the drop-down arrow to the right of the Pool field will give you a list of “pools” of practitioners. This is applicable to large clinics with many resources, such as practitioners. For easier viewing, these large clinics are organized to have smaller pools of practitioners.
For example, the GIT Unit at Princess Margaret has several pools of practitioners. There are pools for DMO (Department of Medical Oncology: P-DMOGIT), DRO (Department of Radiation Oncology: P-DROGIT), and DSO (Department of Surgical Oncology: P-DSOGIT). If you wanted to see only the surgical oncology practitioners, you would click on P-DSOGIT.
The Resource buttons appears only in Week view, for practitioner selection. When you are in Pool view, the Resource field disappears because all of your Resources are already displayed on the screen.
Each appointment appears as a box on the Appointment Book. The patient’s last name is displayed at the top, followed by the procedure and the practitioner. Shorter appointments appear as smaller boxes, and display less information, as they are shorter in duration.