There are three ways to cancel an appointment in PHS. You can cancel an appointment by using the Right-Click Menu, the Find menu, or by dragging an appointment to the Cancel Bin.
Note: If you cancel an appointment for a patient who has subscribed to the myUHN Patient Portal, they will get an email notification.
Cancelling Single Appointments video (4:32)
Cancelling Single Appointments video transcript
· Method 1: Cancelling an Appointment Using the Right-Click Menu
· Method 2: Cancelling an Appointment Using the Find Menu
· Method 3: Cancelling an Appointment by Dragging and Dropping to the Cancel Bin
· Documenting No Show Appointments in PHS
· Documenting No Show Visits in PHS and EPR for Billing Purposes
· Appointments in the Cancel Bin
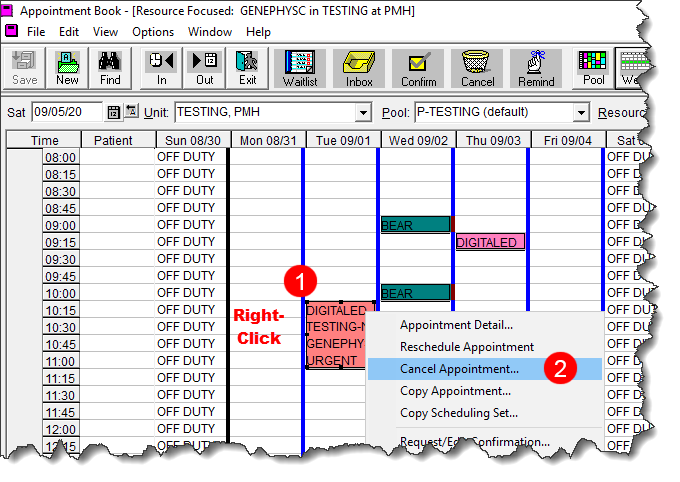
1. Right-click inside the appointment box and select Cancel Appointment.
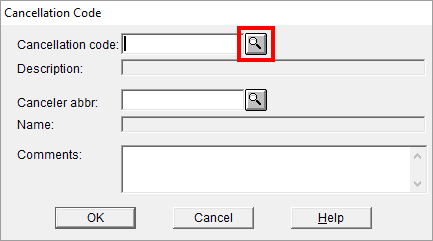
2. The Cancellation Code window appears. Click the magnifying glass to the right side of the Cancellation code field.
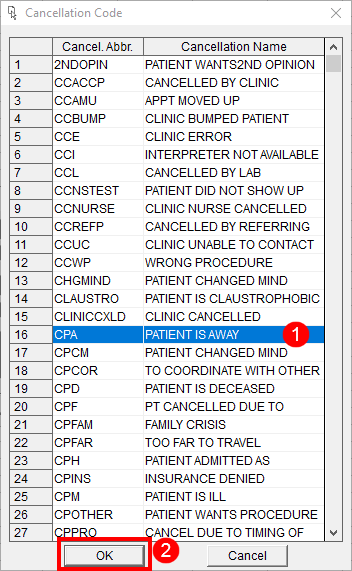
3. Select reason for cancellation, then click OK on the bottom left corner.
4. Indicate who (Canceler abbr.) cancelled the appointment. Note: This is not a mandatory field.
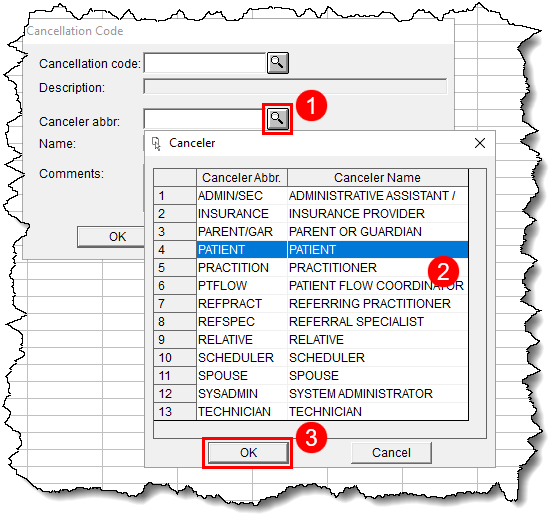
1 Click the magnifying glass to the right of the Canceler abbr field.
2 Select an option from the list of Cancelers.
3 Click OK on the bottom left, and the appointment will disappear from the Appointment Grid.
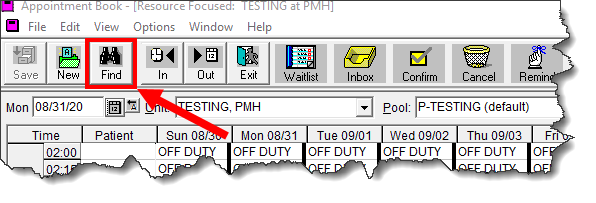
The second method for cancelling an appointment is using the Find button on the toolbar. This will enable you to find your patient and their list of appointments.
1. Click on Find at the top left corner of the Appointment Book window.
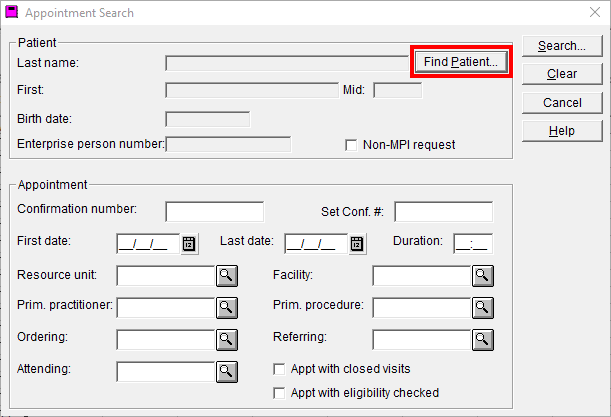
2. On the Appointment Search window, click Find Patient at the top right corner.
3. Search for your patient.
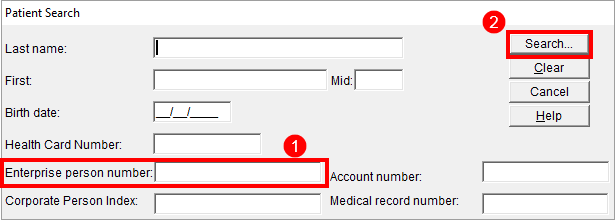
1 Enter your patient’s MRN number into the Enterprise Person Number field at the lower left area of the window.
2 Click on Search in the top right corner.
4. Confirm that you have the correct patient.

1 Verify the information in the Patient Search Results window (check the patient’s name and MRN number).
2 Click on OK in the top right corner.
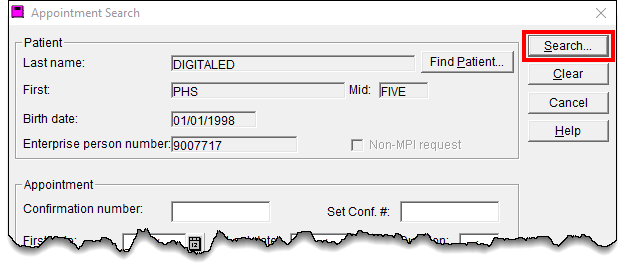
5. Your patient’s information appears in the top section of the Appointment Search Window. Click Search in the top right corner.
6. Your patient’s list of appointments appear on the left area of the Appointment Search Results window. To the right, there is a menu with all the options you can apply to the highlighted appointment on the left.
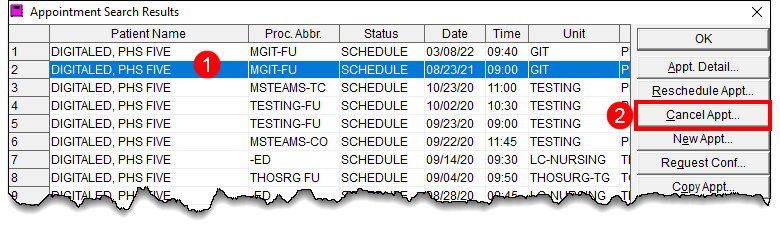
1 Select the appointment you want to cancel.
2 Click Cancel Appt. from the menu on the right.
7. The Cancellation Code window appears. Click the magnifying glass to the right side of the Cancellation code field.
8. Select reason for cancellation, then click OK on the bottom left corner.
9. Indicate who cancelled the appointment. Note: This is not a mandatory field.
1 Click the magnifying glass to the right of the Canceler abbr field.
2 Select an option from the list of Cancelers.
3 Click OK on the bottom left, and the appointment will disappear from the Appointment Book.
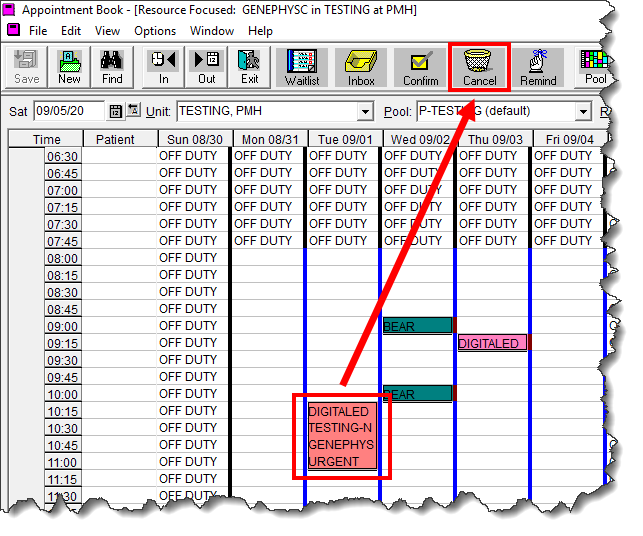
1. Click on the appointment that you need to cancel, then drag and drop it into the Cancel icon on the toolbar.
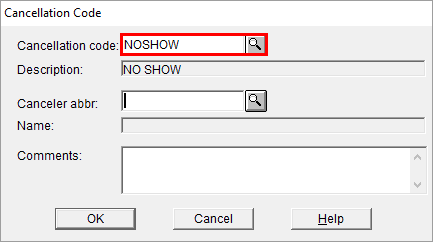
2. The Cancellation Code window appears. Click the magnifying glass to the right side of the Cancellation code field.
3. Select reason for cancellation, then click OK on the bottom left.
4. Indicate who (Canceler abbr.) cancelled the appointment. Note: This is not a mandatory field.
1 Click the magnifying glass to the right of the Canceler abbr field.
2 Select an option from the list of Cancelers.
3 Click OK on the bottom left, and the appointment will disappear from the Appointment Grid.
If a patient has not shown up for their appointment, cancel their appointment in PHS, following the usual steps, and select NO SHOW as the cancellation code. There is no other option available in PHS to document a no show appointment. Appointments that have been cancelled in PHS with a no show visit status are reflected as cancelled in the EPR.
If your area must capture No Show visits in the EPR for billing purposes, you must follow a different process and update EPR first:
1. Mark the visit as no show in EPR.
2. Cancel the appointment in PHS with a no show cancellation code.
In this situation, if you update PHS first, the visit will have a cancelled status in EPR - not a no show status.
Follow the workflow of your area.
You can find a list of all of your cancelled appointments in the Cancel Bin.
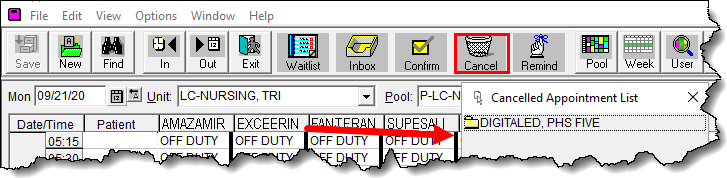
· The cancelled appointment will be available in the Cancel Bin for 24 hours.
· Important PHS will let you drag the appointment from the Cancel Bin to the Scheduling Package to reschedule. However, the visit in EPR is also cancelled, when we cancel the appointment in PHS.
· Never reschedule an appointment from the Cancel Bin as this causes data quality errors. Instead, create a new appointment, if required.
· For patients that do not show up for their appointments, please choose the cancellation code of No Show in PHS.
· If you are cancelling an old appointment, that has taken place in the past, check EPR to ensure that the appointment is cancelled in the EPR as well.
· That the interface is from PHS to EPR so that cancelling a visit in the EPR will not cancel the appointment in PHS.
· Never reschedule an appointment from the Cancel Bin as this causes data quality errors. Instead, create a new appointment, if required.