
For the latest updates, see EPR Release Notices.
For EPR related videos, check out Digital Education's YouTube Channel.
For the latest updates, see EPR Release Notices.
For EPR related videos, check out Digital Education's YouTube Channel.
Transfers
Use the Transfer functionality for inpatients moves between the same levels of care. For example, visits may not be transferred from Acute sites to Rehab sites. The most common levels of care at UHN include Acute, Rehab, and CCC (Complex Continuing Care)
Covered in this topic:
Note: An unscheduled transfer is used when there is no electronic order for the transfer.
1. From the patient desktop, ADT tab, click on Unscheduled Transfer.

2. Enter the date and time the procedure was performed and click OK.

3. Choose (I) Checkin to check the patient in their new room/bed and then hit Enter from your keyboard.

4. Enter the destination the patient is transferring to on the unit by clicking on Expand.

5. Select the Unit/Floor the patient is on and click OK.

6. Select the Room and click OK.

7. Select the bed the patient will occupy in the selected room and click OK.

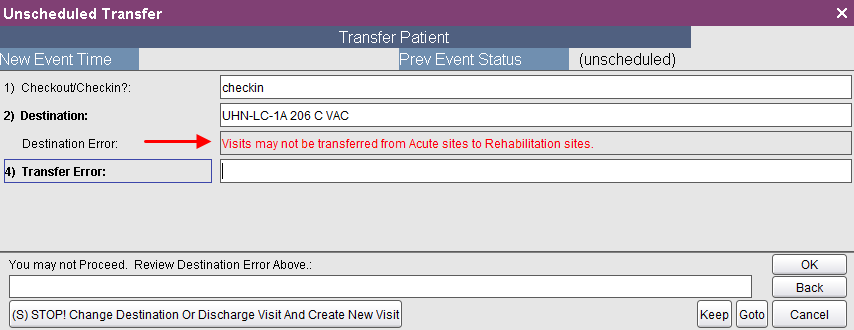
Note: Visits may not be transferred from Acute sites to Rehab sites. Attempting to do so will cause an error message to appear. You must either change the destination or discharge the visit and create a new visit.
8. Select the appropriate Bed Spacing option and click OK. The term Bed Spaced is used to identify when a patient is admitted to a hospital bed that is not associated with their care provider’s unit or program.

9. For Transfer Checkin Time, enter the information and click OK to proceed. If applicable, enter N for now.
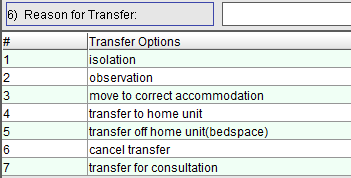
10. Select the applicable Transfer option and click OK.
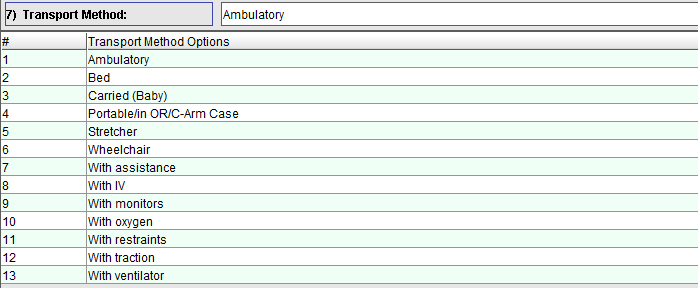
11. Select from the Transport Method options and click OK.
12. Select Yes or No if the new room type is what the patient requested.

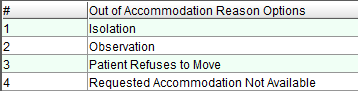
13. If Yes was selected, but you are still prompted to complete the Out of Accommodation Reason, click OK to skip to the next field. If No was selected, select the applicable Out of Accommodation Reason option.
14. If the Attending Physician and/or Resident service has changed, update with the necessary information. Otherwise, click OK or Keep until you see Accept.
15. Choose (A) Accept.
Note: A scheduled transfer requires a physician's order.
A scheduled transfer is used when there is an electronic order for the transfer from the Provider.
A scheduled transfer is a two-step process, whereby the patient must be 1) checked out of the sending unit and 2) checked into the receiving unit.
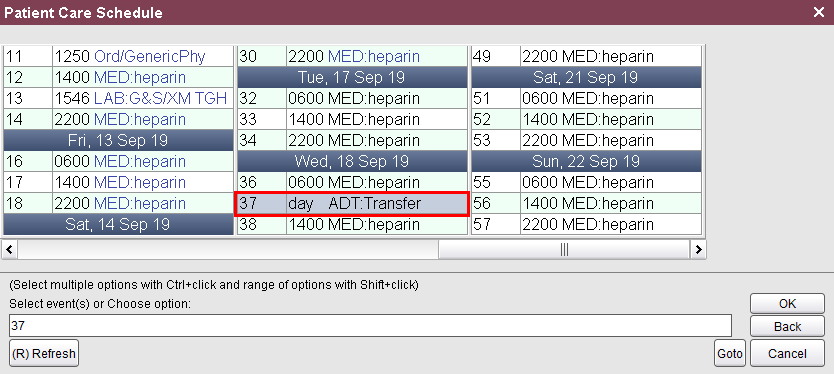
Once the physician has placed the transfer, the entry ADT:Transfer will appear on the Patient Care Schedule (click on the Patient Shortcuts tab to find the Pt Care Schedule). The process is then completed by selecting the event in the Patient Care Schedule and filling in the applicable fields.
Step 1: Checkout (Sending Unit)
1. From the Patient Care Schedule select the ADT:Transfer option (found in black font) and click OK.
2. Choose Document.

3. Enter the date and time the procedure was performed and click OK.

4. As the sending unit, you will be checking the patient out of your unit. Press Enter on your keyboard to check the patient out.

5. Select the Bed Type the patient requested and click OK.
")
6. Select the Reason for Transfer and click OK.

7. Select the applicable Transport Method and click OK.

8. Select Yes or No if the Patient in Room Type Requested meets the patient request.

9. If the patient is not in the room type requested, select an option from the appropriate Out of Accommodation Reason Options. If the patient is in the room type requested, select OK to bypass.

10. If there has been a change in Attending Physician, Medical Service, Resident Service or Current Patient Service, enter the information as applicable. Click OK until the Accept option appears.
Note: Accuracy is very important.

11. Click (A) Accept. You have now checked your patient out of your unit.
Step 2: Checkin (Receiving Unit)
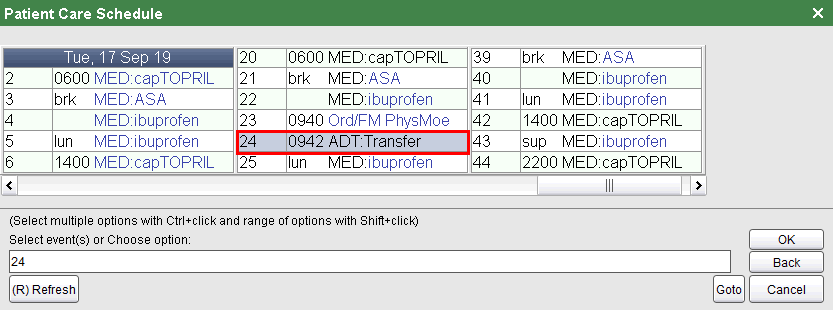
As the Receiving Unit you will need to accept the transfer by selecting the ADT:Transfer (in black font) option from the Patient Care Schedule.
1. From the Patient Care Schedule, select the ADT:Transfer option and click OK.
2. Choose Document.

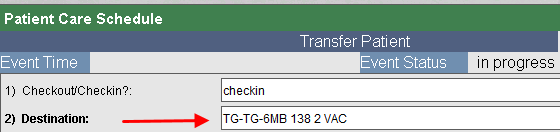
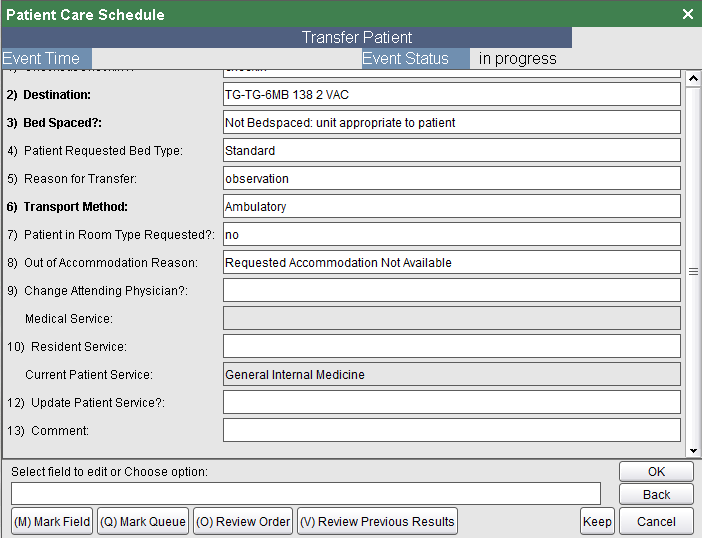
3. You will notice that the Checkin/Checkout field has already been populated with the word Checkin. Additionally, other fields (entered by the sending unit) will also be populated such as Patient Requested Bed Type, Reason for Transfer, and Transport Method. Click in the Destination field to proceed.
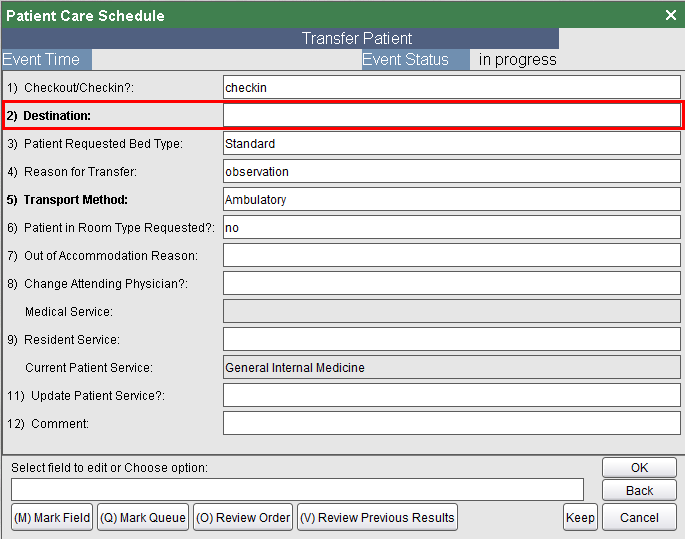
4. Click in the Destination field and then click on Expand.

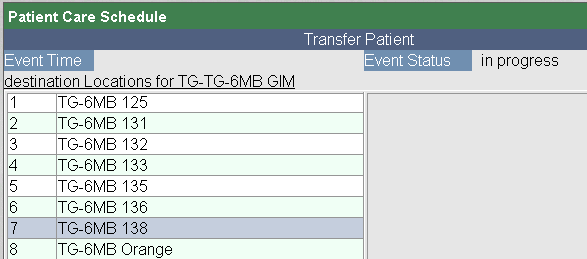
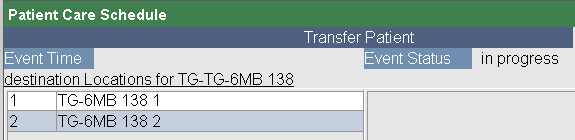
5. A numbered list of all units will appear. Select the Unit that the patient is being transferred to (received in) and click OK.
Note: Each unit is prefixed with the appropriate facility (e.g. TG-6MB, PM-South 5 IP).

6. Select the room the patient will be transferred to and click OK.
7. Select the bed the patient will occupy and click OK.
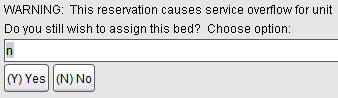
8. Click on Yes to bypass the warning that will occasionally appear.
Note: The Destination field now populates with your patient's unit/room/bed number.
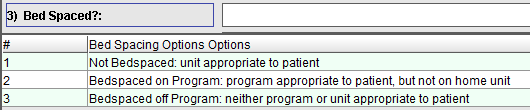
9. Select the appropriate Bed Spacing option and click OK. The term Bed Spaced is used to identify when a patient is admitted to a hospital bed that is not associated with their care provider’s unit or program.
10. Notice that the next several fields are auto-populated with the information entered by the sending unit. Verify and edit these fields, if required.
11. If the Attending Physician, Medical Service, Resident Service or Current Patient Service have changed because of this transfer, enter in the respected fields. Accuracy is important.
Note: Do not free-text in any of these fields. Click the Expand button and pick the name/service from the list.
12. Click (A) Accept. Note that once the transfer is fully complete (accepted), the entry will appear blue on the Patient Care Schedule.

All active orders transfer with the patient, as they move to a new location.
All orders can be found listed in Order Entry, on the Order History Tab.
All active orders, associated with the patient, will print on medication reports (from current and previous patient locations). Do not copy orders.
Visits may not be transferred from Acute sites to Rehab sites.
Please see the following topics for more information:
Patient Transfers and Moves across UHN