For the latest updates, see EPR Release Notices.
For EPR related videos, check out Digital Education's YouTube Channel.
For the latest updates, see EPR Release Notices.
For EPR related videos, check out Digital Education's YouTube Channel.
Visit Activation and Health Card Validation
Covered in this topic:
Toronto Rehab Inpatient - Day of Admit Processing
Once a patient arrives for their visit, you must document this in EPR and activate their visit (status).
Visit Activation is a two-step process in EPR:
Validate
the Health Card (where necessary).
There
are two ways to validate a patient's Health Card:
Swipe method - (if applicable Mx5 external device installed to computer)- auto-populates to patient's chart and it is on the Reg ADT visit level that you need to validate
Manual method - typing in the OHIP
number and version code (if applicable) using the Integrated Health
Card validation on EPR visit level.
If
your unit has a swipe device to validate the OHIP card, use this
method. the swipe device will also pull up the patient's record
on visits on the EPR.
Activate the visit (this action confirms the patient's arrival).
1. Visits should only be activated at point of care, that is, when they are physically present. Before activating a visit, be sure to verify that the patient's demographics is accurate. To start the visit activation process, pull up the patient's list of visits and select the pended visit that is to be activated. This will launch the Patient Desktop.
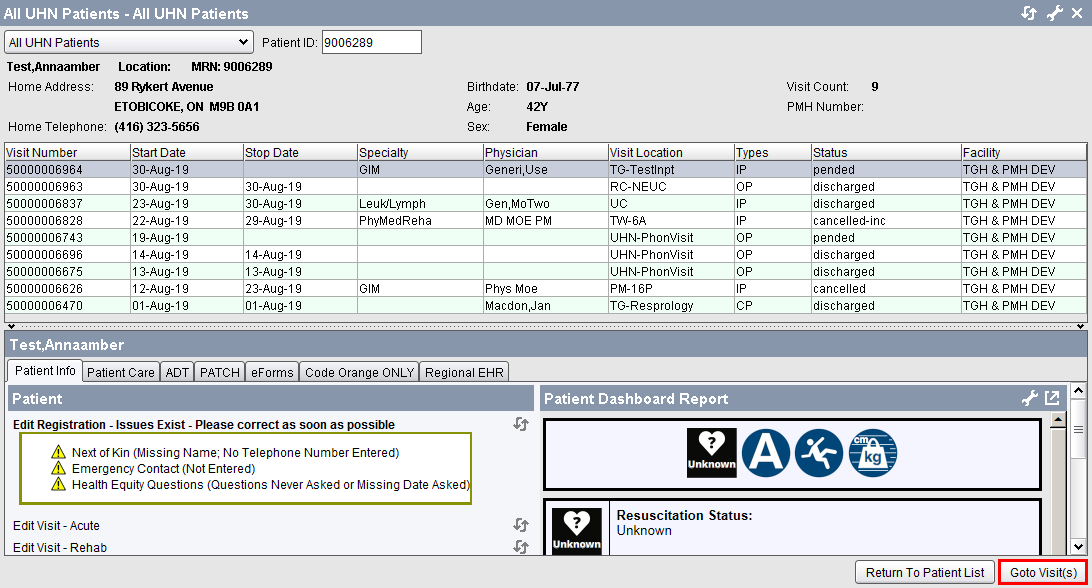
2. On the Patient's Desktop, under the Patient Info tab you may see some Alerts under the Edit Registration header - alerts indicate that you must edit the missing information in the patient's demographics. If there are no alerts, click on the ADT Tab.

3. Under the ADT tab, Admission option, select one of the following activation links (link name varies depending on visit type. For example, there are different options for Acute vs. the Toronto Rehab):
|
|
|
|
4. If the visit screen does not immediately appear, select the Financial/Accident Information or Bed Assignment/Financial Information option (name varies depending on visit type).


5. Proceed with Health Card Validation (HCV) by selecting the OHIP Verification field to edit (If a patient has not had their Health Card validated, the field will display as Not Sent or Not Process). Best practice is to verify the Health Card and/or financial information before activating.
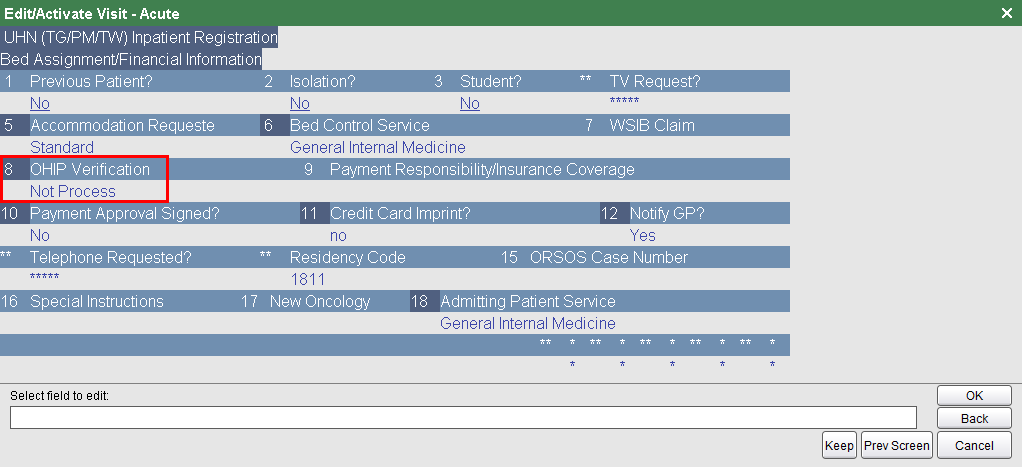
6. Upon clicking the field, the Transaction Line should prompt you to choose (Y) Process or (N) Not Process. Choose to Process Health Card Validation.
**Important** If your patient is non-OHIP, follow the steps below:
a. Select the OHIP Verification field and choose option Not Applicable then click OK. This field should never be left blank.
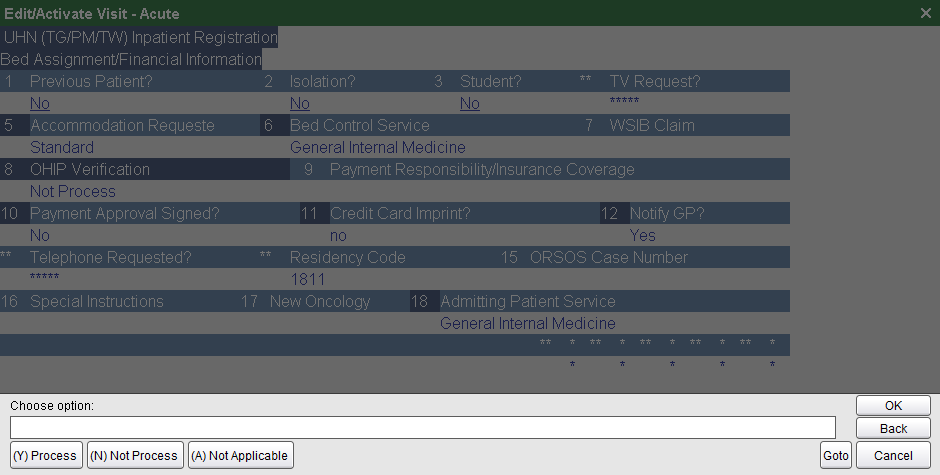
b. Depending on how your desktop looks select appropriate field: Payment Responsibility/Insurance Coverage OR Insurance Payor
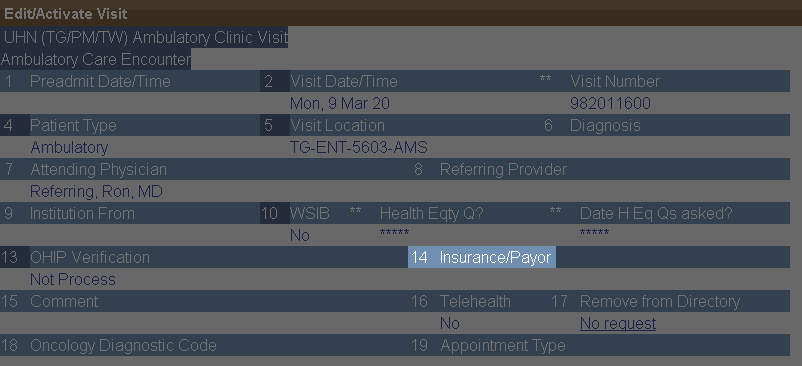
c. Choose Insert
d. Select an option under Common Options List. You may scroll through the list to find the appropriate Payor.
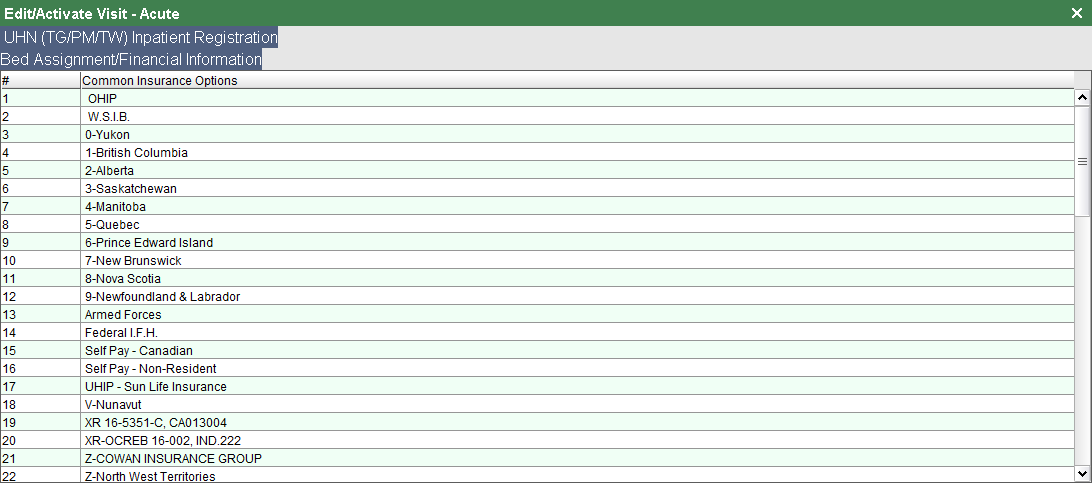
7. A new screen will open, and the Transaction Line will prompt you to Scan card or Choose option. Scan the card or click the Manual Override button.
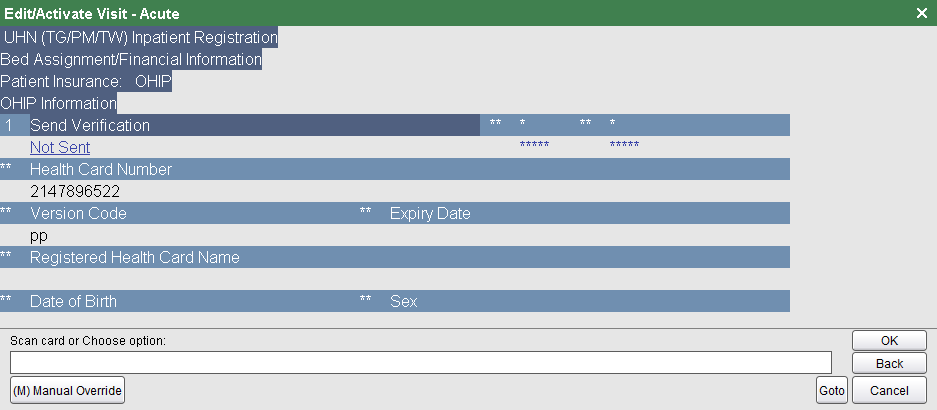
8. The next screen will prompt you to Select field to edit. If you do not need to make any edits, you can by-pass this stage by clicking the OK button.
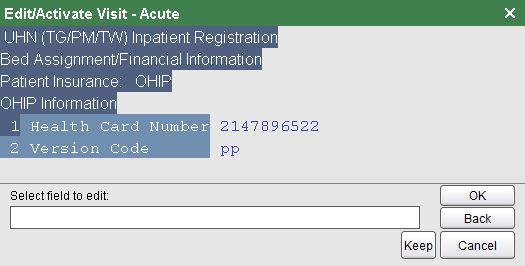
9. Click OK until you see the Accept button, then choose Accept.
10. Choose Yes to activate the visit.
11. The Transaction Line will now give you an option to Accept Visit Activation Time. Choose this button if the activation time indicated above the Transaction Line is correct.
12. You may or may not choose to print visit reports.
Your patient's status on the Patient Banner (beside Location) will be updated to display active (and the type of visit).

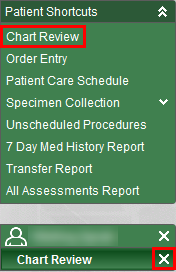
If the status remains as pended, you may refresh the screen by clicking on Chart Review in the Patient Shortcuts box, then closing the Chart Review banner.
This completes the activation process.
Toronto Rehab Inpatient Visit - Day of Admit Processing
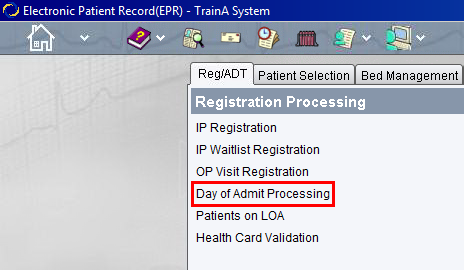
1. From the Main Desktop, Reg/ADT tab, click Day of Admit Processing.
2. Search for the patient whose visit you want to activate by Entering their patient ID.

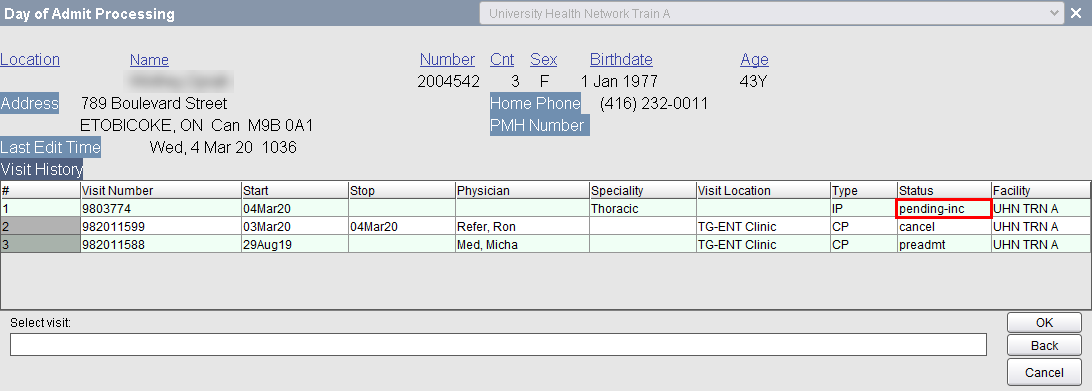
3. Select the patient's pending visit from their list of visits.
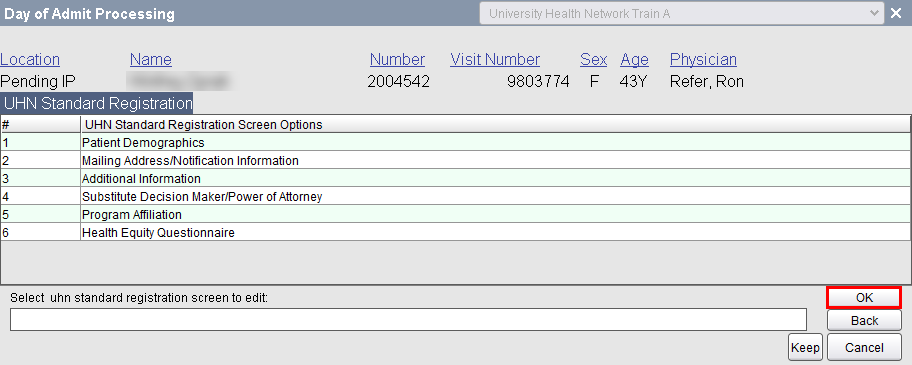
4. The list of the patient's six registration screens will appear. Ensure that the patient's demographics and health card information are accurate. Update as needed. Click OK when completed.
5. Select Financial/Accident Information.

6. The Day of Admit Processing screen will now appear. Follow activation steps above.
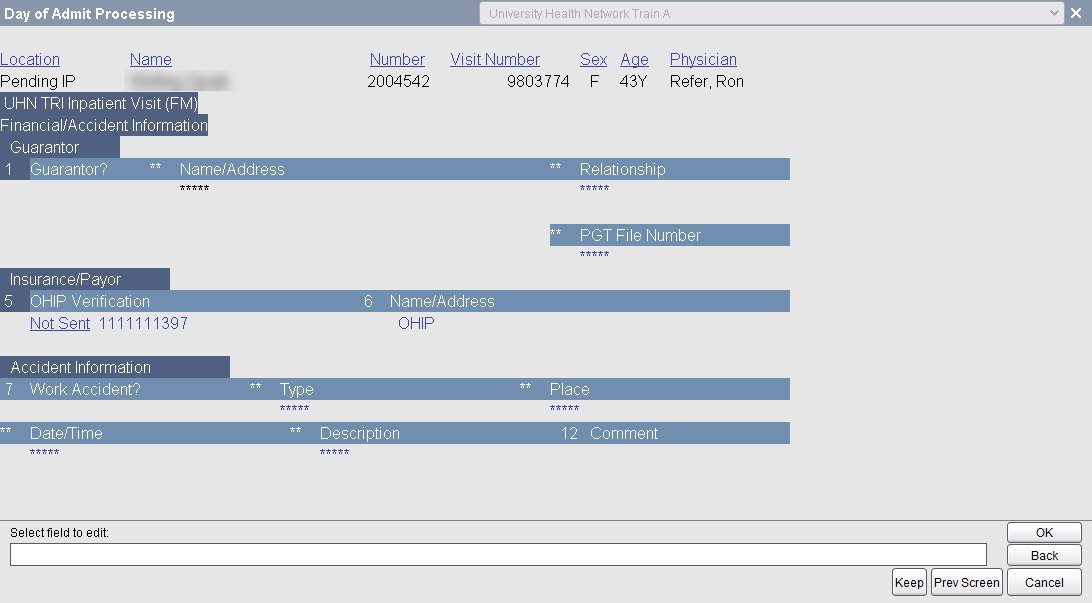
**Important** If your patient is Non OHIP, follow the steps below:
a. Select the Name/Address field.
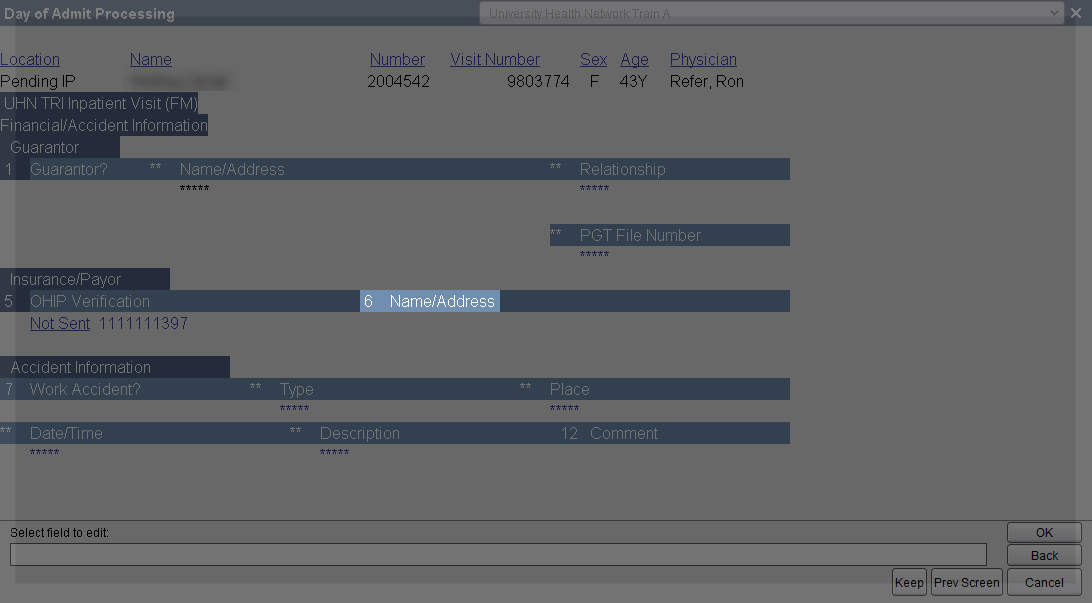
b. Choose the Insert button.
c. Select an option under Common Insurance Options list. You may scroll through the list to find the appropriate Payor.
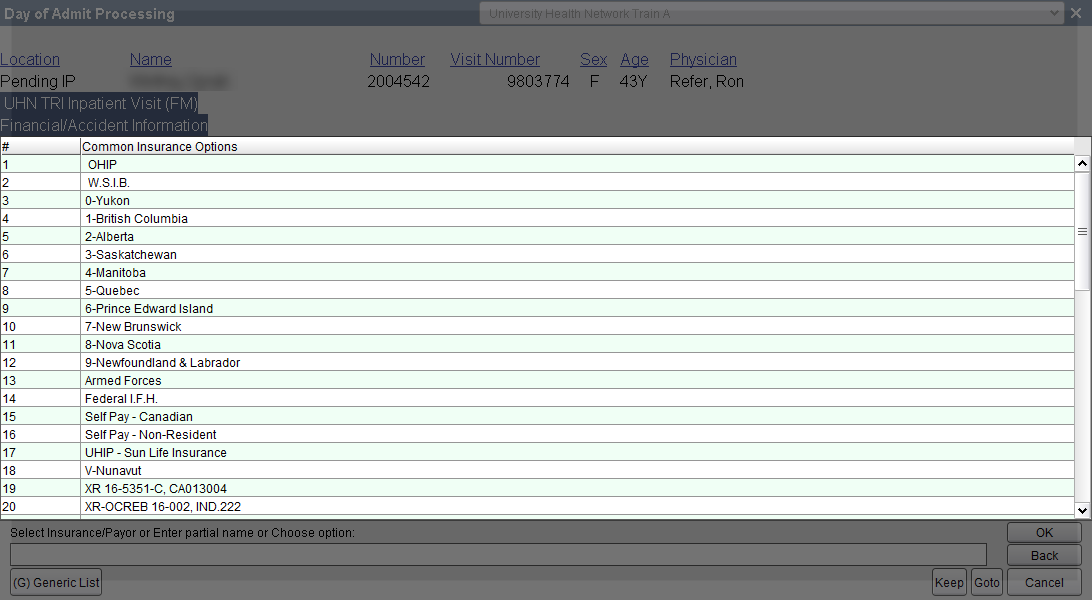
d. Depending on the type of insurance selected, a corresponding screen will appear, prompting you to enter more information. For example, if the insurance option selected is form another province, you will get the Out of Province Insurance screen. or, if you select the Self Pay-Non Resident option, you will get the Self Pay Profile screen.
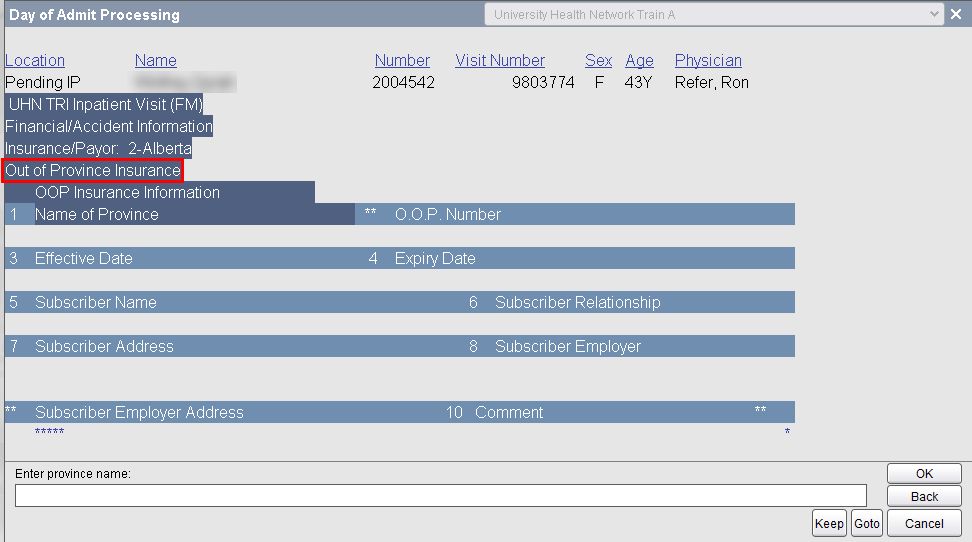
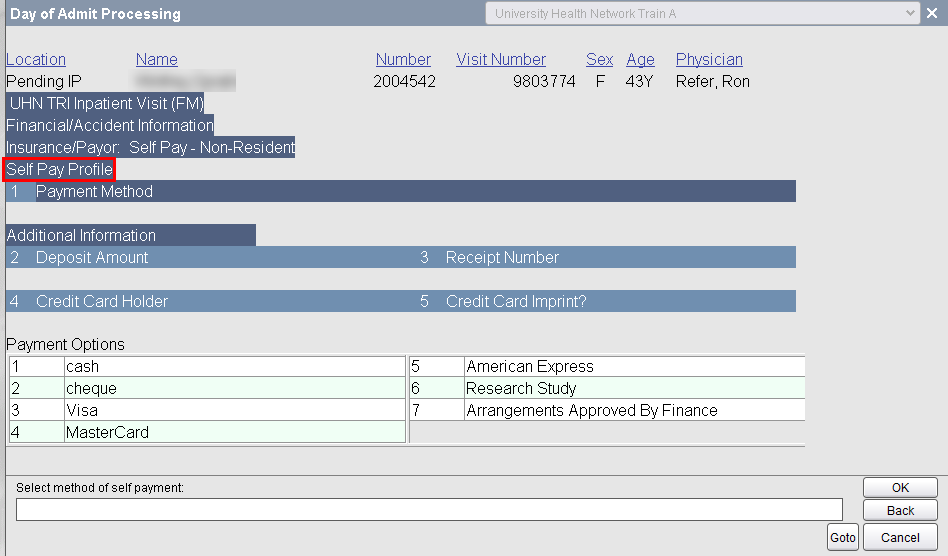
7. Follow the Transaction Line to complete the mandatory fields for each screen, then click OK until you see the Accept or Accept as Partial button. Choose appropriate selection.
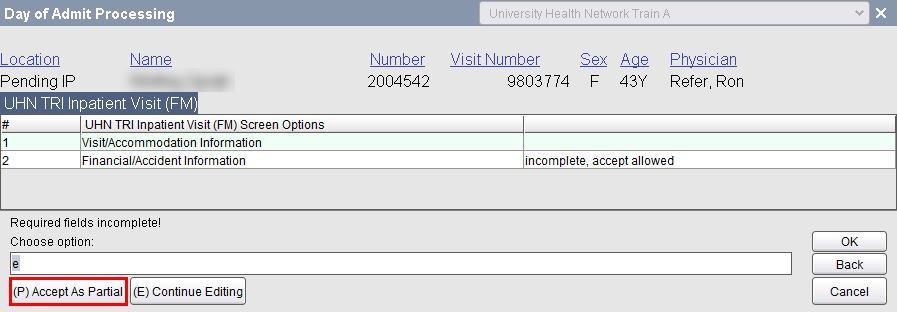
8. Activate Visit by choosing Yes.

9. The Transaction Line will now give you an option to Accept Visit Activation Time. Choose this button if the activation time indicated above the Transaction Line is correct.
10. You may or may not choose to print visit reports.