
For the latest updates, see EPR Release Notices.
For EPR related videos, check out Digital Education's YouTube Channel.
For the latest updates, see EPR Release Notices.
For EPR related videos, check out Digital Education's YouTube Channel.
Bed Check-In (formerly called Visit Check-In)
Checkin without a Reserved Bed
Use this function to checkin an inpatient (IP visit) or a same day (SP visit) patient into a bed. There is a different process for some areas. For example, at Toronto Rehab and other areas that use same day visits, Checkin is automated after activating the visit.
Note: When a bed is reserved, RV will appear in blue text on the Inpatient By Unit screens:

Once you have completed the Checkin process, OCC will appear in black text:

Similar to Health Card Validation, usually the Admitting Clerk reserves the patient’s bed.
1. Ensure the visit is activated. For more details, see the Visit Activation and Health Card Validation topic.
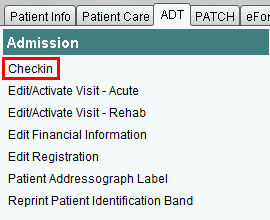
2. On the Patient's Desktop, go to the ADT tab. Under the Admission banner, click on Checkin.
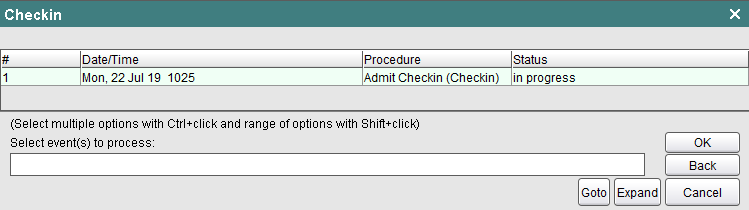
3. Select the Admit Checkin event and click OK.
4. Always choose Document when checking a patient in to a bed.

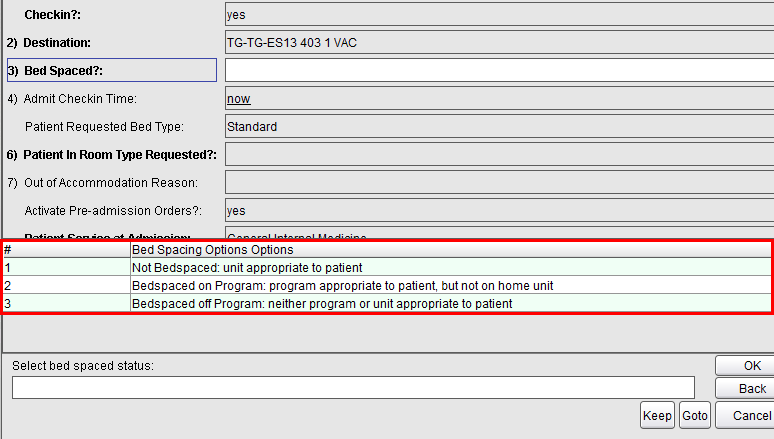
5. Select the appropriate Bed Spaced option and click OK.
The term Bed Spaced is used to identify when a patient is admitted to a hospital bed that is not associated with their care provider’s unit or program.
6. For Admit Checkin Time enter the info, and click OK to proceed. Alternatively, enter ‘n’ to auto-generate the exact current date and time.
7. Choose (Y) Yes or (N) No to indicate if the patient is in the Room Type that they requested.
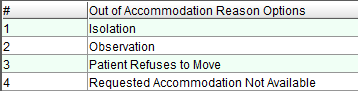
8. If patient is not in the Room Type that they requested, select the appropriate Out of Accommodation Reason option. Click OK to proceed.
9. Choose (Y) Yes or (N) No to indicate if the Patient Service needs updating.
10. If nothing further is required, choose (A) Accept to save and complete the patient Checkin.
Bed checkin steps are the same as above. The difference is that you will need to locate the patient's bed from the EPR list, when it has not been pre-selected or reserved in advance.
1. Follow Steps 1-4 above in the Checkin with a Reserved bed topic.
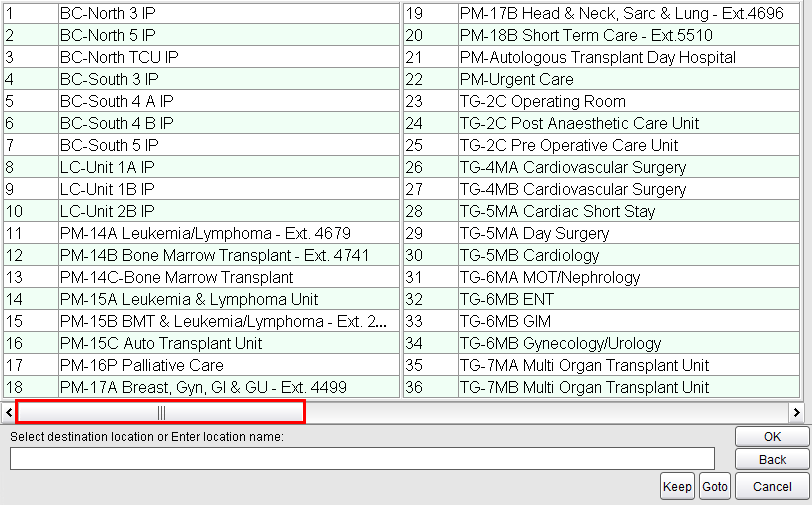
2. For the destination location name, choose the Expand button.

3. Select the applicable unit. You may need to scroll to find it.
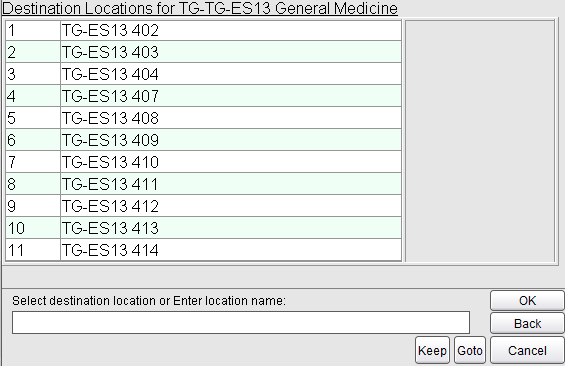
4. Select the applicable room.
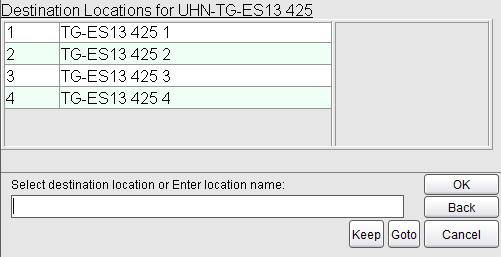
5. Select the applicable bed.
6. Proceed with Steps 5-10 above in the Checkin with a Reserved bed topic.