Blocks are an important component of PHS, as PHS is a complete time management tool for clinicians. The text on the Appointment Book indicates that time has been blocked for the clinician.
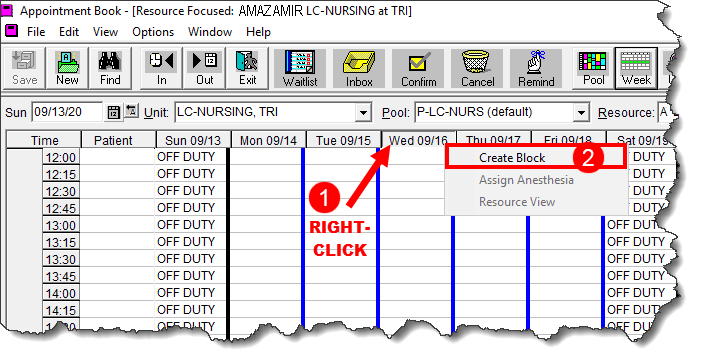
o Step 1: Navigate to the Date for the Block.
o Step 2: Right-click the Column Heading of the Block, then Select Create Block.
o Step 3: Enter the Information into the Create Block Window.
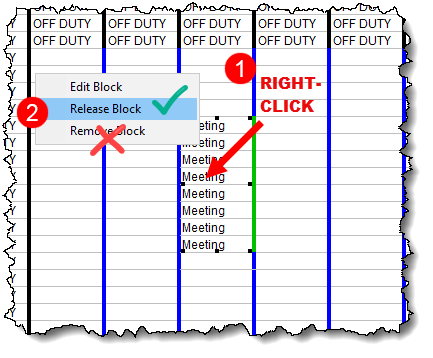
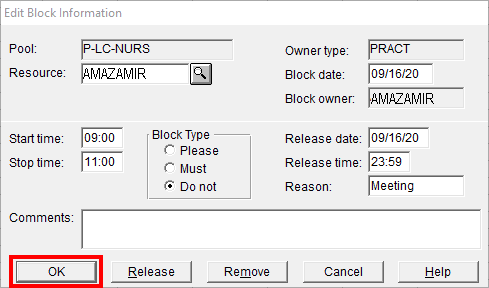
o Step 1: Right-click inside the Block (the text) and Select Edit Block From the Menu.
o One Step: Right-click inside the block and select Release Block from the menu.
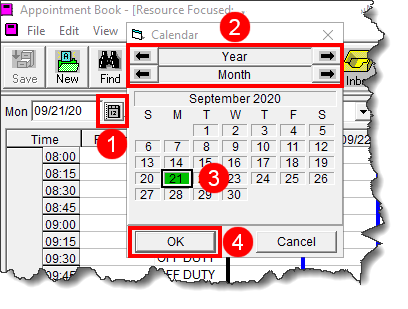
1 Click on the calendar icon in the top left corner of the Appointment Book window.
2 Use the arrows at the top of the calendar to navigate to your preferred date.
3 Click the date for the copied appointment.
4 Click the OK button at the bottom.
Note: In. Week View, click on a date in the column heading: in Pool View, click on the practitioner (or room/equipment) name in the column heading.
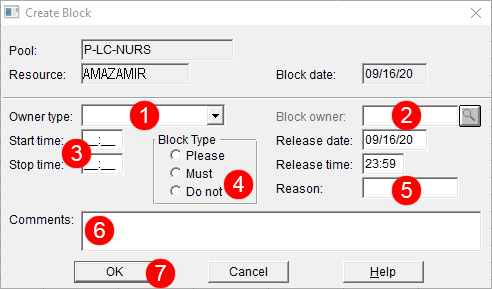
1 Click
on the arrow at the right of the Owner type field and select
the Resource
Type that you are blocking time for. Note: If you are creating a block
for a practitioner, choose PRACT.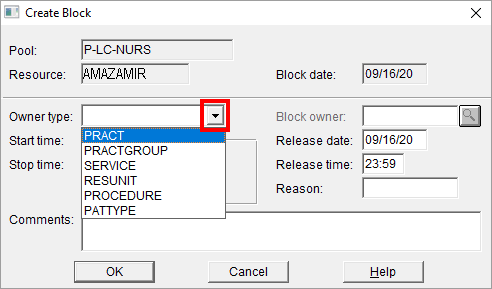
2 In the Block owner field, enter the name of the Practitioner (or resource), then click the magnifying glass.
· Remember that the naming convention for practitioners is the first four letters of the last name and the first four letters of the first name
· For example, the naming convention for Dr. Fiona Fantastic would be FANTFION
3 Enter the start and stop times for the Block timeframe. Note that times are entered using the 24 hour clock (i.e.: 13:00 for 1pm)
4 Select the Block Type:
· Please Block - Add a message or comment to the Appointment Book. Allows scheduling an appointment to the block, as the practitioner is available.
· Must Block - Not used at UHN
· Do Not Block - Blocks the Appointment Book when a practitioner (or room/equipment) is not available.
See the Block Overview topic for more details and examples.
5 Enter the reason for the block. E.g. “Meeting”. (Note be brief, the number of characters is limited.)
6 Enter comments or additional details for the block. This is where you can document background information, such as approval or information from a clinician.
7 Click the OK button at the bottom left.
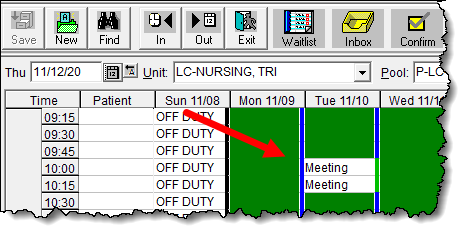
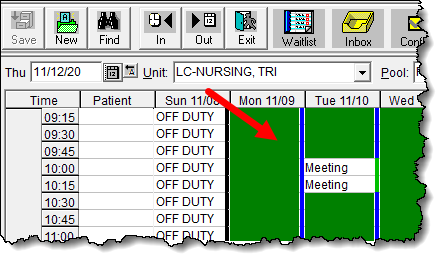
8 Your Block appears on the Appointment Book, displaying the reason for the reserved timeframe
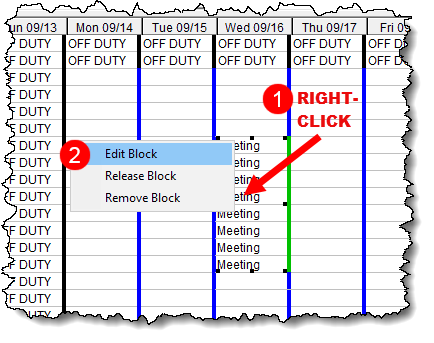
· Do not use Remove Block because this will remove information from the PHS Database, which is important for audits.