
For the latest updates, see EPR Release Notices.
For EPR related videos, check out Digital Education's YouTube Channel.
For the latest updates, see EPR Release Notices.
For EPR related videos, check out Digital Education's YouTube Channel.
Diet Order Entry
For specific questions on placing diet orders, please consult UHN Nutrition Services.
Covered in this topic:
Before entering a diet order, it is important that food allergies are documented. If allergies have not been documented for the patient, an Allergy Check Alert! warning will appear (see screenshot below). You will need to exit the diet order and complete a Food Allergy Assessment (see Allergy Documentation for further details).

IMPORTANT: If a change is required to the food allergy assessment, the diet order must be reordered afterwards. Editing food allergies in the Electronic Patient Record (EPR) sends a message to CBORD (UHN's Nutrition Services system) to cancel the existing order.
When re-ordering a diet, ensure you use the Copy Order function, otherwise the diet order will need to be ordered from scratch. The Comment field should not be used to communicate any diet order details.
In the example below, we will order a Regular Full diet for every meal starting immediately.
1. From the Order Entry Screen click on the All Nutrition folder (to see how to get to Order Entry click Order Entry Overview).

2. Select the diet type and click on Add Order.

3. The Typical Orders screen will appear, offering various consistency options. In our example, we will select Regular full q meal starts now.
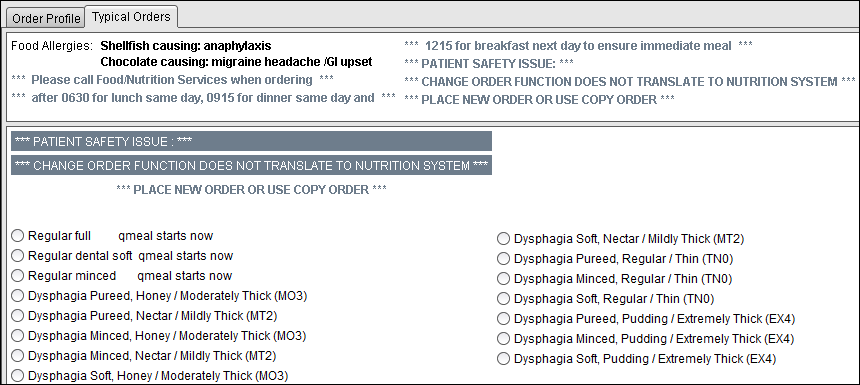
Notice the Food allergies at the top of the screen. You will also notice the cut off times for each meal. This means that if you have ordered the diet after the cut off time, you will need to call the nutrition department for the next immediate meal.
Our example does not need any modifications. However, if change are needed, proceed to step 4. Otherwise, click Add Order. Review Order and click OK. Click Order Summary. Click Accept Order.
4. If changes are needed, click the Order Profile tab. Select any options that may be needed (i.e. Consistency, Modifier, Supplement Feeding) and click OK.

5. Click Order Summary and then Accept Order.
Note: The example below shows a regular diet with NPO, with the focus being on the NPO requirement.
1. Once you have clicked on the desired diet type from under the Diet Types banner (in this example, Regular), click on NPO under the NPO banner and then click Add Order.

The regular diet option will be ordered first.
2. From the Order Profile tab, select any other options that may be needed (i.e. Consistency, Modifier). Click OK.

3. Next, select the appropriate NPO option and click Add Order.

4. The Order Profile tab will populate to allow for any modifications. Click OK.

5. If required, click inside the field you wish to edit and edit as necessary. Then click Order Summary to confirm the order.
6. Click Accept Order.
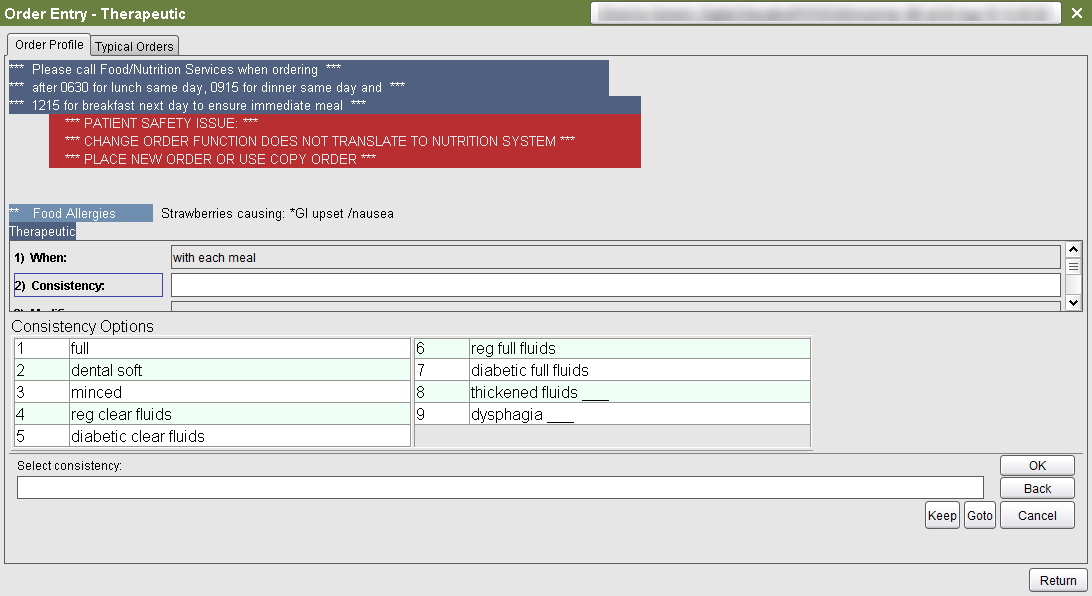
1. Choose Therapeutic Diet under the Diet Types banner and click Add Order.

The Typical Order screen will appear next, offering you a choice of quick pick diets. These selections will only allow you to select one diet. Under the Food Allergies at the top of the screen, you will find the cut off times for each meal. This means that if you have ordered the diet after the cut off time, you will need to call the nutrition department for the next immediate meal.

2. To customize the diet, click on the Order Profile tab.

3. Select the appropriate frequency. Diet orders usually use the qmeal frequency.

4. Select a consistency option for patient diet. Full is selected here as there are no consistency requests for this diet.
5. Select any modifiers the patient may have requested. In this example, there are no requests so no restriction is selected.

6. In this example, we will order a Diabetic, Healthy Heart, Hi Fiber, Low Lactose Diet. Select Therapeutic Diet Type, then select the following options: diabetic, controlled fat___, GI Surgery___, low lactose.
Note: Each category with a ___ after it will bring you to a sub-menu of other choices.
Click OK.

7. The first therapeutic option to address is indicated by a red line after the diet category. In this example the controlled fat options are presented. Select the Healthy Heart (low cholesterol, low saturated fat, NAS).

8. The next screen displays GI Surgery Diet options. Select high fibre.

9. Once you have accepted the therapeutic diet, fill out any fields as needed and then click OK.

10. From the Order Summary pane, review the diet for accuracy and then click Order Summary and Accept Order.

See the Diet Order Reference Guide for more options for each diet type.