
Always ensure that you have documented/updated your patient’s allergies in PSS, before prescribing any medication.
1. With
the patient’s chart open, select the  icon from
the toolbar. You can also use the shortcut CTRL +
B to prescribe.
icon from
the toolbar. You can also use the shortcut CTRL +
B to prescribe.

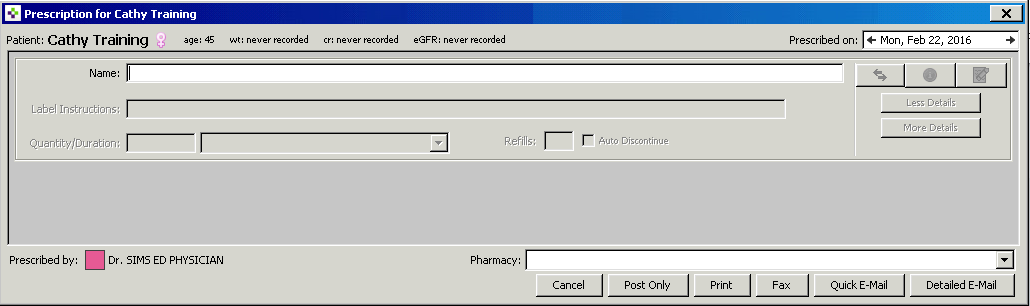
2. The Prescription Form will appear.
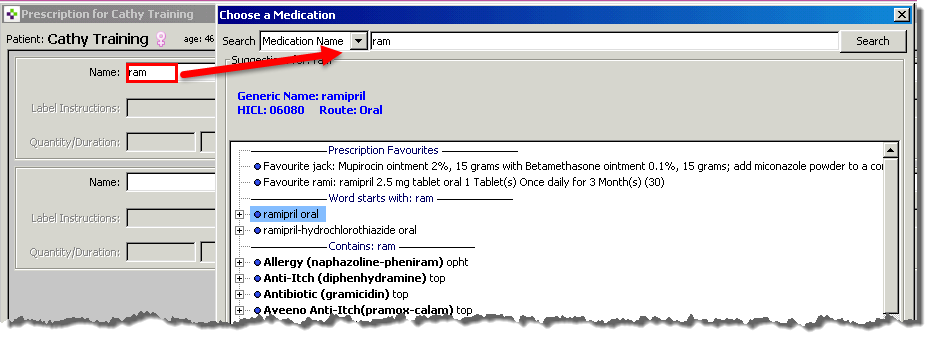
3. Type the first 4 to 5 letters of the name of the desired medication and select the tab key.
· The Choose a Medication Screen appears that uses a Medication Tree functionality for easy navigation
4. A single click on the plus sign beside a medication on the Medication Tree will display more options:
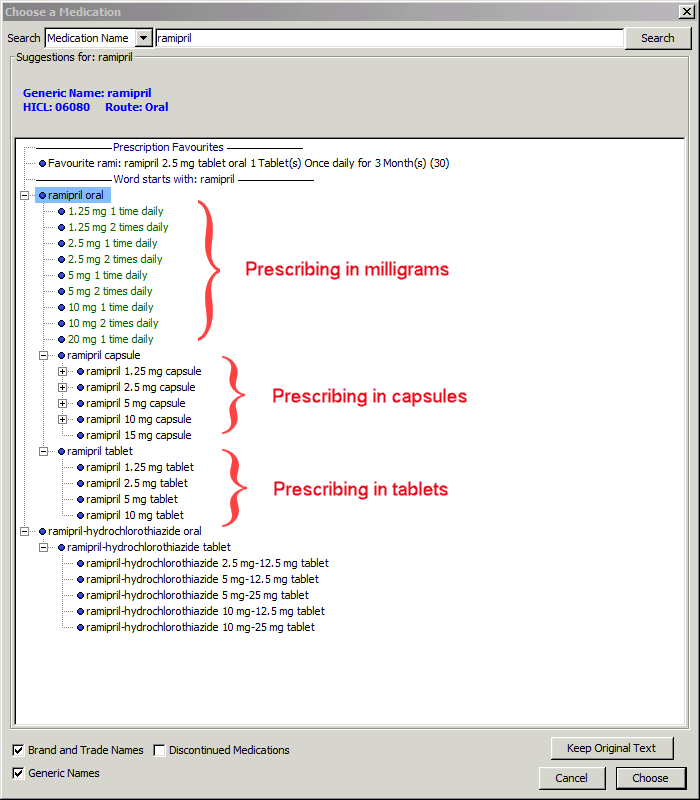
· At the top of the tree, you will see options for ordering the medication in milligrams
· As you move down the medication tree, you will see options for capsules and tablets
· You may see different colours of text in the medication tree:
· Black Text: Allows for more flexibility and customization of the medication
· Green Text: Allows you to make quick selections with fewer clicks, which is great for standard dosages. Always use clinical judgement as the suggested dosage may not be appropriate for your patient.
· Red Text: This warning text may be red according to age or renal function. Always use according to your clinical judgement.
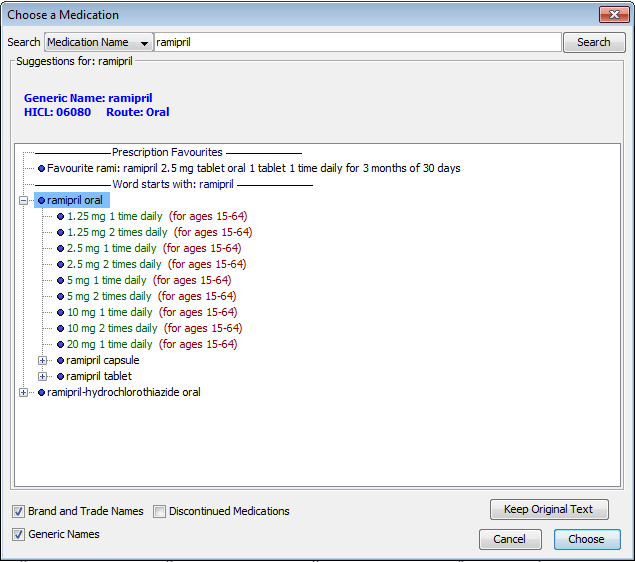
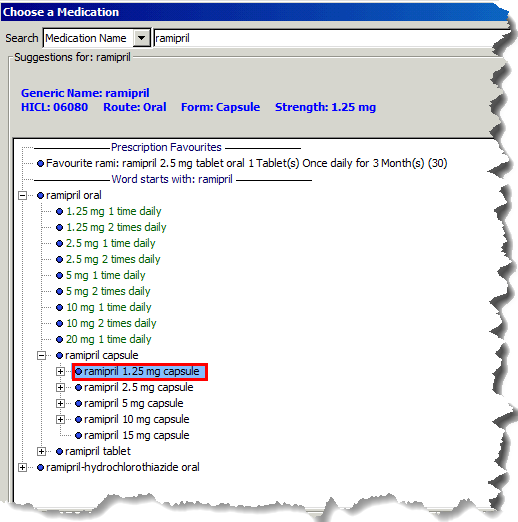
· You may need to select the “+” key several times to reveal the options in more detail
5. Select the desired medication and select Choose.
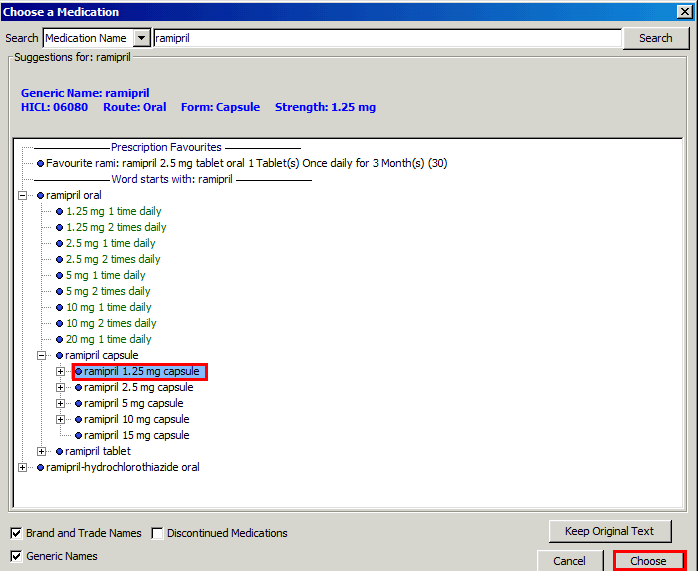
· As medication best practice, choose the desired medication product instead of a specific dosing regimen (usually in black text, rather than green text)
6. The prescription screen appears with the medication name listed.
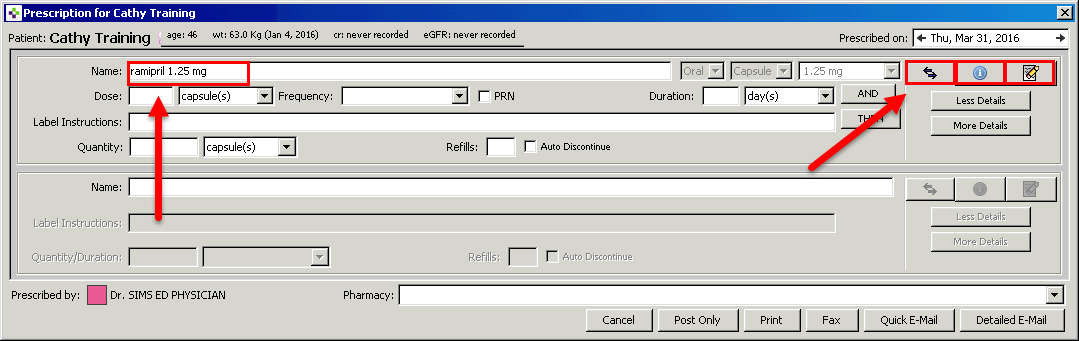
7. In the top right corner of the prescription screen, there are three useful buttons:
 Allows
you to swap similar medications by class or indication
Allows
you to swap similar medications by class or indication
 Provides
information about the medication prescribed
Provides
information about the medication prescribed
 Erases
the prescription that you are presently working on, without tabbing through
all the fields
Erases
the prescription that you are presently working on, without tabbing through
all the fields

· Always select More Details order in order to fully display all the fields in the prescription screen - multiple medication errors have occurred from skipping this step!
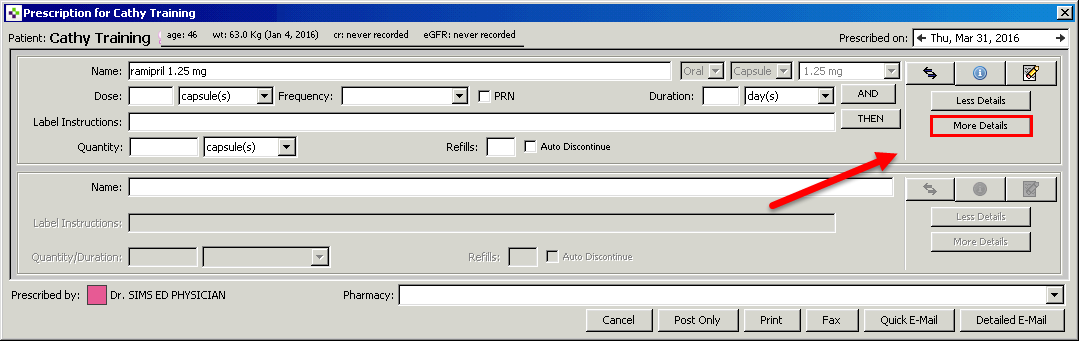
8. Complete all of the required prescription fields:
· Dose
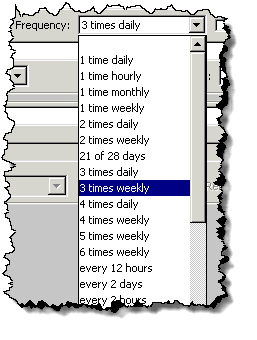
· Frequency
· Number of Days supply
· Label Instructions (use as needed - when you need to add extra instructions)
· Quantity
· Refills (optional)
· Selecting
More Details again will allow you to add additional detail
e.g. Instructions to the pharmacist or compliance packaging
· For all medications anticipated for chronic use, consider prescribing a one-year supply


Tip 1: You can use the tab key to navigate quickly from field to field
Tip 2: In the Frequency field, typing the first letter of your desired option will allow you to quickly make your selection
o Example 1: Type “3” will result in presentation of all options beginning with 3 (3 times daily , 3 times weekly)
o Example
2: Type “e” to scroll through all the entries beginning
with “every”
9. You can now select whether to Post Only, Print or Fax the prescription.
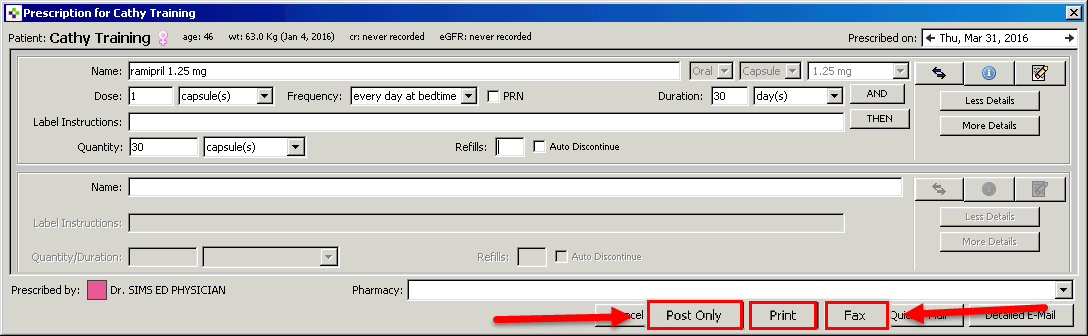
· Select Print if you are giving the paper prescription to your patient
· Select Post Only if you are simply recording the patient’s medication in the chart
· Select Fax if you would like to fax the script directly to Pharmacy rather than printing it
Please see the topic: Faxing Documents From a Patient Chart
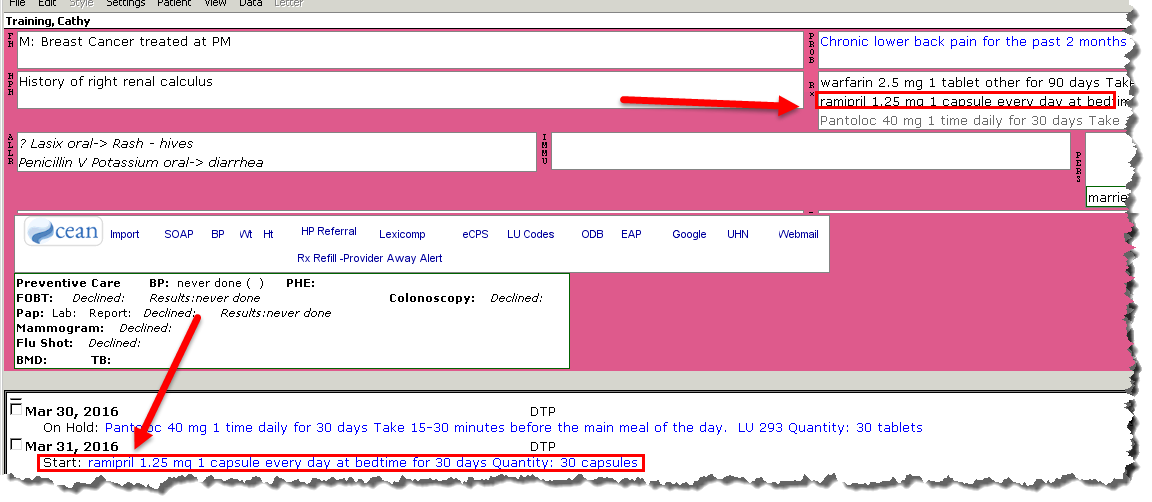
10. The medication will appear both in the RX section of the chart, as well as in the progress notes section.
· If the ordering clinician is a resident, the prescription will be blue barred in the chart
· If the ordering clinician is a staff physician, the prescription will not be blue barred
· In the example below, the ordering physician is a resident, so the prescription is blue barred
· Always
review the prescription before signing or faxing to ensure accuracy.
Multiple medication errors have occurred from skipping this step!

Learning powered by Digital Education