When scheduling an appointment you must enter the details into the Patient Scheduling Screen.
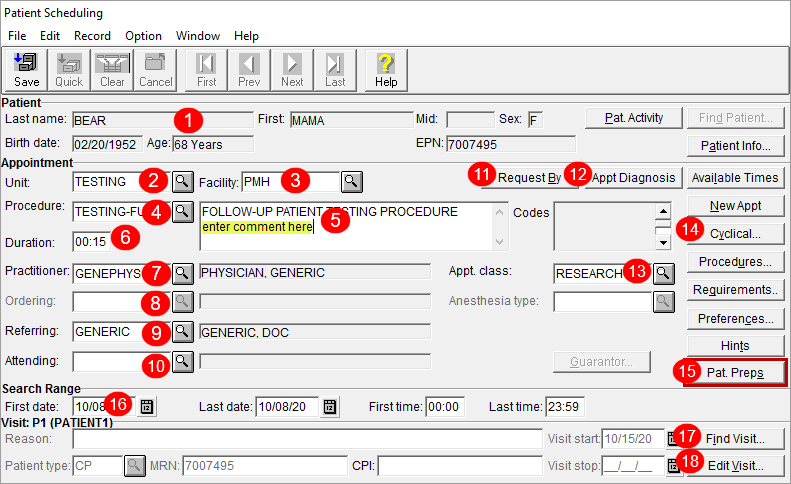
1 Patient Info – The patient’s name, gender, birthdate, age and MRN number (In PHS the EPN is the MRN number).
2 Unit – The department or clinic that the appointment will take place in.
3 Facility – The hospital where the appointment is taking place.
4 Procedure (Short Name) –The reason for the appointment. This can be a diagnostic test, assessment, treatment or consultation. Note: This is the abbreviated procedure name.
5 Procedure Long Name – This is the non-abbreviated procedure name. If desired, you can enter a comment after the long procedure name, which will print on the daily patient lists that are generated by PHS. This is functionality is used frequently across UHN.
6 Duration – Length of time for the procedure. Every procedure has a set duration, which appears in this field once you have selected the procedure.
7 Practitioner – The clinician who is seeing the patient during the appointment. See the naming conventions for practitioners in the PHS Terminology topic.
8 Ordering – Ordering Physician – not required for every appointment, therefore it is sometimes greyed out (non-mandatory). See the naming conventions for practitioners in the PHS Terminology topic.
9 Referring – Referring Physician – The best practice is to complete this field, for data collection. The referring practitioner’s name is sent to EPR, via the interface between PHS and EPR.
· Check that you have selected the correct practitioner, by scrolling on the list of referring physicians that appears during scheduling, and reviewing their phone number. See The Direct Scheduling topic for further details. See the naming conventions for practitioners in the PHS Terminology topic.
· Clinical information after a patient appointment is automatically faxed to the referring physician listed in EPR. It is important to enter the correct referring physician in PHS.
· Enter UNKNOWN in the Referring field if you are unsure of who the practitioner is. Be sure to go back and update.
· The PHS Referring practitioner field links to the Canadian Medical Directory (CMD).
· If you need to add or edit a practitioner in PHS, go to the Corporate Intranet, select Forms, and then select the PHS Physician's Address Change/ Add Request option .
10 Attending – Attending Physician – Not required for every appointment, therefore it is sometimes greyed out (non-mandatory). See the naming conventions for practitioners in the PHS Terminology topic.
11 Request By – Captures referral information – Used by some units to capture referral dates and other information related to wait times.
12 Appt. Diagnosis – Captures ICD9 Codes – mostly used by Units at Princess Margaret.
13 Appt. Class – Categorizes appointments by colour coding the appointment box on the Appointment Grid.
14 Cyclical – Enables you to create sets of recurring appointments, all at the same time.
· For example, you would use cyclical functionality to schedule a patient for physiotherapy appointments twice a week for six weeks, with all appointments at the same time.
15 Patient Preps –If there are instructions to communicate to your patient for the appointment you are scheduling, a red box will appear around this field.
16 First Date – Lists the appointment date that you are currently scheduling. Click on the calendar icon to change the date.
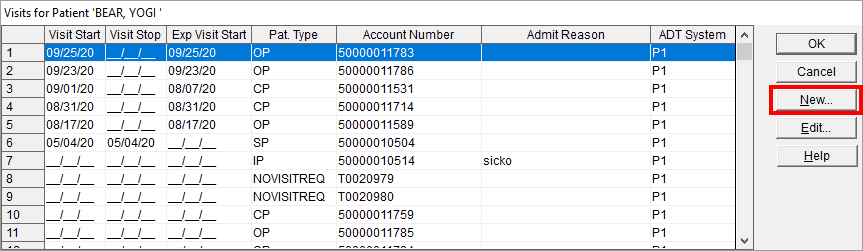
17 Find Visit – Opens the Visits for Patient window.
· You must always click on the New button to generate a visit number for the appointment. This crucial for funding.
· See the topic Patient Types and Insurance Options for more details.
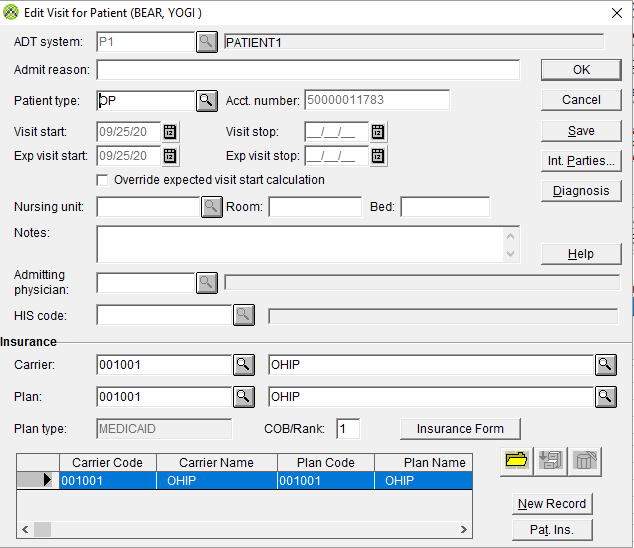
18 Edit Visit – Opens the Edit Visit for Patient window, where you can make changes to the visit information.
· See the topic Patient Types and Insurance Options for more details.