For the latest updates, see EPR Release Notices.
For EPR related videos, check out Digital Education's YouTube Channel.
For the latest updates, see EPR Release Notices.
For EPR related videos, check out Digital Education's YouTube Channel.
Staff Assignment
Covered in this topic:
The Staff Assignment is used to create a short-list of patients that have been assigned to RN’s. The Staff Assignment can assist the RN by notifying them of changes to patient orders and reminders of undocumented events to assist the nurse in providing patient care.
Note: staff assignment does not work for those assigned to a Nursing Student desktop/role in EPR.
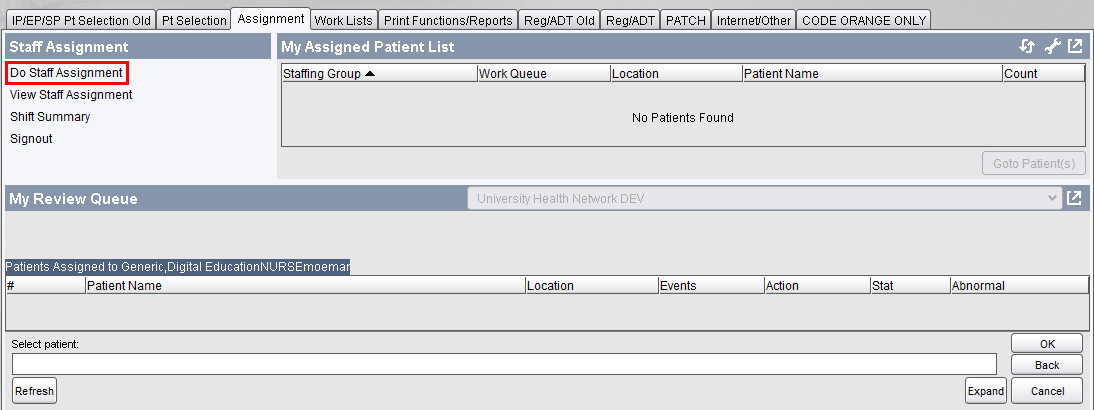
1. From the Main Desktop, Assignment tab, select Do Staff Assignment.
2. Choose Add.
Note: If you already have an existing active assignment that you need to edit, you would just select it from the list.
Note: The blue banner at the top will always show a two day time-frame with today as the end date. This defines the default parameters that EPR uses to show only two days of archived assignments.

3. Select the Staffing Group you are working on and click OK.
4. Enter the schedule date/time (such as N for Now) and click OK.

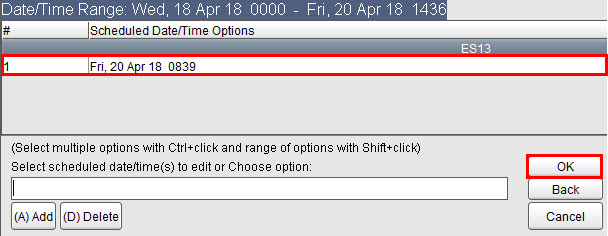
5. You have now created a shift, which is the shell for an assignment list. You are returned to the first screen, which asks you to select which shift you want to edit. Select the shift just created to add patient names to it and click OK.
6. Choose Add.
7. Scroll through unit list and select the patients you are assigned to for the day and click OK.
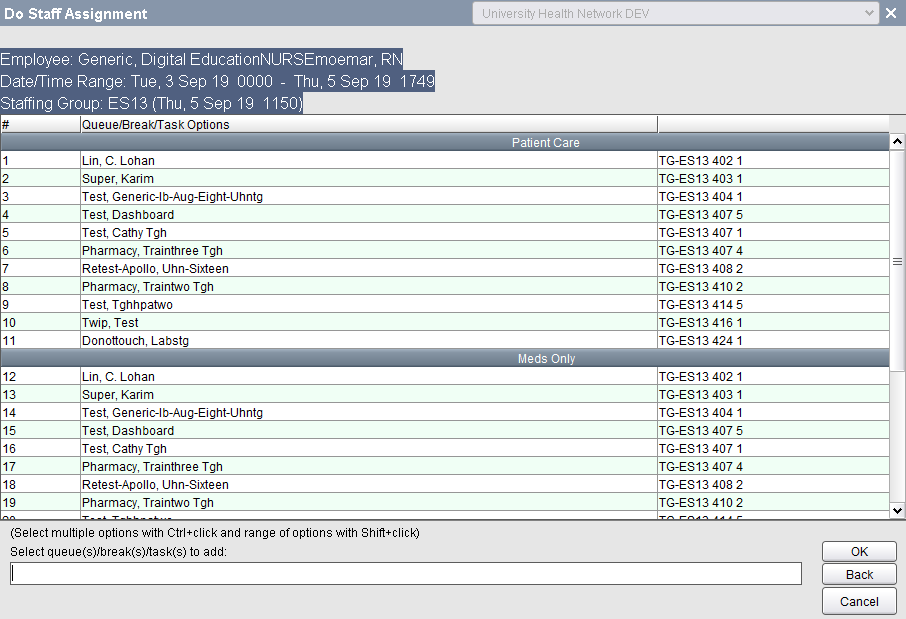
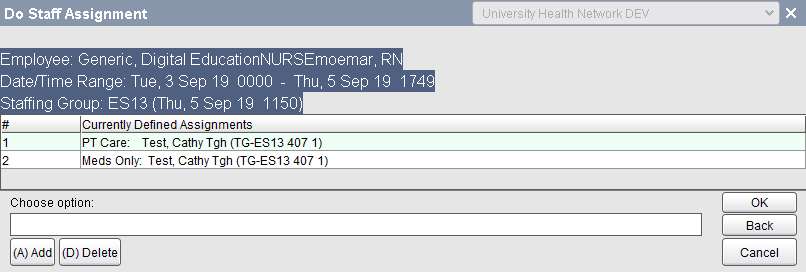
8. Click OK to confirm your list.
Note: If you need to add or delete patients, choose Add or Delete.
9. Choose Accept Assignments.

10.Click OK.
11.Ensure to click on the Refresh button for each section in order to see My Assigned Patient List and My Review Queue.
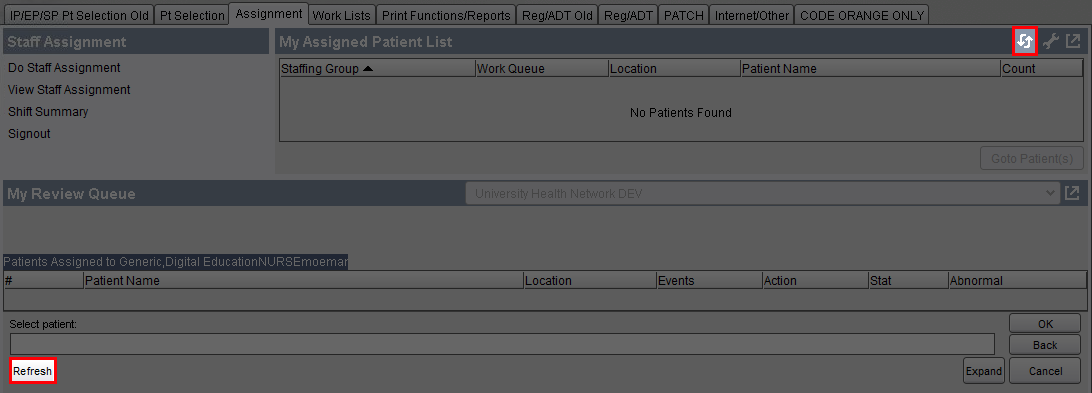
The refreshed screen now has My Assigned Patient List patients at the top of the screen and My Review Queue at the bottom.
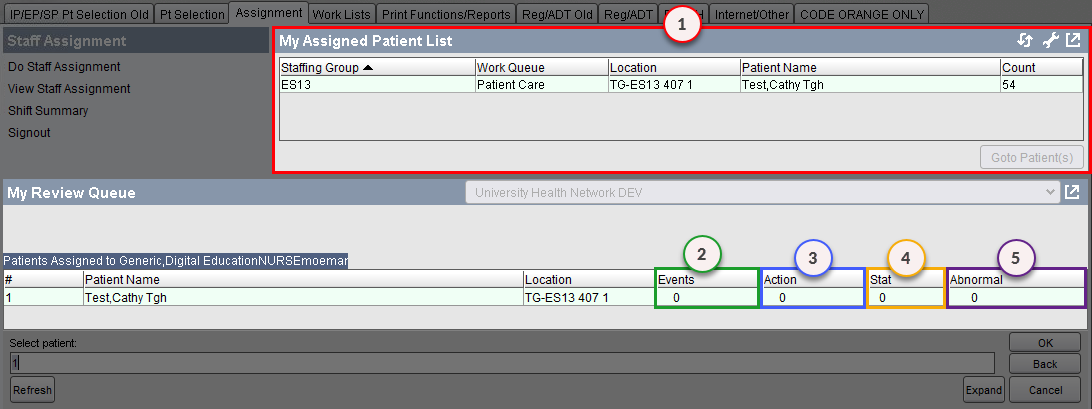
1. My Assigned Patient List: This is a high-level list of the patients already on your assignment.
Select a patient name and choose the Goto Patient(s) button to open the visit.
The Count column shows the total number of events in the visit, including orders, Inbox items, eMAR events, etc.
2. My Review Queue: Events – Shows the number of events in the visit that are due (i.e. items waiting to be signed in Inbox, eMAR doses past due, etc.).
3. Action: This field is specific to physicians only, and therefore will always show zero count for nursing EPR users.
4. Stat: This displays the number of STAT orders.
5. Abnormal: This displays the number of critical and/or abnormal results.
Any unsigned Critical or Abnormal results will pop-up over top of your My Review Queue (as per the below). This is essentially a shortcut to the Nursing Inbox, and can be used accordingly. You can sign off on the result by clicking on the Accept Final Review. After you have addressed the alerts, My Review Queue will return to showing your list of patients.
Signing out at the end of the shift allows you to quickly see if any patient care events for your assigned patients were inadvertently missed or not documented during your shift.
Note: If you do not sign out from your assignment, it will not have any effect on patient care, as it will not block other nurses from adding the patient(s) to their own assignment and/or working in the chart.
Note: In the event that you do not sign out, you can still double-check for undocumented items using the Outstanding Doses Report.
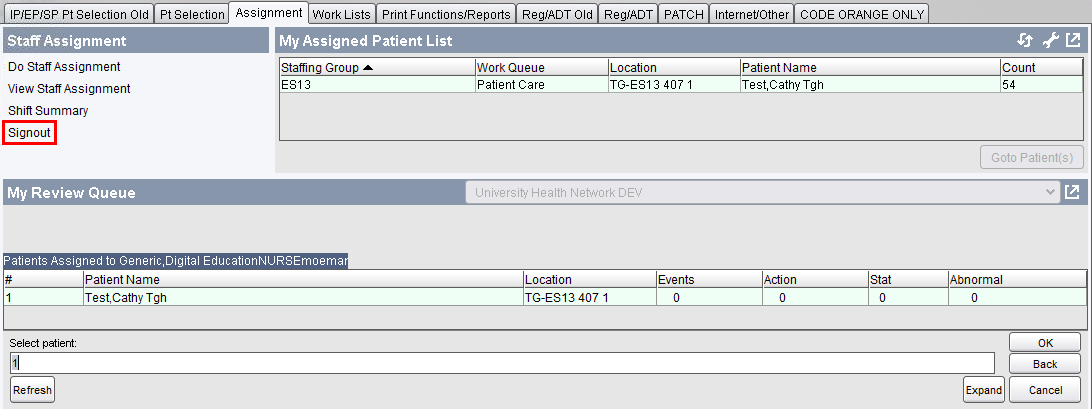
1. From the Main Desktop, Assignment tab, select Signout.
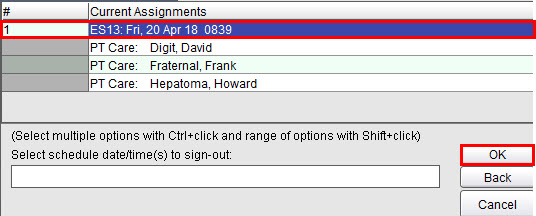
2. Select the list you created at the beginning of your shift and click OK.
3. EPR will scan the visit for any overdue documentation events. Your next step is dependent on if any are found or not:
a. If there are no patient care events outstanding or undocumented for the visit, you will see only two button options. Choose (A) Accept Sign-Out and you are done.
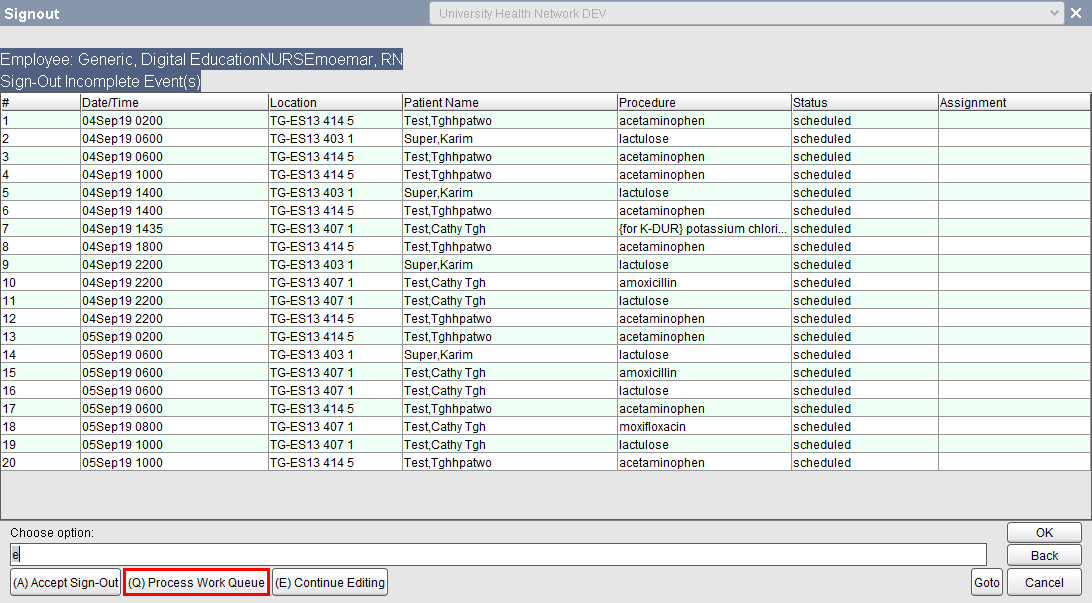
b. If there are any events outstanding or undocumented, EPR will list those for you and there will be three button options. You should only choose Accept Sign-out once you have reconciled all the documentation. Should you need to address any items on the list, you can choose button (Q) Process Work Queue.
1. Any events that are outstanding or undocumented during your shift will appear on the list. Choose Process Work Queue.
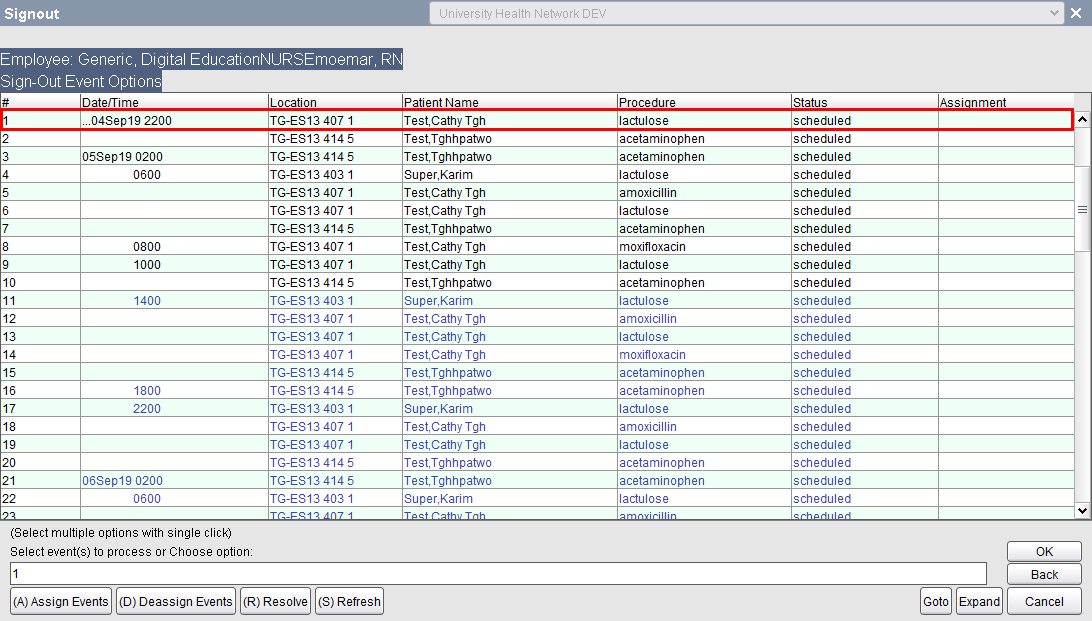
2. Select the event you want to process and click OK.
3. EPR will automatically take you to the Patient Care Schedule to process whatever item you selected. Choose Document.
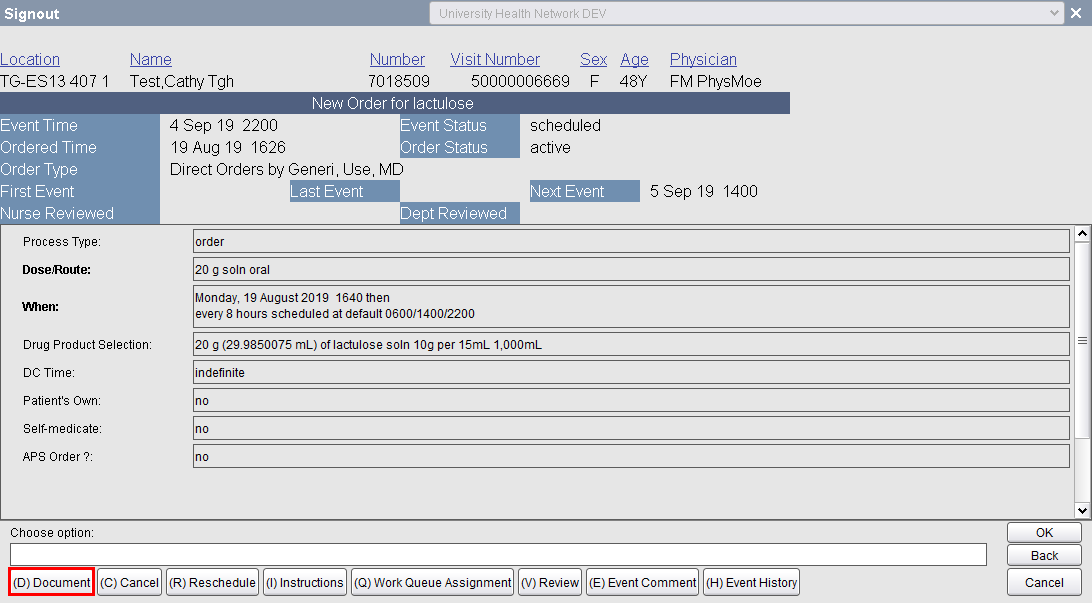
4. Enter the date and time the event was processed and click OK.
5. Continue following the transaction line to complete the rest of the documentation.
6. When you have finished reconciling your documentation and are ready to sign-out, choose the button Accept Sign-Out.