For the latest updates, see EPR Release Notices.
For EPR related videos, check out Digital Education's YouTube Channel.
For the latest updates, see EPR Release Notices.
For EPR related videos, check out Digital Education's YouTube Channel.
ALC Documentation
Also found in this topic:
For questions, concerns, or more information about this topic, please contact your Clinical Educator or PCC.
Once an ALC order has been placed, the Patient Care Coordinator (PCC) or in-charge nurse will document the order when the destination facility has been confirmed.
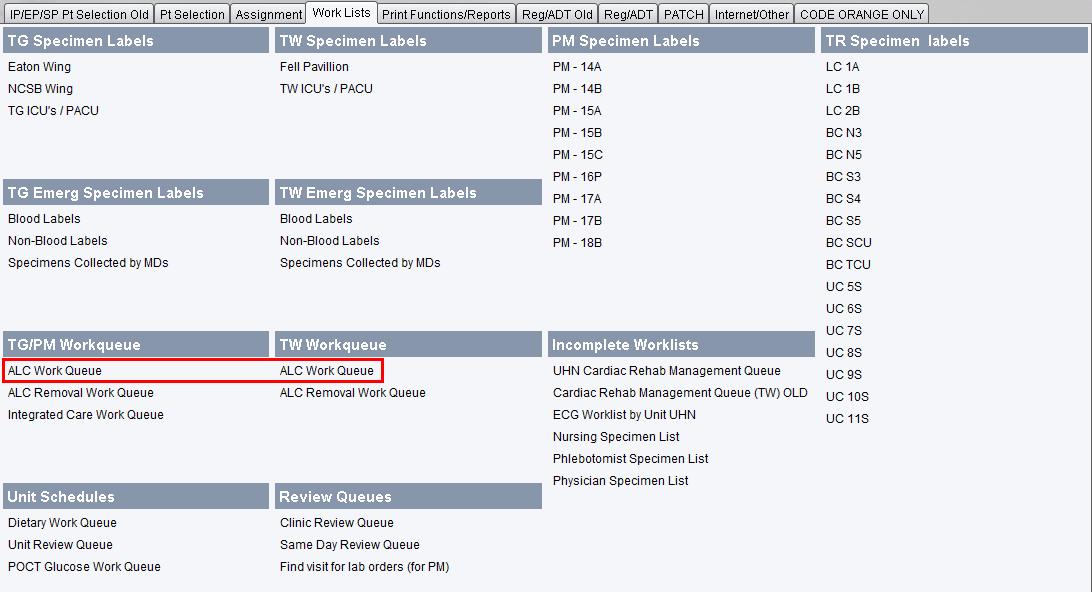
1. From the Main Desktop, Work Lists tab, click on the appropriate ALC Work Queue.

2. Select the ALC work queue and click OK.

3. Select the event to process and click OK.

4. Choose Document.

5. Enter the Date and Time of documentation and click OK.

6. Select the ALC Designation from the list and click OK.

7. Choose Yes or No to confirm if this is the most appropriate destination.

8. Enter the most Appropriate Discharge Destination Determination Date and click OK.

9. Choose Yes or No for indicators for specialized needs/supports and click OK.

Note: If No was selected, then you will move on to the next screen. If Yes, select the Primary Specialized Need / Support option and click OK.

If needed, select other specialized needs / support and click OK. Multiple options can be selected.

10. Click OK until you see (A) Accept.
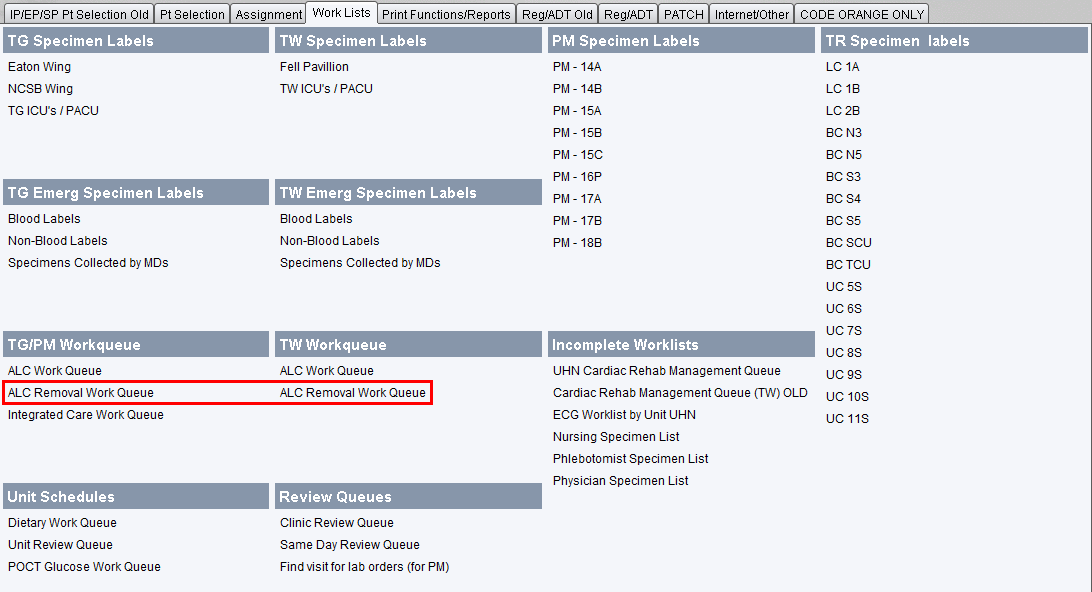
1. From the Main Desktop, Work List tab, click on the appropriate ALC Removal Work Queue depending on the UHN hospital site.

2. Select the work queue from the list and click OK.
3. Click the patient on the ALC Removal Work queue.
4. Choose (D) Document.
5. Enter the date and time click OK.
6. Enter comments if necessary and click OK.
7. Click on (A) Accept.