
For the latest updates, see EPR Release Notices.
For EPR related videos, check out Digital Education's YouTube Channel.
For the latest updates, see EPR Release Notices.
For EPR related videos, check out Digital Education's YouTube Channel.
Resuscitation Status
Covered in this topic:
Documenting Resuscitation Status
Reviewing Resuscitation Status
Patient Dashboard Report Icon Example
Display in In-Patient Whiteboard
Documenting Resuscitation Status
Note: Only Physicians (including qualified Trainees) and Nurse Practitioners will be permitted to enter or update a patient’s resuscitation status.
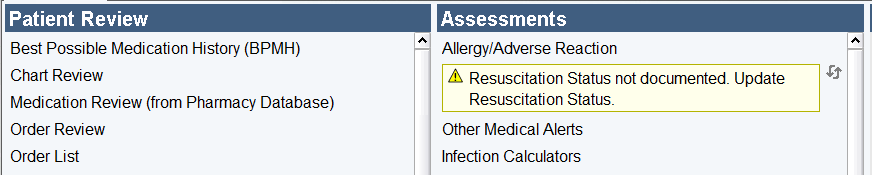
1. From the Patient Desktop, Patient Care tab, under Assessments, click
Resuscitation Status: Not documented on this visit.
2. Enter the date and time the assessment was performed and click OK.

Note: The event time can be backdated to the actual date and time of the conversation with the patient or the substitute decision maker. Patient Dashboard and In-patient Whiteboard will display the most recent result based on the time entered in this field.
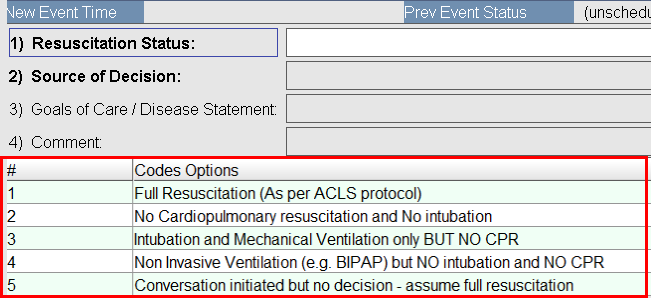
3. Select the appropriate Resuscitation Status/Codes option from the list and click OK.
4. Select an option to determine the Source of Decision and click OK.

Note: A name and contact information is required for a Substitute Decision Maker.
5. Enter comment then click OK.
Note: This is an optional field.

6. Once the fields are completed and OK has been clicked, choose Accept to
save.
Reviewing Resuscitation Status
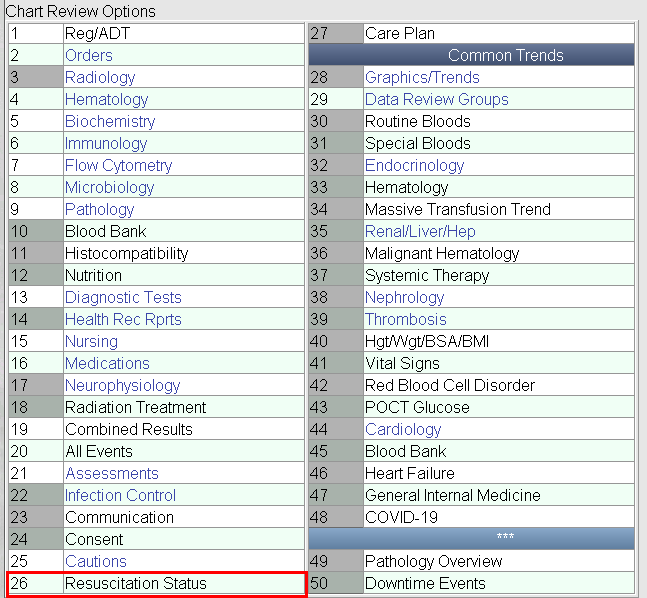
1. From Chart Review Options, select Resuscitation Status and click OK.
2. Select option(s) and click OK to view details of selected event(s).

Patient Dashboard Report Icon Example

Status Types include:
No CPR |
Full Resuscitation |
Intubation/No CPR |
Unknown |
Display in In-Patient Whiteboard


