For the latest updates, see EPR Release Notices.
For EPR related videos, check out Digital Education's YouTube Channel.
For the latest updates, see EPR Release Notices.
For EPR related videos, check out Digital Education's YouTube Channel.
Coverage List
Covered in this topic:
The Coverage function enables a Provider quick access to view patient items or to find orders requiring co-signatures for which they are providing coverage.
Note: Senior Medical Students do not have the coverage functionality.
1. From the Main Desktop, Patient List tab, under the MY IP/EP/SP Patients banner, click on the My Active Inpatients link.
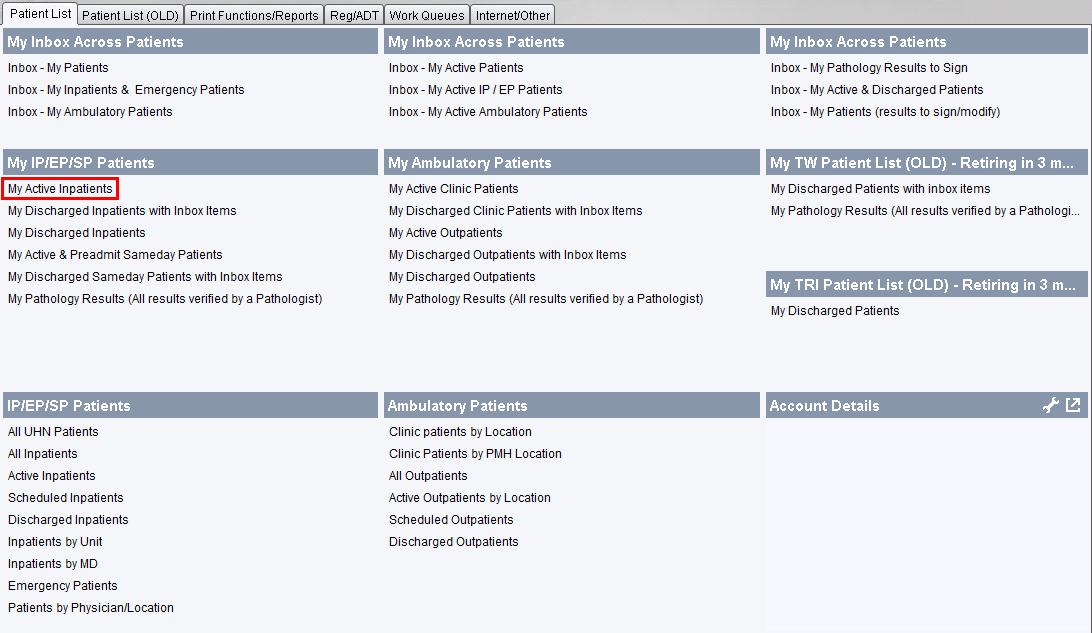
Please note that separate patient lists by site (My TW Patient List and My TRI Ptaient List) will remain for 3 months after facilities have been merged in EPR, so outstanding results items prior to the merge can be viewed through these functions.
Old visits can also be viewed through the Old Visits icon on the top toolbar.

You can filter the My Active Inpatients list by selecting the dropdown field in the top left corner and display patients by type of visit or visit status.
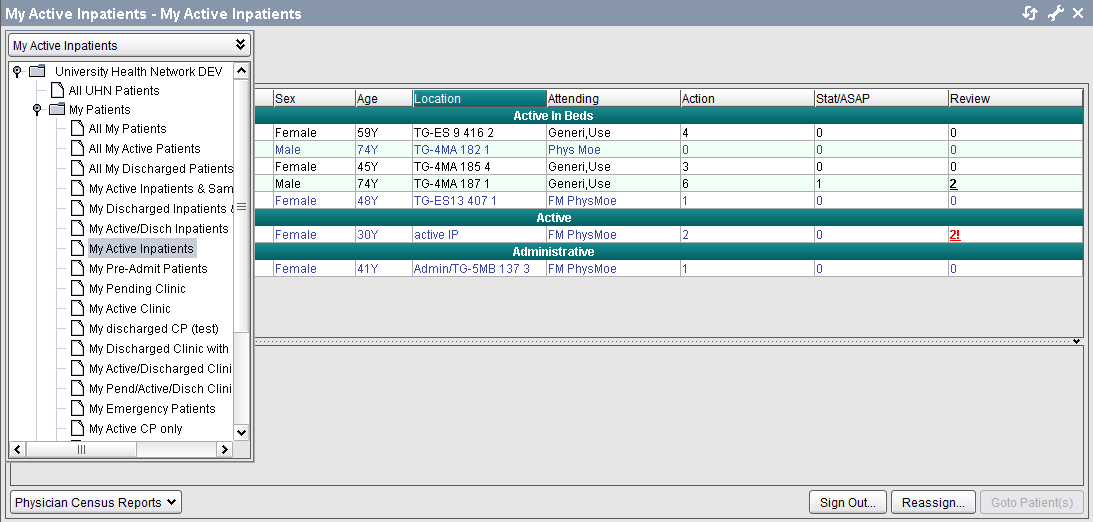
If you are the attending physician, by selecting multiple patients you can reassign your patients to another physician by clicking on the reassign button or sign out the selected patients using the sign out button at the bottom right of the screen.
2. Click on the Coverage tab. All assigned coverage patients will be listed.
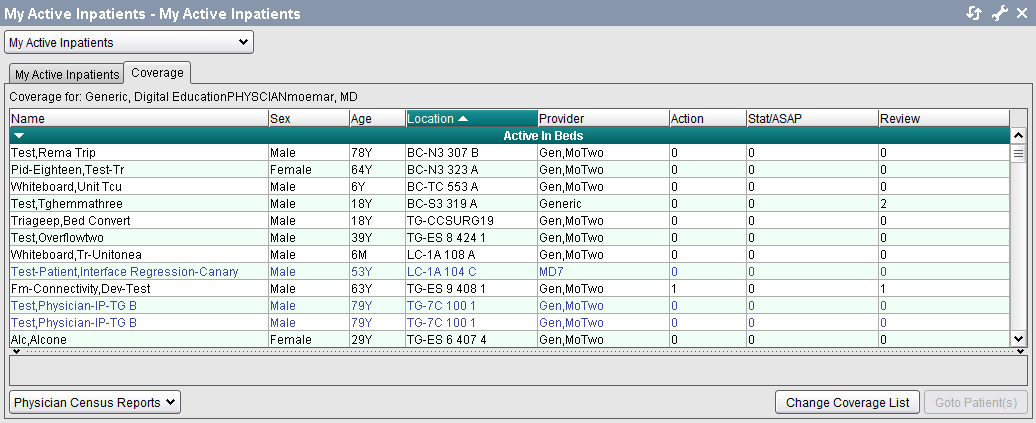
1. Follow the steps outlined above to access the Coverage tab.
2. The message No Patients Found will appear if you have not yet added a coverage assignment. Click on Change Coverage List at the bottom right of the screen.
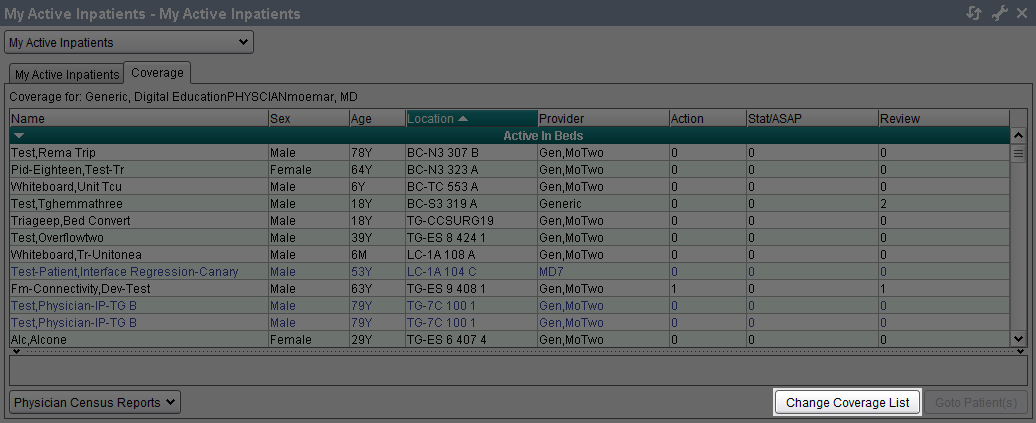
3. The Change Coverage window appears. Under Search Option, Physician field, type the Provider name for which you will be doing coverage. Click Search.
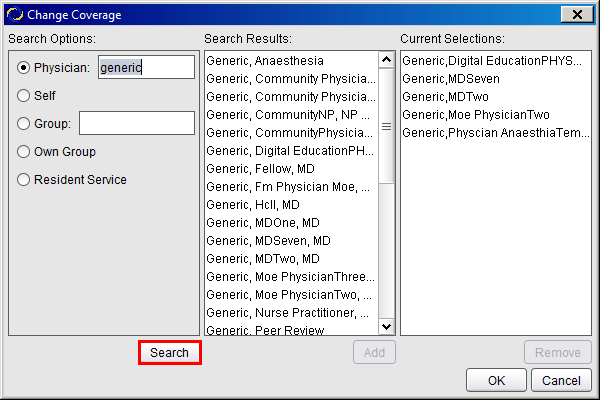
4. Select the Provider name under Search Results and click Add. This will move the Provider name to the Current Selections column.
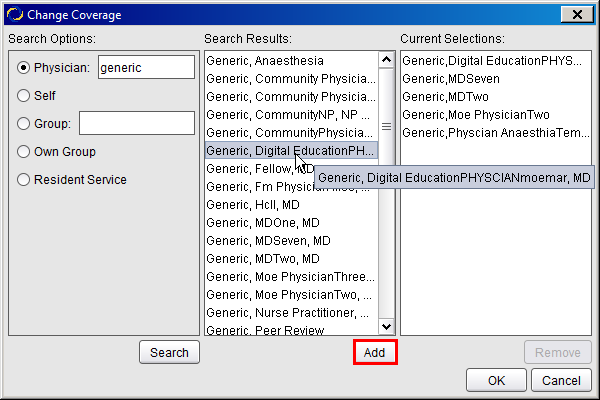
5. Click OK to save. The Provider’s assigned patients will now be listed in the Coverage tab.
When coverage is no longer required, you will need to remove the Provider from your coverage list.
1. Navigate to the Coverage tab and click on Change Coverage List as outlined above.
2. Select a Provider name under the Current Selections column and click Remove.
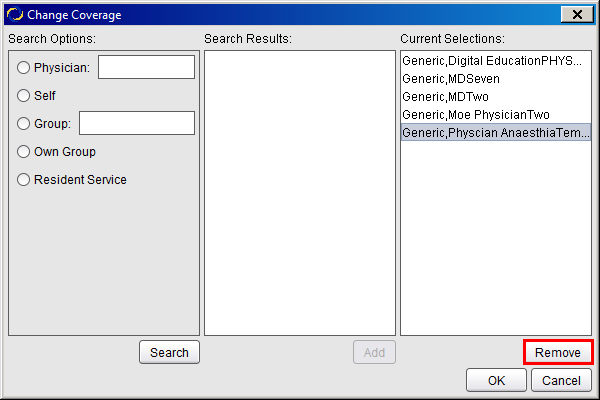
3. Click OK to save. The Provider’s assigned patients will no longer be listed in the Coverage tab.