
For the latest updates, see EPR Release Notices.
For EPR related videos, check out Digital Education's YouTube Channel.
For the latest updates, see EPR Release Notices.
For EPR related videos, check out Digital Education's YouTube Channel.
Specimen Collection
Covered in this topic:
Specimen collection typically involves three steps:
i. Print specimen labels from EPR
ii. Collect patient specimens in labelled receptacles
iii. Document specimen collection in EPR
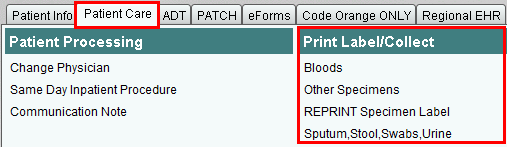
1. Once an order has been placed, access Specimen Collection by going to the patient's desktop:
a. Patient Care tab, then clicking on the appropriate link under the Print Label/Collect heading; or
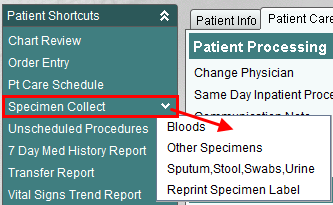
b. Patient's Shortcut menu by clicking on the down arrow.
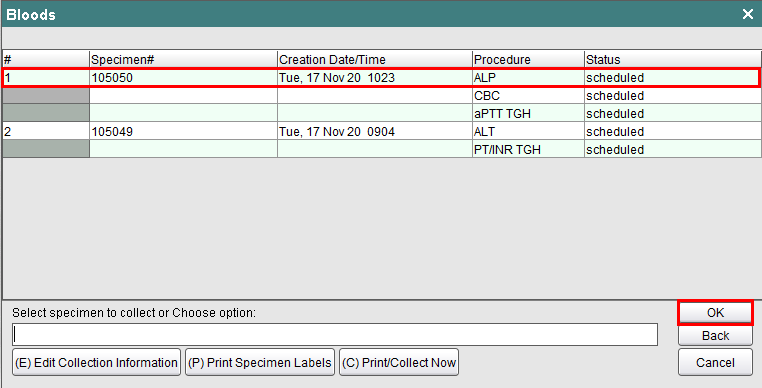
The first screen of the Specimen Collection queue will provide a number of options for how to proceed. Review the options in your Transaction Line:

a. Select a specimen to collect: EPR will list any specimens that are considered to be “waiting to be collected.” This would include any orders that already have a printed label.
b. Edit Collection Information button: used to edit the collection information only.
c. Print Specimen Labels button: used to begin the specimen collection process by printing a label.
d. Print/Collect Now button:This button would print a label and document collection at the same time. Use of this button is not best practice since it implies that collection was done without a labelled container ready.
2. Since there are no specimens displayed, which indicates that they are waiting to be documented as collected, click on the Print Specimen Labels button to begin the Specimen Collection process.

3. You will now be prompted to specify a collection cut-off date/time. You may accept the default cut-off time of two hours, or enter a new date/time, using the date/time format (ddmmyy 0000). Click OK to accept the default date/time or type in a new date/time.

4. The Specimen Options screen appears, which lists all undocumented tests that fall within the specified cut-off window of the next two hours. Select a single test or multiple tests or choose the All button located below the transaction line. Click OK when done.
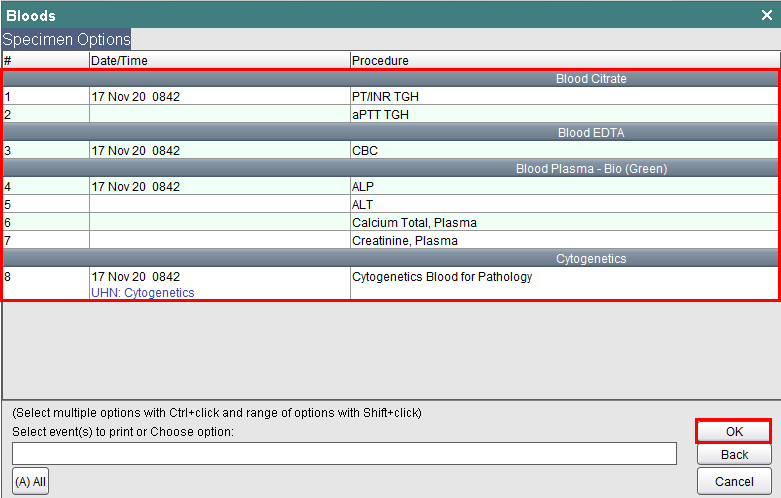
5. Click Accept to print the label for the selected test.
6. The label will now be printed and ready for pick up.
Note: The patient's full name, as it appears in EPR, must appear on Blood Bank specimen labels. If the patient has a long name that does not fit on the specimen label, the collector must handwrite the missing letters of the name and initial the label to acknowledge the correction, otherwise it will be rejected by Blood Bank.
After the specimen has physically been collected from the patient in labelled receptacles, you are now ready to document the collection in EPR.
1. Repeat step one from above, selecting Specimen Collection from either the Patient Care tab or Patient Shortcuts.
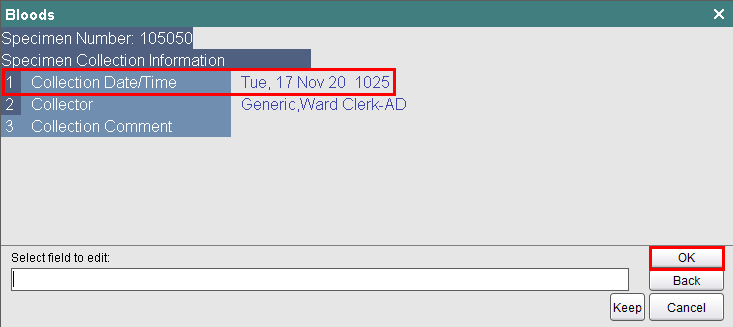
2. Printed labels appear in the list with an assigned specimen number. Now you must document the date and time that it was collected. Click on the appropriate specimen, then click OK.
3. Click OK to accept the EPR auto-entered collection date and time.
4. Click Accept to complete the documentation of this specimen.
If a lab order is missed, then there is no order and a physician needs to place another order in EPR. If the order existed and was unable to be collected, then it remains active until the phlebotomist acknowledges it has been collected. (The acknowledgment process in EPR: labels are printed from EPR and then once collected, status of ‘collected’ is entered into EPR. Both steps change orders in EPR from active to collected.)
1. From the Patient Desktop, Patient Care tab, select REPRINT Specimen Label.
2. Select the specimen you wish to reprint the label for, and click OK.
3. Verify that the specimen showing is the one you wish to reprint the label for by clicking YES.
4. Collect the reprinted label from the printer.