
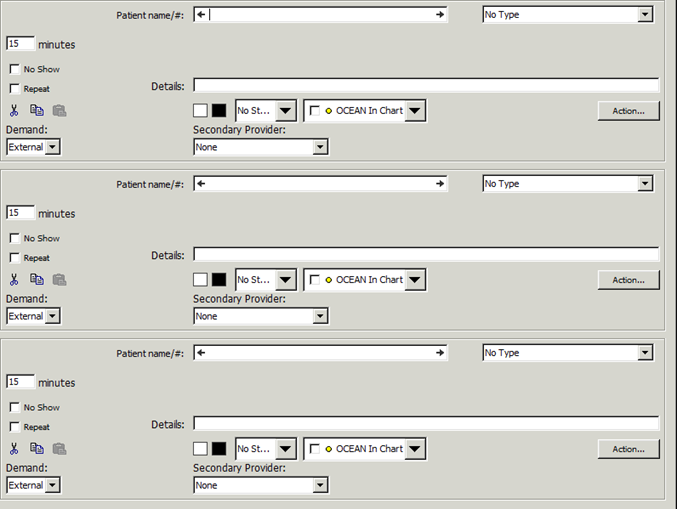
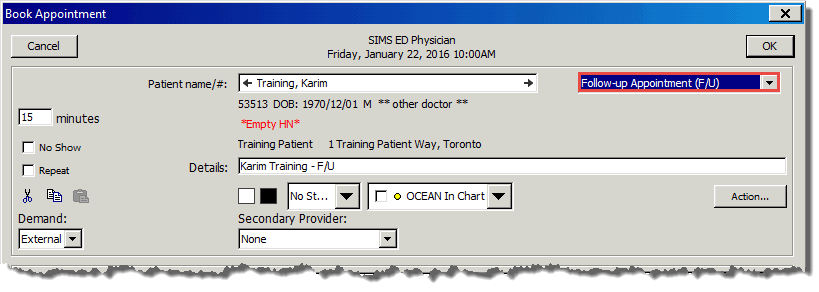
1. The quickest and easiest way to schedule an appointment is to double-click on a time slot.
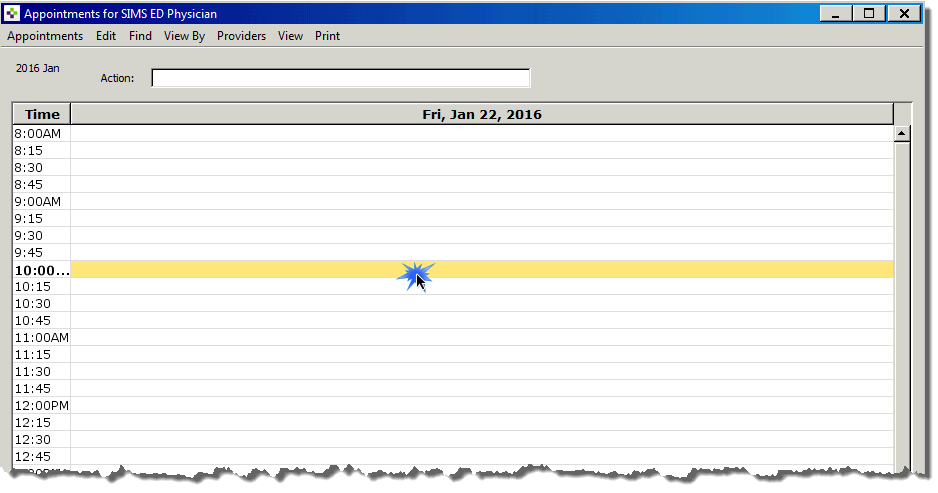
The Book Appointment window opens. You can enter up to three appointments
simultaneously, if desired.
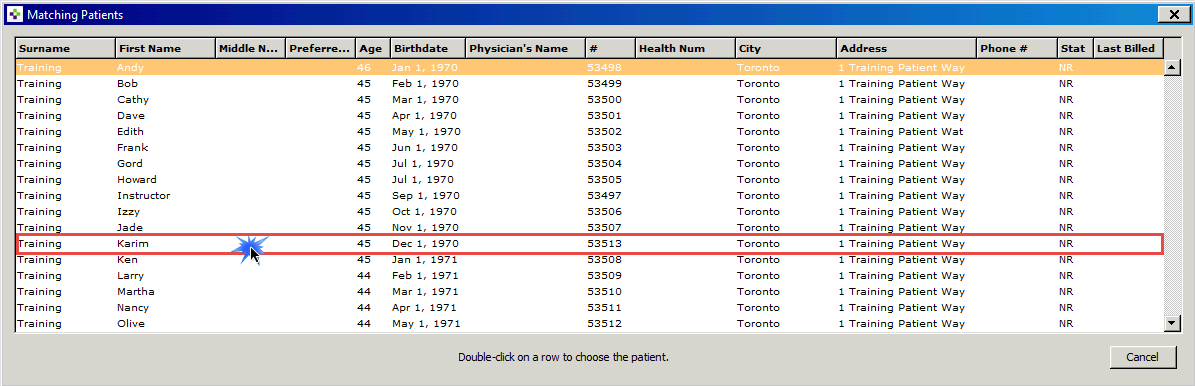
2. Enter the patient’s last name and press the tab key to populate names that meet your criteria.
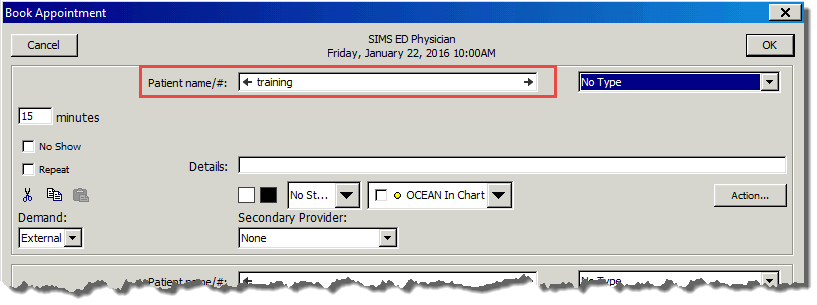
3. Select the patient from the list by double-clicking the patient name.
4. Select
the patient type. In this example I entered “f”
as a shortcut to get to a follow up
appointment.
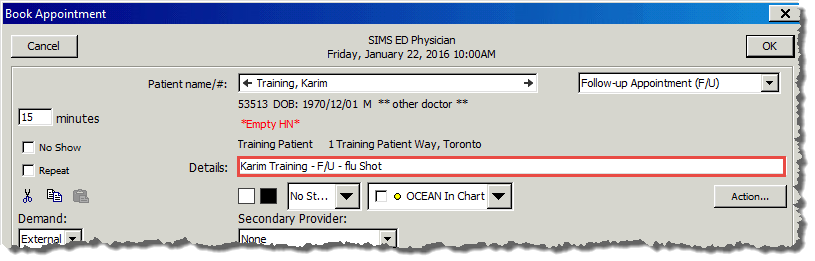
5. Enter
any details necessary for the appointment, such as the reason
for the appointment.
In this example Flu shot was added to the Details Field. These details
display in the
Appointment Book and will print out on daily patient lists.
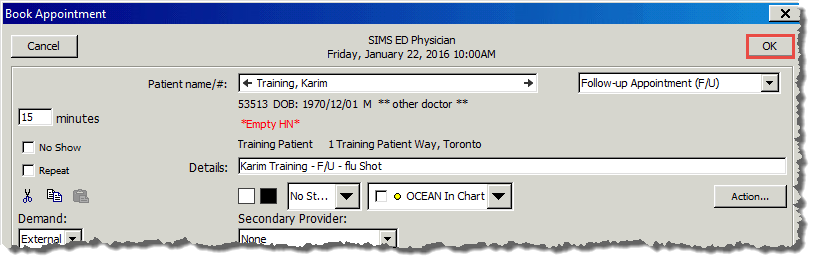
6. Click OK.
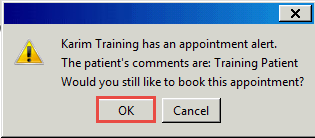
7. A
prompt appears displaying the Appointment Alert. The
comments were previously entered
on the Patients Screen. Click OK.
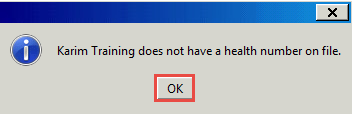
8. In
this scenario, a second prompt appears informing you that the patient
does not have a
health card. Click OK. Note: If you get a prompt
like this, please inform admin staff so that
they can enter the patient’s health card into the system.
9. The patient appointment has now been scheduled.
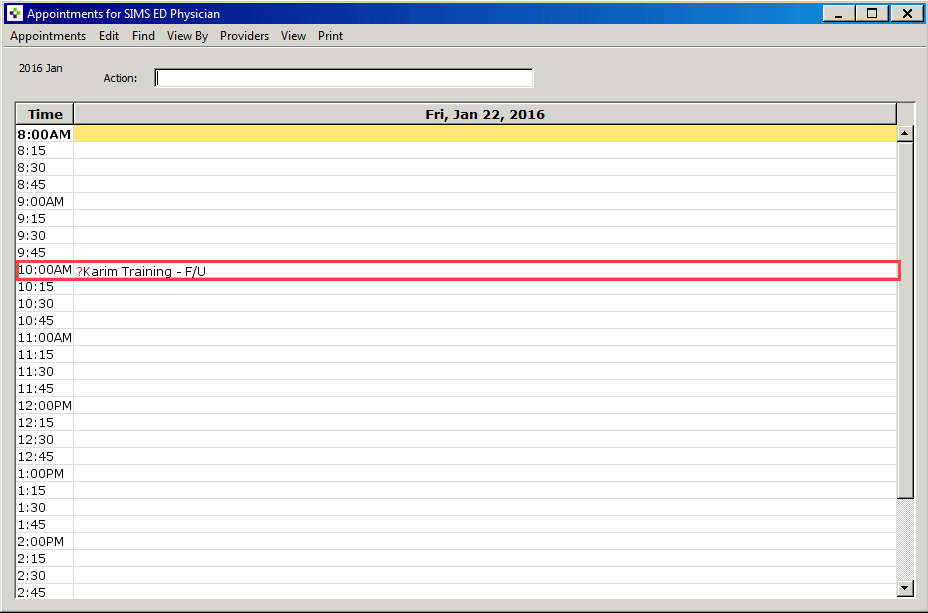
You will notice that there is a “?” mark beside the patient name. This
indicates that the
health card eligibility is unknown.
# |
Indicates patient has an invalid health card or it is missing from the demographic field |
? |
Indicates the health card eligibility is unknown |
~ |
Before the patient name, indicates that MOH has been billed for this appointment |
X |
Indicates the specified time has been defined by the clinician |
‘ |
Before the patient name, indicates that you have billed the patient or a third party for this appointment. |

Learning powered by Digital Education